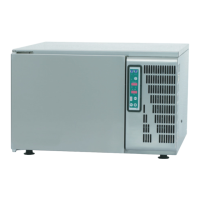
14
• The cell temperature is constantly shown on display 16 ; during this cycle, defrost
cycles are performed at regular intervals with duration set as required (parameter pro-
gramming reserved for installation technician). The factory setting for positive storage tem-
perature is +2°C.
• Press push-button 6 to set the appliance to STOP status (relative LED switches off),
ready for a new cycle.
To modify the final blast chilling temperature, consult the user programming instructions.
5.3 SOFT TIMED BLAST CHILLING
• Press push-button 2 (relative LED lights up), then press push-button 5 to select
the timer mode (LED 5B on). Display 15 shows the maximum chilling time (set by
default to 90 minutes).
To modify this time, press push-buttons 7 and 8 (time in minutes).
• Press push-button 6 to start the appliance. LED 5B and push-button LEDs remain
on and LEDs 13 flash throughout the cycle.
• Internal cell temperature is shown on display 16 .
• When the maximum chilling time has counted back to 0, the chilling cycle is completed and
the appliance automatically switches to the set positive storage temperature for an indefi-
nite interval.
• LEDs illuminate and the beep is activated when the cycle is finished (as in the chilling cycle
by temperature). The same applies for the positive storage function.
Press push-button 6 to set the appliance to STOP status (relative LED switches off),
ready for a new cycle.
IMPORTANT: Use the storage function sparingly. After chilling, food products should be
placed in storage cabinets.
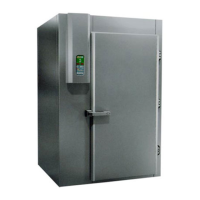
HARD BLAST CHILLING
When the HARD function is used, chilling takes place in two stages:
• an initial “Hard” stage when the air temperature is brought down to below 0°C in order to
accelerate chilling;
• a second “Soft” stage, involving air temperatures around 0°C.