230 Series Auger Packer
13 OF 115
The Model 230 Auger Packer consists of the packer
assembly and various items as ordered.
RECEIPT AND INSPECTION
Upon receipt, a check should be made to see that all
items ordered have arrived and are in good condition.
Any damage incurred in shipment should be reported to
the delivering carrier immediately and a claim for the
damage should be filled. If anything is missing or
damaged, contact Choice Bagging Equipment, Ltd. (512-
352-3694) so that replacement or repair can be initiated.
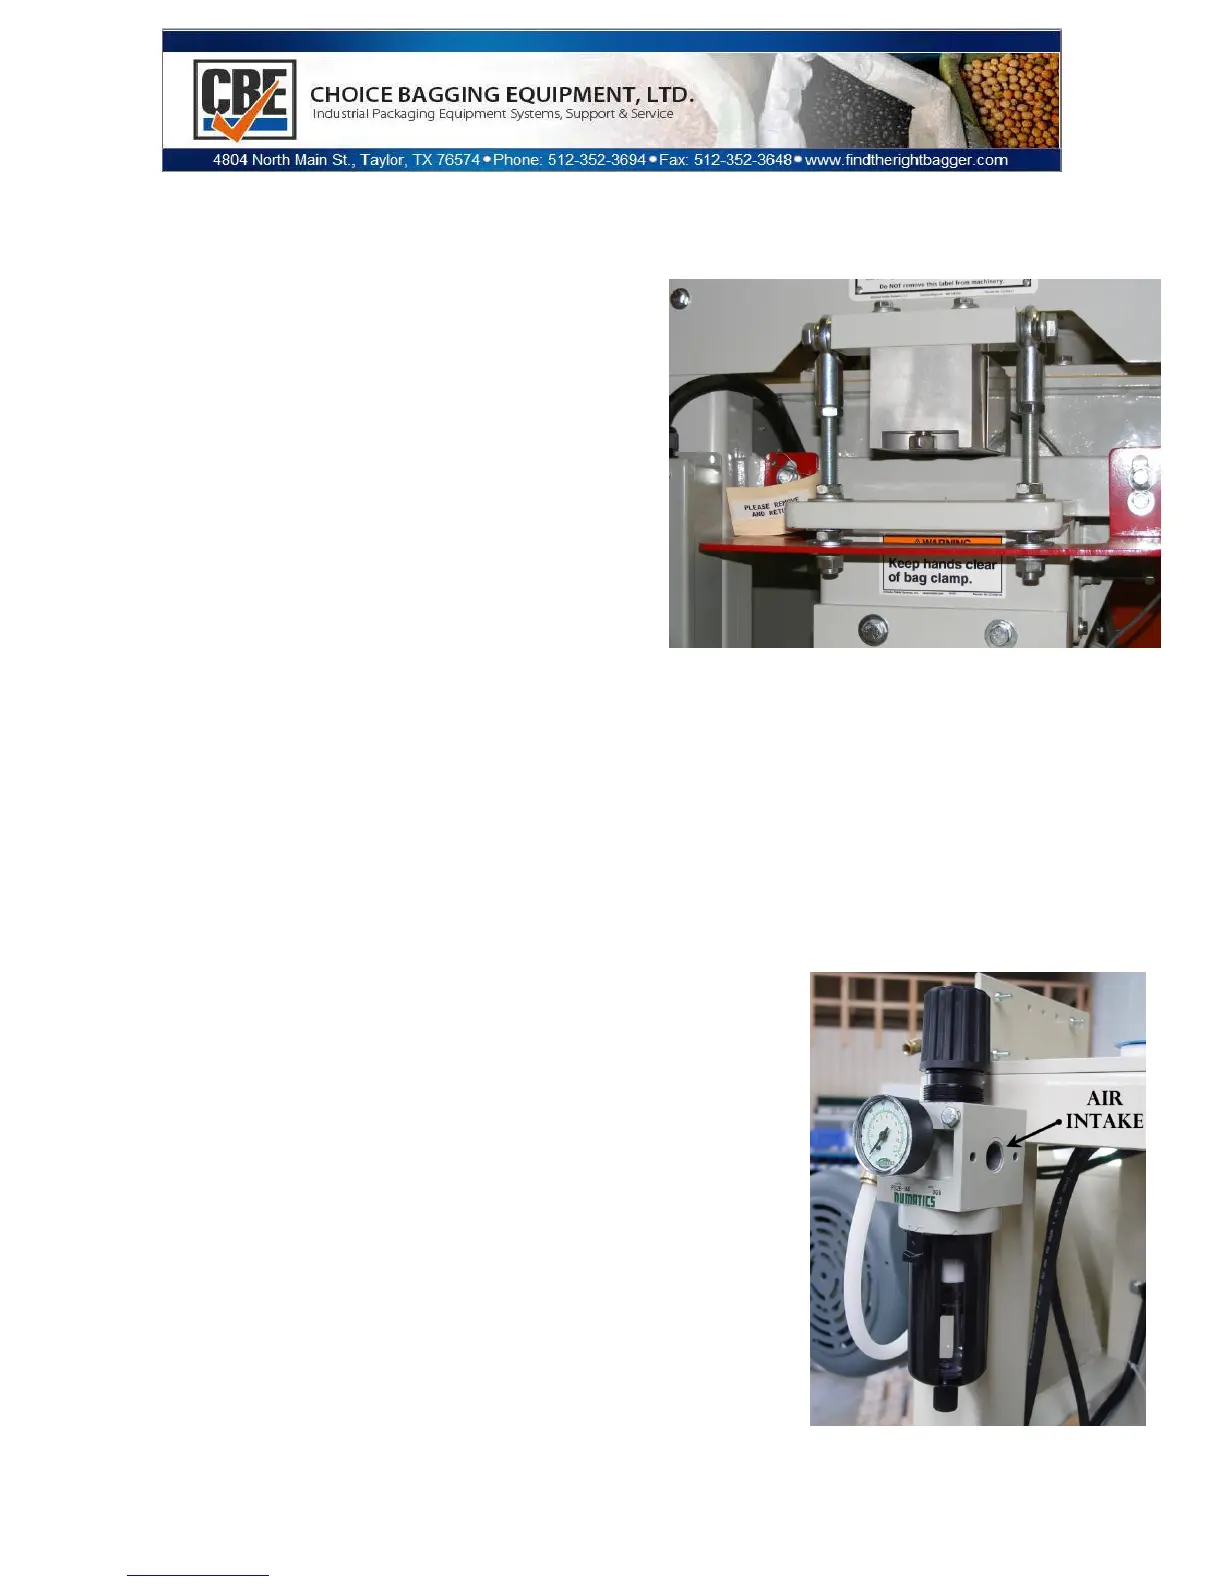
The Model 230 Auger Packer is shipped with locking
bolts installed to secure and protect the bag post and
weighing assembly during shipment. (See Picture)
ASSEMBLY PROCEDURES
Mark the centerlines of the packer, reference the General Arrangement drawing.
Set the packer into place. It may be desirable to defer final anchoring to the floor until after testing. Place
the packer in the proper location, insuring the frame is level. Check the clearance and fit to the feed
hopper and associated piping prior to securing it firmly to the floor.
It is recommended to install a rubber connection sleeve between bin and
hopper to isolate bin vibrations from packers. (Sleeve not provided with
machine. Recommend 0.25” - 0.375” wall thickness. Sleeve can be
purchased from CBE separately).
The weighing assembly is secured by two shipping bolts that protect the
scale from any damage during shipment. Be sure to remove the shipping
bolts located above the bag chair post before attempting to operate the
machine.
The Model 230 Auger packer uses a load cell scale weighing unit. It is
important to make certain that the load cell and components being
suspended are free from side friction.
Check the alignment of the fill tube to the auger. If adjustments need to
be made to the auger, this is discussed later in Chapter , how to adjust