4-2
Cisco Wide Area Virtualization Engine 7541, 7571, and 8541 Hardware Installation Guide
Chapter 4 Installing Hardware Options for the WAVE-7541, WAVE-7571, and WAVE-8541
Replacing a Hard Disk Drive/Solid State Drive
Step 1 Review the information in the Safety Warnings and Cautions and Safety Guidelines sections in Chapter
2, “Preparing to Install the WAVE-7541, WAVE-7571, and WAVE-8541.”
Step 2 Power down the appliance.
Note You must power down the appliance before installing or removing an Interface Module. Interface
Modules are not hot-swappable.
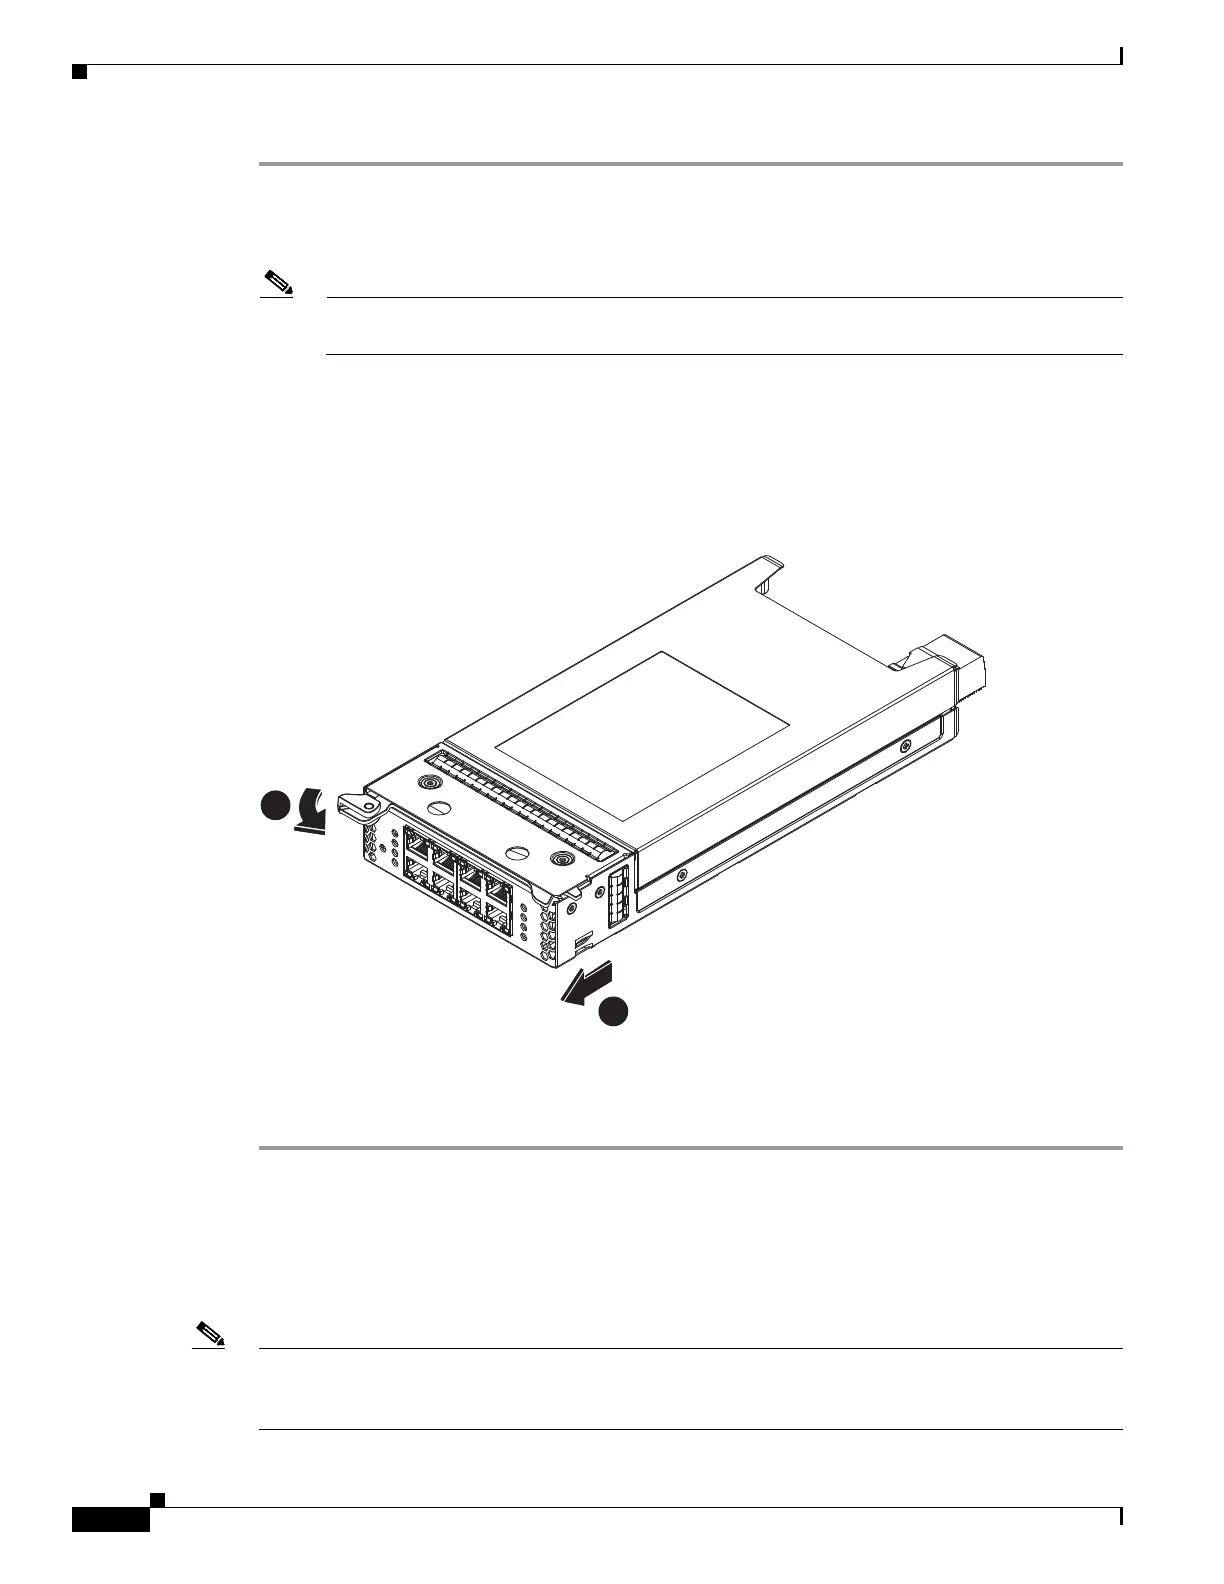
Step 3 Locate the Interface Module slot in the appliance chassis and slide the Interface Module into the slot
until the ejector lever is seated.
To remove an Interface Module, first use the ejector lever to unlatch and then pull out the Interface
Module. (See Figure 4-1.)
Figure 4-1 Interface Module—Removal
Step 4 Power on the appliance.
Step 5 For information about connecting cables to the Cisco WAVE Interface Module ports, see Chapter 5,
“WAVE Interface Modules.”
Replacing a Hard Disk Drive/Solid State Drive
The WAVE appliance supports as many as eight 2.5-inch (Small Form Factor) SAS hard drives.
Note The WAVE-8541 supports both Solid State Drives and Hard Disk Drives. You cannot mix HDD and SSD
in the same chasis.
For details about the WAVE-8541 appliance specifications, see Appendix A, “Appliance Specifications”.