Check for Stranded IPPV Events and Clear NVM
6 If you moved the DHCT ID into the subscriber's account in step 2, return the
DHCT to the appropriate inventory status.
7 Disconnect the DHCT.
Resetting the DHCT to the Default Configuration
This process assumes that your system is using Service Disconnect Mode. Follow
these steps to reset the DHCT to the default configuration. This process clears the
NVM or SARA menu settings and, for DVR-equiped DHCTs, reformats the hard
drive and erases all DVR recordings.
Note: If you are troubleshooting the DHCT and need to only reformat the hard drive
without clearing the NVM, go to Format the Hard Drive Without Clearing NVM (on
page 157).
1 Activate the staging toolkit using the procedures described in Activating the
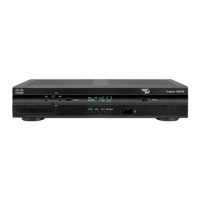
Staging Toolkit (on page 168). The LED panel on the DHCT displays the EMM
ISE count for each DHCT that has been entered into the billing system. Before
proceeding, wait for the count to stop. There should be 4 or 5 EMMs.
2 Place the DHCT in an inventory status that has no authorization profile.
3 After the EMM ISE count stops, press the Exit key on the remote control. Each
DHCT should be in Service Disconnect mode with [- - - -] displaying on the LED
panel.
Note: For POWER LED only DHCTs, the POWER LED either blinks four times,
pauses, then repeats only once (for normal operation); or the LED blinks eight
times, pauses, and repeats (for Service Disconnect Mode [- - - -]).
4 Press and hold the Pause key on the remote control for approximately 10
seconds or until the message indicator flashes on the DHCT.
5 Press one of the following keys:
For 3-function or PVR/PIP remote controls, press the PAGE – key.
For 4-function remote controls, press the PREV – key.
6 Press one of the following keys:
For 3-function or PVR/PIP remote controls, press the SETTINGS key.
For 4-function remote controls, press the SETTINGS MENU key.
Result: The LED panel displays C-0.
7 Enter pin code 728469 to clear the existing DHCT settings. The LED panel on the
DHCT displays [C - - -], indicating that all menu settings are clear and PINs
disabled.
Important: If you are clearing the settings on a DVR-equipped DHCT, this
procedure also reformats the hard drive and reboots the DHCT.
8 Press the Exit key on the remote control.
 Loading...


