• IPv6—Check the Autoconfiguration check box for stateless autoconfiguration.
f) Click OK.
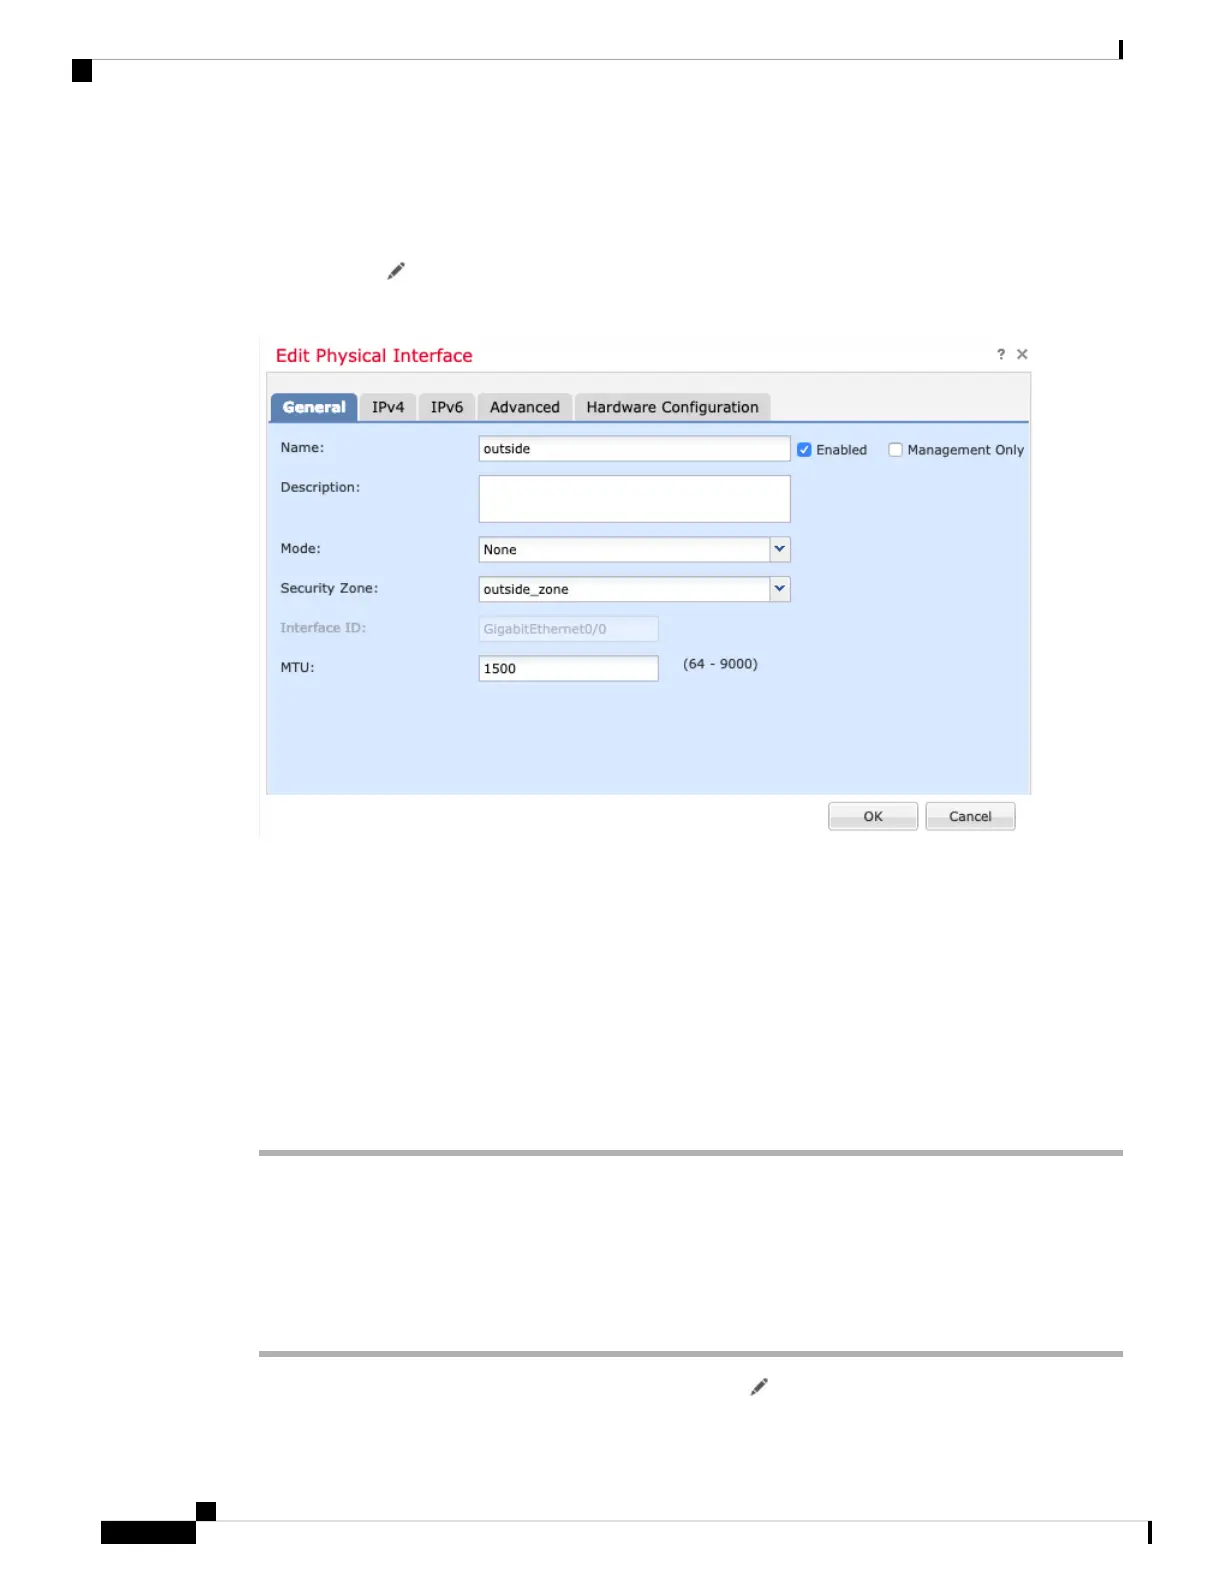
Step 4 Click the Edit ( ) for the interface that you want to use for outside.
The General tab appears.
You already pre-configured this interface for manager access, so the interface will already be named, enabled,
and addressed. You should not alter any of these basic settings because doing so will disrupt the management
center management connection. You must still configure the Security Zone on this screen for through traffic
policies.
a) From the Security Zone drop-down list, choose an existing outside security zone or add a new one by
clicking New.
For example, add a zone called outside_zone.
b) Click OK.
Step 5 Click Save.
Configure the DHCP Server
Enable the DHCP server if you want clients to use DHCP to obtain IP addresses from the threat defense.
Procedure
Step 1 Choose Devices > Device Management, and click the Edit ( ) for the device.
Cisco Firepower 1100 Getting Started Guide
140
Threat Defense Deployment with CDO
Configure the DHCP Server

 Loading...


