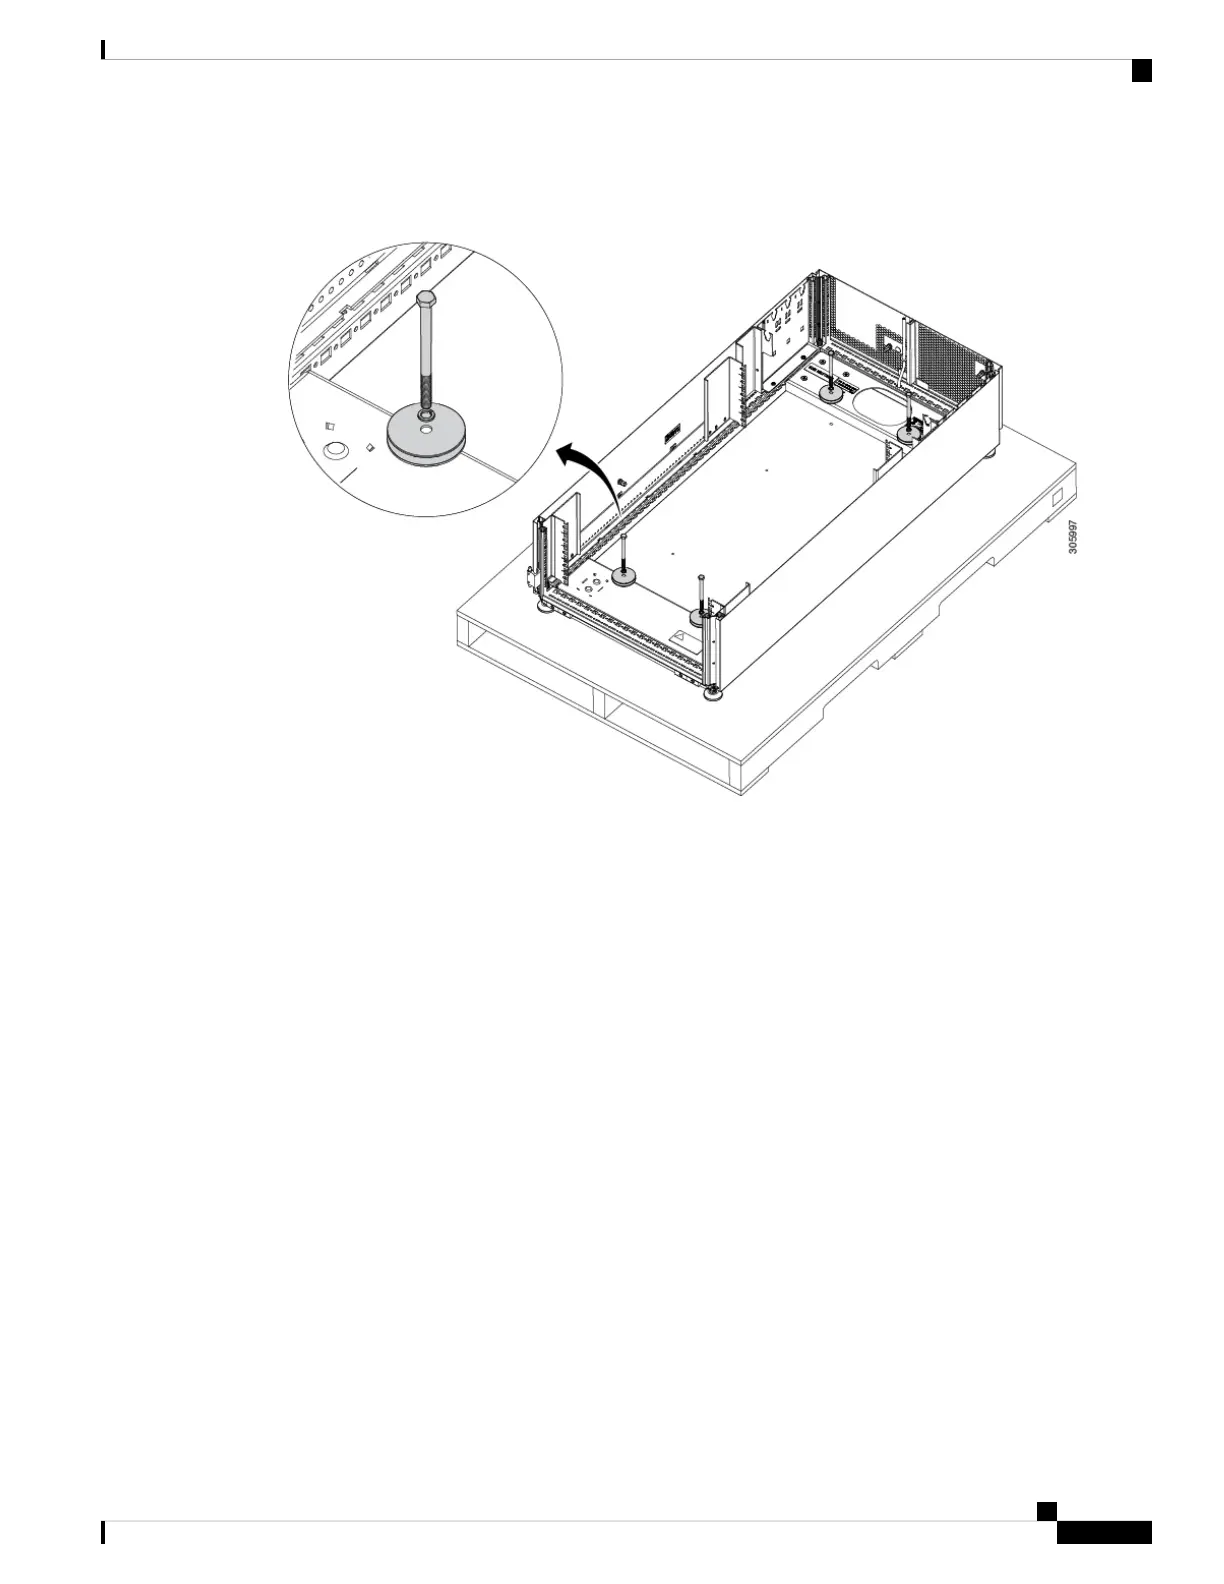
Figure 8: Removing the Brackets
Step 5 (Optional) To reduce the weight of the rack for easier handling, remove the side panels (if Included). See
Removing and Installing Side Panels, on page 43.
Step 6 (Optional) To reduce the weight of the rack for easier handling, remove the front door. See Removing and
Installing the Front Door, on page 44.
Step 7 (Optional) To reduce the weight of the rack for easier handling, remove the rear doors. See Removing and
Installing Rear Doors, on page 46.
Step 8 For racks with equipment that is already installed, use the four bolts from the front of the rack that were set
aside in Step 4 to secure the two ramps to the pallet at the rear of the rack. Predrilled holes are hardware are
provided there. See the following figure.
Cisco R42612 Rack and RP-Series Metered Input PDU Installation Guide
23
Unpacking the Rack
Removing the Cisco Cisco R42612 Rack from the Pallet
 Loading...