C-10
Cisco UCS C240 Server Installation and Service Guide
OL-25761-01
Appendix C RAID Controller Considerations
Embedded MegaRAID Controller
Installing a SCU Upgrade ROM Module For Embedded RAID SAS Support
The SCU Upgrade ROM module contains a chip on a small circuit board. This module attaches to a
motherboard header. This chip upgrades the standard four-drive SATA support to add SAS support for
up to eight drives.
Note The Cisco PID UCSC-RAID-ROM5= includes the SCU upgrade ROM module.
The Cisco PID UCSC-RAID-ROM55= includes the SCU upgrade ROM module and the RAID 5 key.
To install a SCU upgrade ROM module, follow these steps:
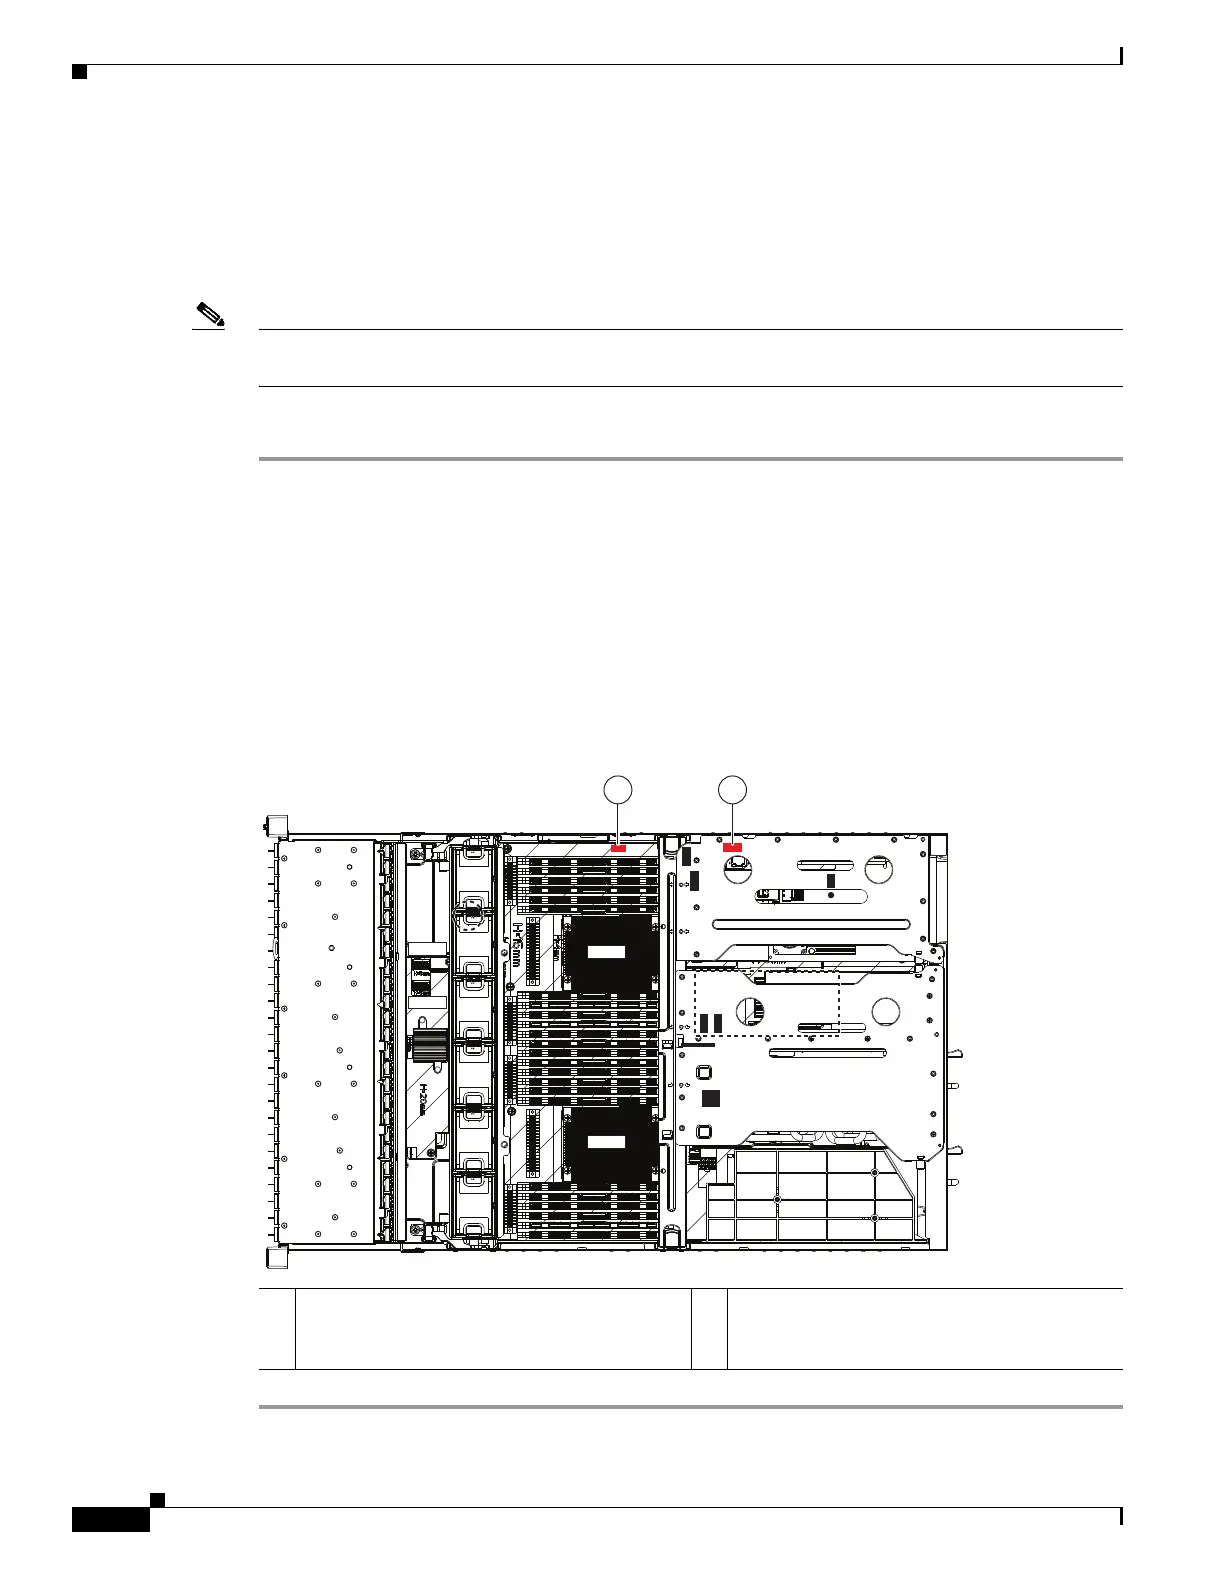
Step 1 Locate the header labelled “PCH UPGRD SKU ROM” under any cables that are routed along the chassis
wall (see Figure C-1).
Step 2 Align the connector on the SCU upgrade ROM module with the pins on the header, then gently push the
connector onto the pins.
Step 3 Replace the top cover.
Step 4 Replace the server in the rack, replace cables, and then power on the server by pressing the Power button.
Step 5 Continue with either Installing a Software RAID Key Module for Embedded RAID 5 Support, page C-11
or Enabling the Embedded RAID Controller in the BIOS, page C-11.
Figure C-1 SCU Upgrade ROM and RAID 5 Key Header Locations on Motherboard
1 SCU upgrade ROM header
PCH UPGRD SKU ROM
(adds SAS drive support)
2 Software RAID 5 key header
SW RAID KEY
(adds RAID 5 support)
SAS2
SAS1
FAN1
FAN2
FAN3
FAN4
FAN5
FAN6
CPU1
CPU2
SAS1
SAS2
Riser 1
Riser 2
SAS1
SAS2
333260
1 2