Chapter 2 Web-Based User Interface
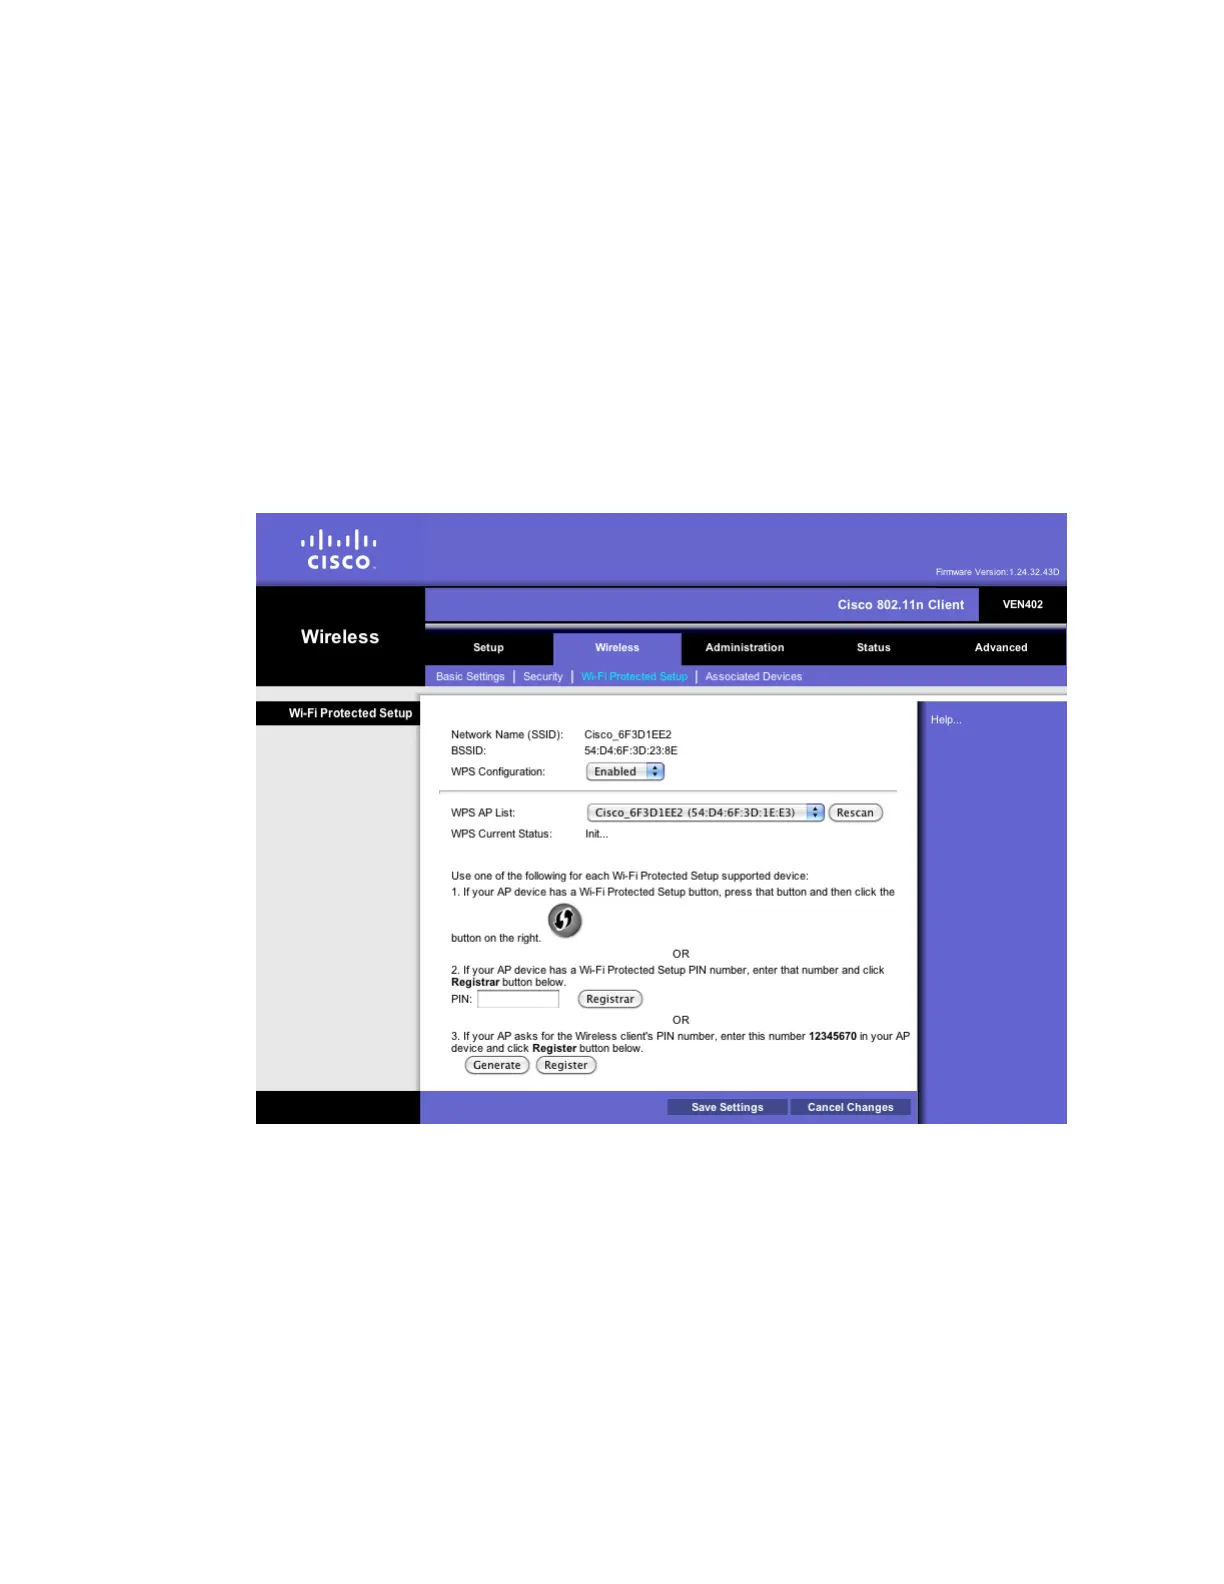
4 If your client device has a WPS PIN or passcode, complete the steps below:
a Enter your PIN in the field provided.
b Click the Register button.
c After the client devices has been configured, click the OK button.
5 Click the Save Settings button to apply your changes or Cancel Changes button
to cancel.
6 Refer back to your client device or its documentation for further instructions.
Set Up WPS on the VEN402
Use this screen to use the Wi-Fi Protected Setup (WPS) feature on the VEN402 client
device. The Network Name (SSID) and BSSID are identified in non-editable fields.
1 From the WPS Configuration menu select Enabled to enable the WPS feature.
2 From the WPS AP List menu, select the desired access point from the list of
available options. If necessary, click the Rescan button to refresh the list. The
WPS Current Status field indicates that the scan is in process or complete.
3 If your access point device has a WPS button, complete the steps below to pair
your devices. Otherwise, skip to step 4.
a Click or press the WPS button on the client device.
b Click the WPS button on this screen.
c After the client devices have been paired, click the OK button.