14
Instructions for installer - 9120-25533 - CEX9-U - 801042 - November 2012 v1.00
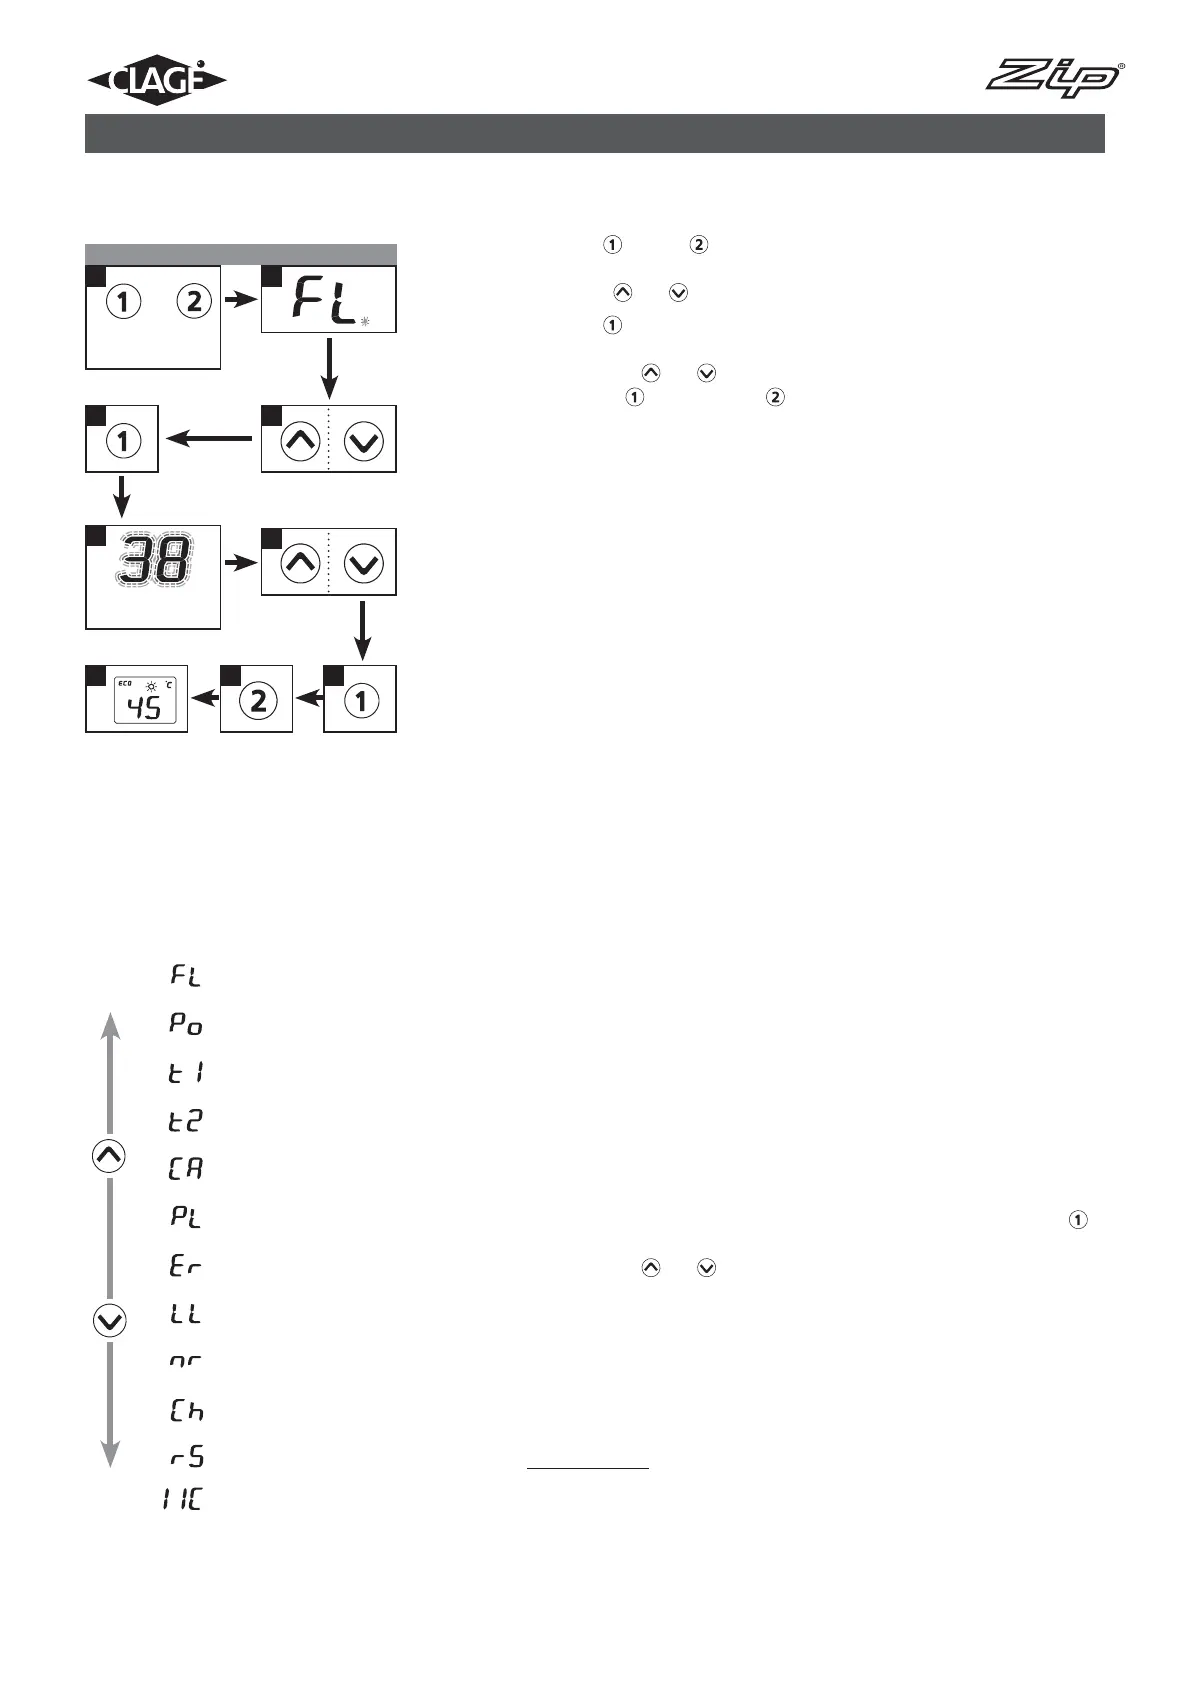
The service menu offers an overview of system parameters and is used for
diagnostics.
Press key
and key simultaneously for at least 2 seconds to call up the
service menu, the display confirms by “FL” and by a flashing point. Using the
arrow keys
and , you can switch between the individual menus.
Press key
to see the value of the currently selected menu. The value fla-
shes in the display. (The values of some menus can be switched over by using
the arrow keys
and .) You will get back to the drop-down-menu when
pressing key
again. With key you will get back to the standard display
(nominal value). After two minutes without any key stroke the system automa-
tically switches back to the standard display.
Individual menu items as follows:
“FL“: Flow
Indication of current flow rate given
in l/min.
“Po“: Power
Indication of current power consumption (kW).
“t1“: Temp in
Indication of inlet temperature (°C).
“t2“: Temp out
Indication of outlet temperature (°C).
“CA“: Control value
Indication of calibration value of the
control system. Regular range: 40 – 60.
“PL“: Power limit
Informs about the current maximum power rating (kW) of the appliance.
“Er“: Diagnostics
Indication of the last ten diagnostic
messages.
The error code is indicated by the first displayed value after pressing key
(refer to “Abstract for Trouble-Shooting & Diagnostics” in the hood). By using
the arrow keys
and the last 10 error codes are displayed chronologi-
cally. Thereby the display indicates in turns the error numbers from “0” to “9“
and the corresponding error. The last error will be recorded at position “0” and
the former ones each shifted 1 position backwards.
“LL“: Lock level
The operating mode of the appliance can be restricted.
Setting Options:
“0” no restriction (factory setting)
“1” factory reset via key (countdown) not possible, parameters can be
seen, but not be modified in setup menu
“2” same as “1”, additionally the setup menu cannot be opened
Service-Menü ansehen Service menu
2
8
4
7
5
3
6
9
+
1
Display flashes
Press
2 sec
Menu item order of “Service menu“:
Flow
Power
Temp in
Temp out
Control value
Power limit
Diagnostics
Lock level
Software version
Radio channel
Received strength
Signal
10. Service menu