15
CLAGE
• Das Gerät so installieren, dass die
Wasseranschlüsse senkrecht nach oben
stehen und direkt an die Anschlüsse der
Sanitärarmatur angeschlossen werden
können.
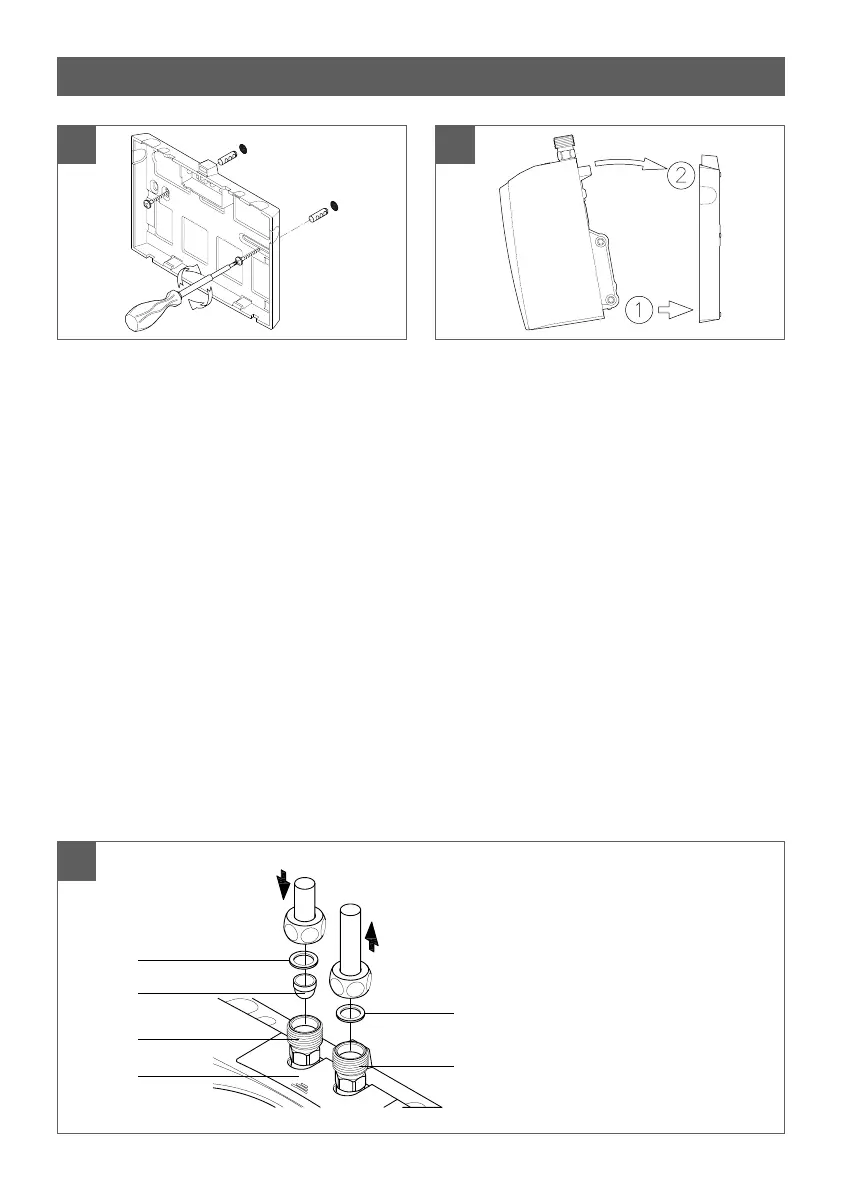
• Wandhalter mit Schrauben dübeln (Abb. 5).
• Gerät auf den Wandhalter stecken und ein-
rasten (Abb. 6). Das Gerät darf nur betrie-
ben werden, wenn es ordnungsgemäß auf
dem Wandhalter eingerastet ist!
• Wasserzulauf (blau) und -auslauf (rot)
sind durch Farb markierungen auf dem
Typenschild (unter der Typenschild-Blende)
gekennzeichnet (Abb. 7).
• Die Kennzeichnungen der Armaturen müs-
sen entsprechend zugeordnet werden. Die
Montage muss so erfolgen, dass die ange-
• Install the appliance with the water con-
nectors vertically upwards for direct con-
nection to the sanitary tap.
• Secure the wall bracket to the wall with
screws and suitable wall plugs (fig. 5).
• Place the appliance on the wall bracket
and snap it into position (fig. 6). The appli-
ance may only be operated, if it has been
placed properly into the wall bracket!
• Tap connection (fig. 7): Cold water inlet
(blue) and hot water outlet (red) are
marked on the rating plate (under the rat-
ing plate cover).
• Connect the appropriate pipe or hose of
the sanitary tap with the red marked hot
water outlet. Avoid exerting any kind of
9. Montage und Wasseranschluss 9. Installing the appliance
5 6
7
a
d
a
b
c
e
a. Dichtung
b. Filtersieb
c. Kaltwasseranschluss (Zulauf)
d. Warmwasseranschluss (Auslauf)
e. Typenschild-Blende
a. Seal
b. Strainer
c. Cold water-connection (inlet)
d. Hot water-connection (outlet)
e. Rating plate cover
 Loading...