Basic Operations
Adjusting
the MONITOR
Adjusting
the brightness
and
tone
of
color
Notes:
• This function is
not
available when the display is
stored.
• The
HUE
setting can be adjusted only when the
NTSC mode is selected.
• Switch to the VISUAUDVD player(DVD video
or
video CD)/DVD changer/TV mode you see.
1. Press the
[ADJ]
button to switch
to
the
ADJUST
mode
menu.
2. Touch the [MONITOR]
key.
3. Touch the [MONI
ADJ]
key
to
display
[BRIGHT], [HUE] and
[COLOR]
key.
Touch
the [BRIGHT], [HUE] and
[COLOR]
key
to
adjust BRIGHT, HUE and COLOR.
•
"BRIGHT":
Adjust the brightness
of
the display.
•
"HUE":
Adjust
the
tone
of color (red is emphasized
or
green is emphasized)
• This operation is available only when the
car
is stopped
and
the parking brake is applied.
•
"COLOR":
Adjust the color saturation.
• This operation is available only when the car
is stopped
and
the parking brake is applied.
4. Operate
the
touch key
to
adjust a level.
•
"BRIGHT":
[.".] Press
to
make image brighter
[
....
] Press
to
make image
dimmer
•
"HUE":
[.".] Press
to
increase green
[
....
1Press
to
increase red
•
"COLOR":
[.".]
Press to increase color depth
[<llIIII]
Press
to
decrease color depth
5. Touch the [RTN]
key,
[ESC]
key,
or
press the
[ADJ]
button.
Adjusting
the dimmer level
Use
to
adjust panel brightness when
car
lights
are ON/OFF.
•
The
factory
default:
When the
car
light is off: Brightest setting (58
steps)
When the
car
light is on: Medium brightness (29
steps)
1. When
the
panel is open, press the
[ADJ]
button
to
display the
ADJUST
mode menu.
2. Touch the [MONITOR]
key,
and touch
the
[DIMMER
LEVEL]
key to adjust the
dimmer
level.
3. Touch
the
[
...
]
or
[<llIIII]
key
to
adjust.
4. Touch the [RTN]
key,
[ESC]
key,
or
press the
[ADJ] button.
Warning
display
when CCD camera
is
installed
When a
TV
tuner
(sold separately) is installed
together with optional CCO camera, the
following warning message is displayed during
use
of
the
CCD
camera:
"Make
sure
of
safety
around
your
vehicle"
*The factory default setting is "ON"
1.
Press the
[ADJ]
button.
2.
Touch
the
[MONITOR]
key,
and touch
the
[CCD
WARNING]
key
to
switch between
"ON" and "OFF".
3. Touch the [RTN]
key,
[ESC]
key,
or
press the
[ADJ]
button.
Switching the
VTR
system between
NTSCandPAL
*This function
is
enabled only when the panel
is
open.
*The factory default setting
is
"NTSC".
Switch
to
the
VISUAUVTR
in
TV
mode you use.
1.
Press the
[ADJ]
button
to
switch to the
ADJUST
mode
menu.
2.
Touch the [MONITOR]
key.
3. Touch the [NTSC/PAL] key
to
select "NTSC"
or
"PAL".
4. Touch the [RTN]
key,
[ESC]
key,
or
press the
[ADJ]
button.
Front
monitor
lock
1. Press and hold the [ADJ] button for 1 second
or
longer.
2. Press the [SOURCE] button to select
the
desired mode.
3.
To
cancel the monitor lock, press the [ADJ]
button.
The
screen
shows
the image
of
the selected
mode.
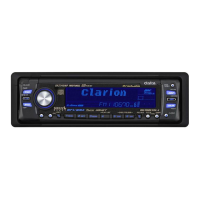
VRX755VD 27
 Loading...