7
ASSEMBLY
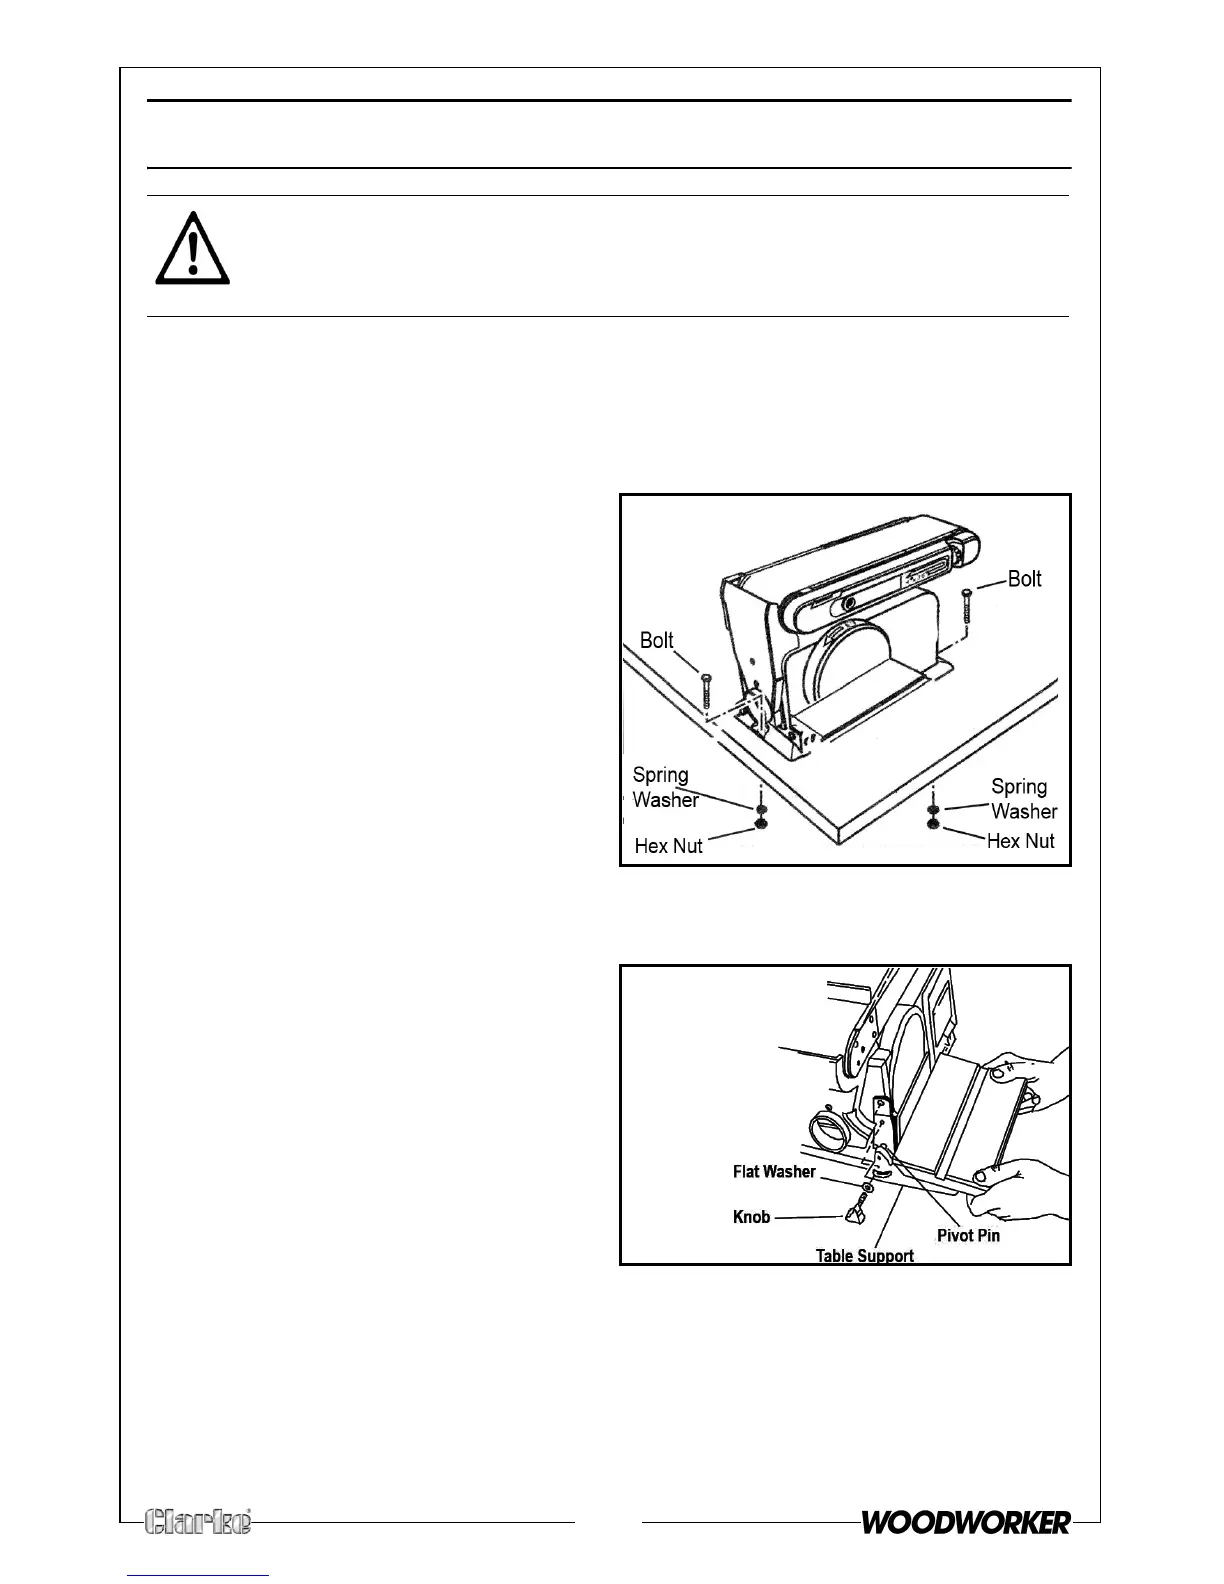
MOUNTING THE SANDER TO A WORKBENCH
Before attempting to use this sander, it should be properly mounted to a
workbench or stand
1. Position the sander on the
workbench where you intend to
use it.
2. Mark the workbench through the
mounting holes located in the
sander base. Drill holes in the
workbench at the marks.
3. Use long bolts, spring washers and
nuts (not supplied), to secure the
sander to the workbench as
shown.
MOUNTING THE TILTING WORK TABLE ASSEMBLY
1. Position the table-support bracket
so that the “pivot pin” fits into the
corresponding hole on the sander
frame and the radius slot aligns
with the threaded hole in the
frame.
2. Place a washer on the threaded
shaft of the knob, insert through
radius slot, and tighten into
threaded hole.
3. Adjust the table to the angle desired for the sanding task.
4. To avoid trapping the workpiece or your fingers between the table and
disc, adjust the position of the table on it’s mounting bracket to maintain a
gap of no more than 2 mm.
CAUTION: THE SANDER MUST BE ASSEMBLED BEFORE USE. DO NOT PLUG
THE SANDER INTO A POWER SOURCE UNTIL IT HAS BEEN COMPLETELY
ASSEMBLED.