10
Parts & Service: 020 8988 7400 / E-mail: Parts@clarkeinternational.com or Service@clarkeinternational.com
ASSEMBLY
ASSEMBLE THE STAND
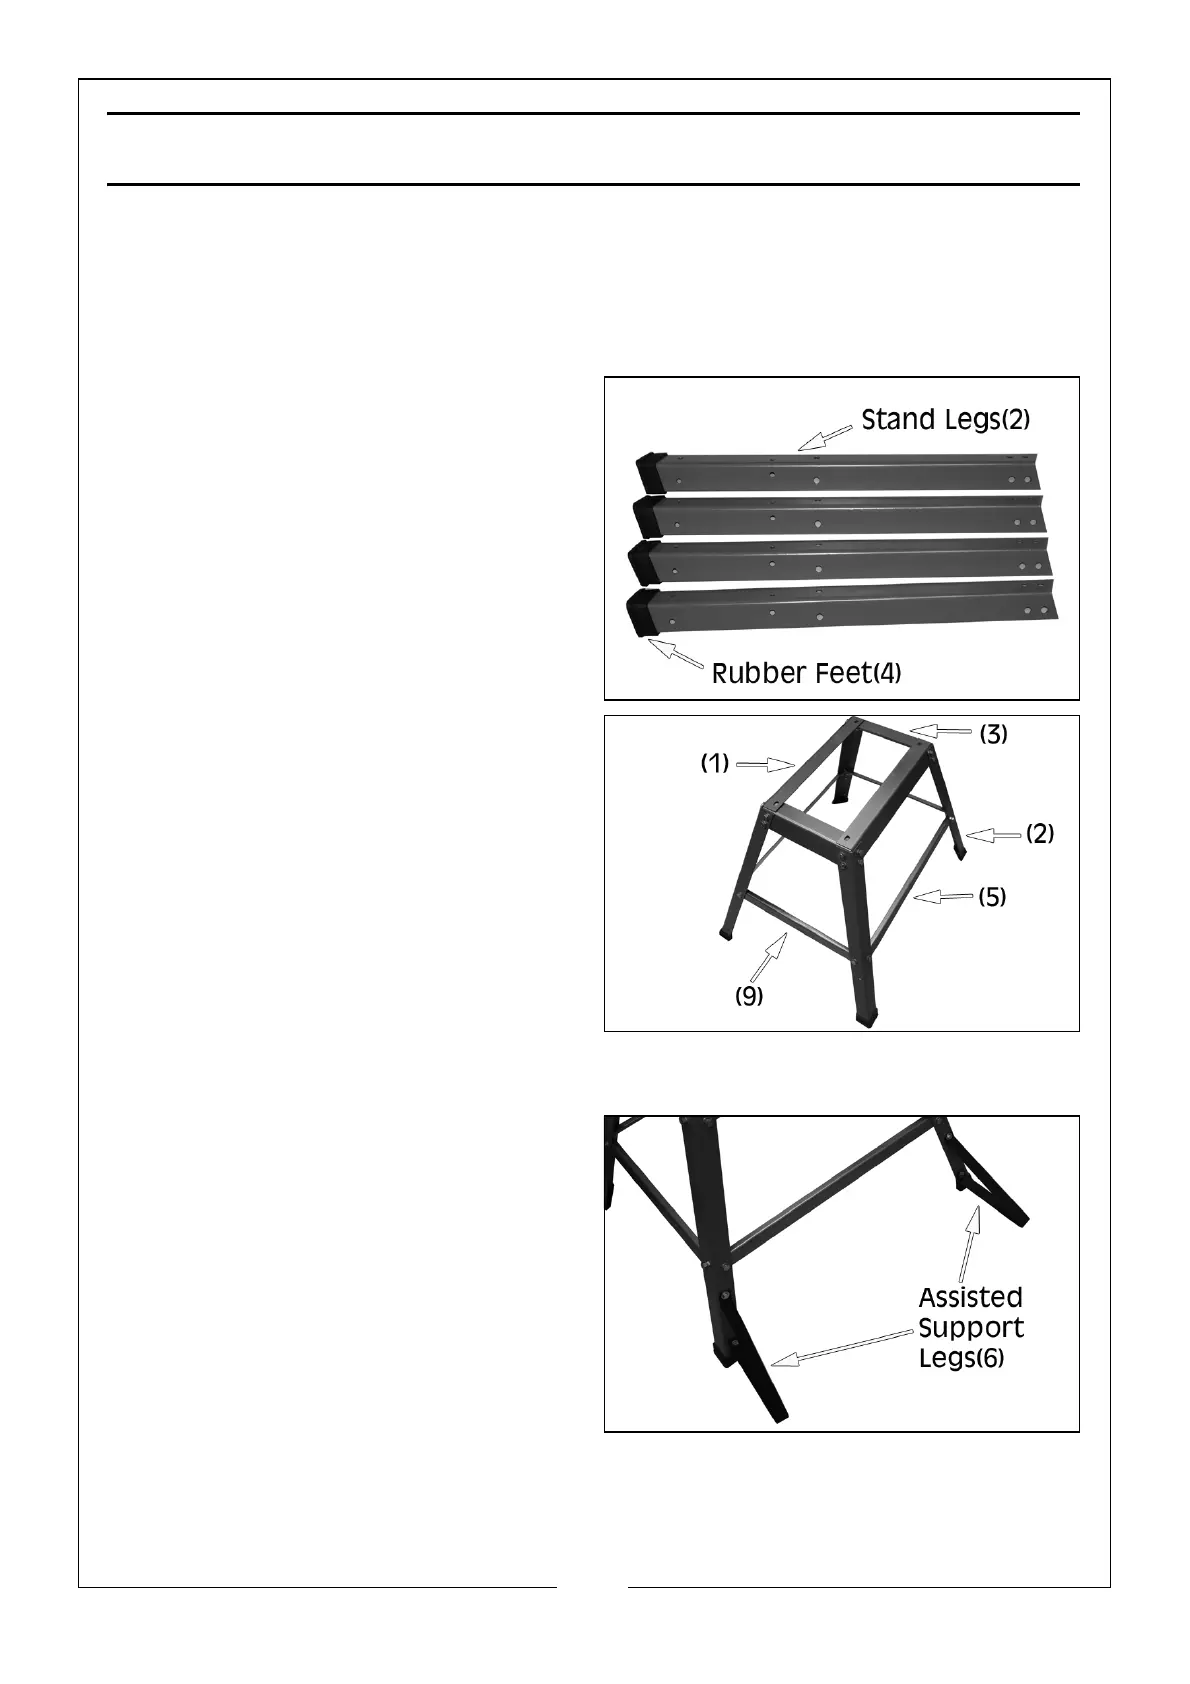
NOTE: All numbers in brackets correspond to the Contents - Stand list on
page 9.
1. Place the rubber feet (4) onto the
ends of the stand legs (2).
2. Attach the 4 stand legs (2) to the
outside of the 2 long beams (1) &
2 short beams (3), securing each
leg with 4 x M8 x 16 bolts, flat
washers and nuts. Hand tighten
nuts only at this stage.
3. Attach the 2 long support plates
(5) and 2 short support plates (9)
to the legs, secure each with 2 x
M8 x 16 bolts, flat washers and
nuts. Hand tighten nuts only at this
stage.
4. Attach the 2 assisted support legs
(6) to the 2 stand legs (2) on the
long support plate (5) side of the
stand, secure each with 2 x M6 x
16 bolts, flat washers and
nuts.Hand tighten nuts only at this
stage.

 Loading...