PART
V
SANITIZING
THE
FREEZER
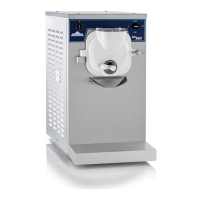
Prior to starting the freezer with the product that will be served, the freezer
must be sanitized-
Sanitizing the freezer
is
most important as the procedure retards the growth
of bacteria and insures acceptable product test results when examined by local
Health and/or Agriculture Departments.
The frequency of cleaning and sanitizing cycles must comply with local Health
Regulations. If uncertain about the regulations in your area, contact the local
Board of Health or Department of Agriculture.
To begin the sanitizing process, you
will
need a clean pail, wire wisk, and a
soft plastic bristle brush.
1.
Mix
2
9z. of sanitizer,
STERA
SHEEN
'GREEN LABEL
OR
EQUIVALENT, (sample packs included in the STXRT-
UP
KIT) into a pail containing one gallon of warm water.
Dissolve sanitizer by stirring with a wire wisk, This
formula will make a
200
P.P.M-
(parts per million)
concentration of chlorine sanitizing solution.
IMPORTANT: Do not exceed the formula recommended by the sanitizer
manufacturer as it
will
not add to
its
effectiveness,
2.
Liftthe fill chute cover and pour the sanitizing solution
into the cylinder until the solution rises in the fill chute.
3.
Turn the selector switch to the CLEAN position for 30
seconds (Ref, Fig.
4,
PC.
5).
The beater will run
allowing the sanitizing solution to come in contact with
all internal product contact areas- During ihe 30 second
CLEAN period, the remainder of the one gallon of sanit-
izing solution should be added filling the fill chute,
4.
Turn the selector to ihe
OFF
position.
5.
Using a sanitized soft Srisile brush, brush the dispense
chute, the underside of the fill cnute cover, and the sides
of the fill chute that
will
come in contact with product.
Close the fill cover. Allow the sanitizing solution to
remain in contact with the product areas for three
(3)
to five
(5)
minutes-