6
Tr o u b l e s h o o t i n g
Tr o u b l es h oo t in g l 6- 3 3
R e p l a c i n g t he He a t er s
R e g e n e r a t i on H e at e r Tu be
1
Stop the dryer, disconnect the power, and follow proper lockout
procedures.
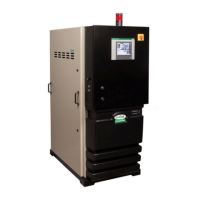
2 Open or remove the right side panel of the dryer, as viewed
from the control panel, to gain access to the regeneration heater.
3 Disconnect the regeneration heater
wires and high temperature switch
wires at the quick disconnects near the
heater tube.
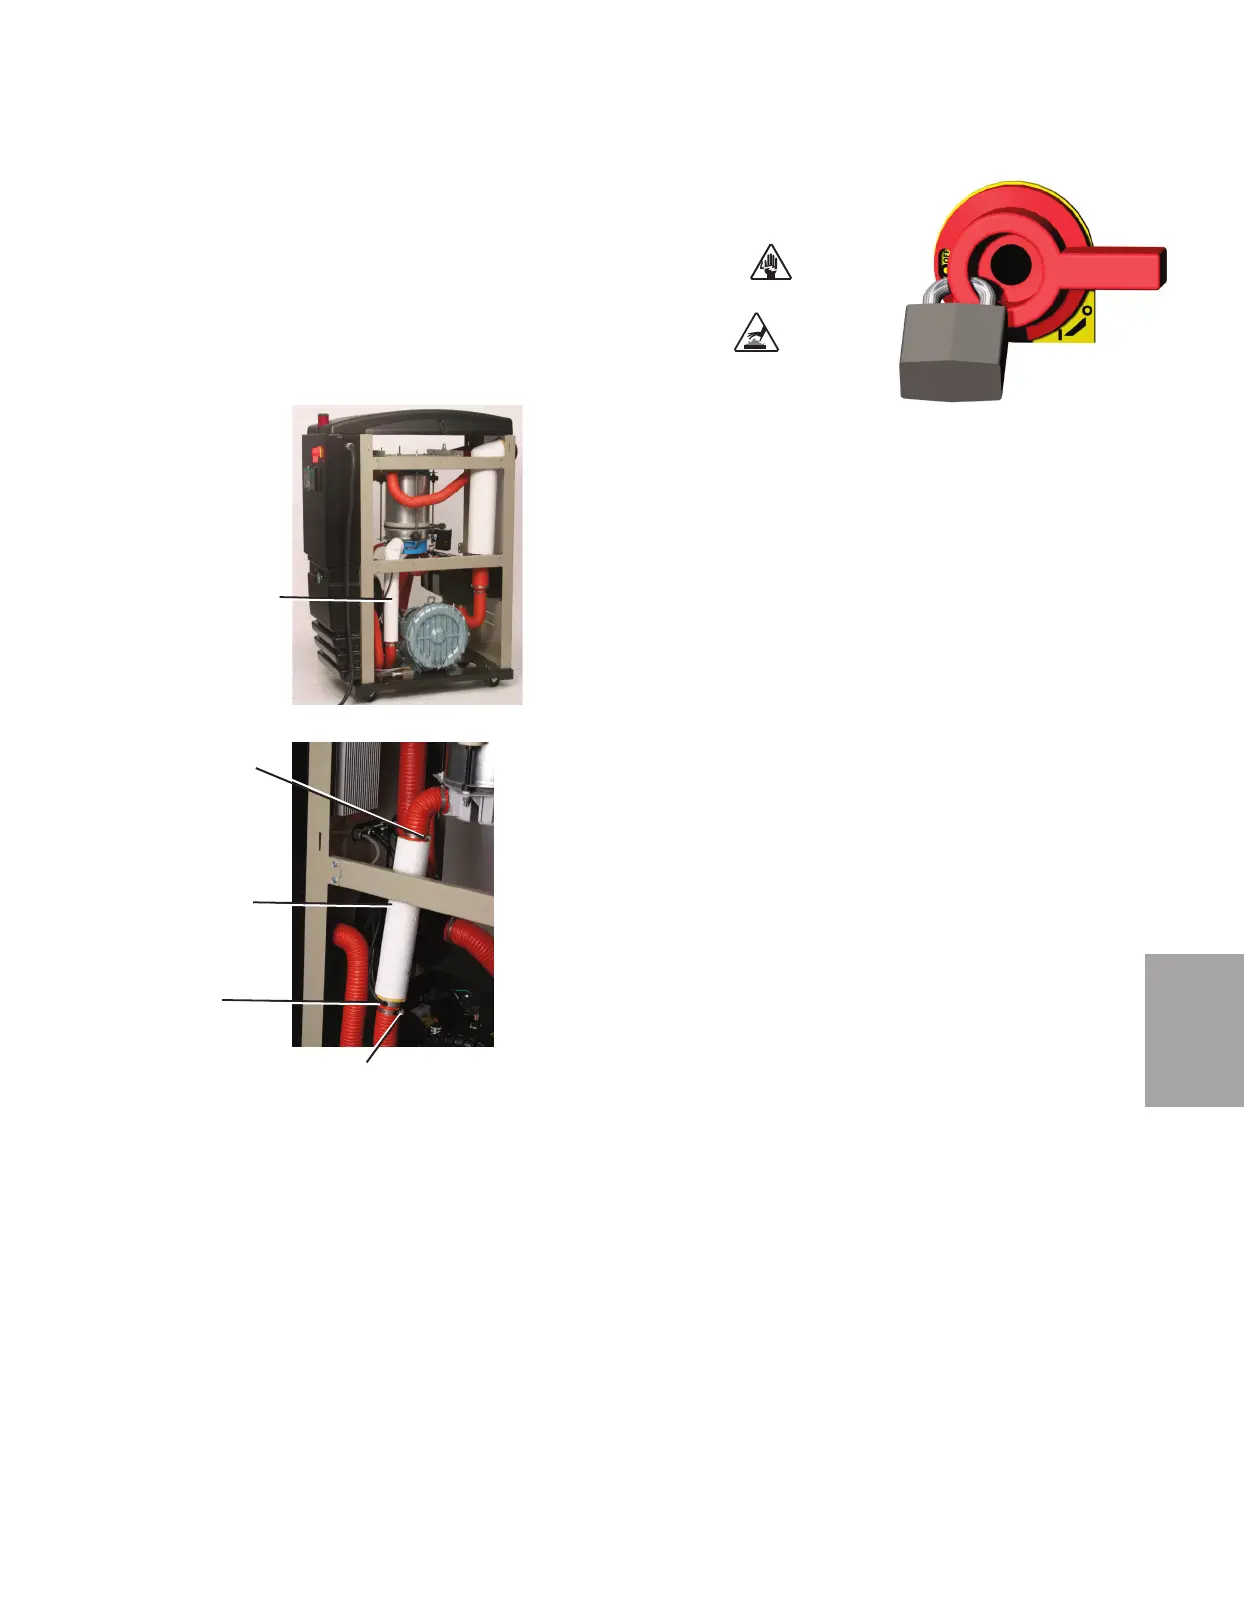
4 Remove the insulation from the
regeneration heater tube by cutting
the insulation in a straight line from top
to bottom.
5 Remove the hose and clamp at the bot-
tom of the heater tube.
6 While supporting the heater tube, dis-
connect the hose clamp and hose from
the top of heater tube, and remove the
heater tube from the dryer.
7 Compare the markings on the outside
of the regeneration heater tube to
ensure the new one has the same voltage
and kW ratings as the original heater
tube. This information is on the end
nearest the wires.
8 Connect the hose from the reactivation inlet to the top of the new regeneration
heater tube with a clamp. The heater tube wires should be at the bottom of the heater
tube when installed into the dryer.
9 Connect the hose and clamp to the bottom of the new regeneration heater tube.
10 Put the original insulation back on the regeneration heater tube. Apply duct tape to
the seam that was cut during removal.
11 Connect the heater wires and high temperature switch wires to the quick discon-
nects near the heater tube.
12 Replace the side panel of the dryer.
13 Make sure the regeneration heater fuses are not blown before applying power to
the new heater.
Regeneration
Heater
Insulation
Wires
Clamp
Clamp
 Loading...