I n s t a l l a t i o n l 3 -9
3
I n s t a l l a t i o n
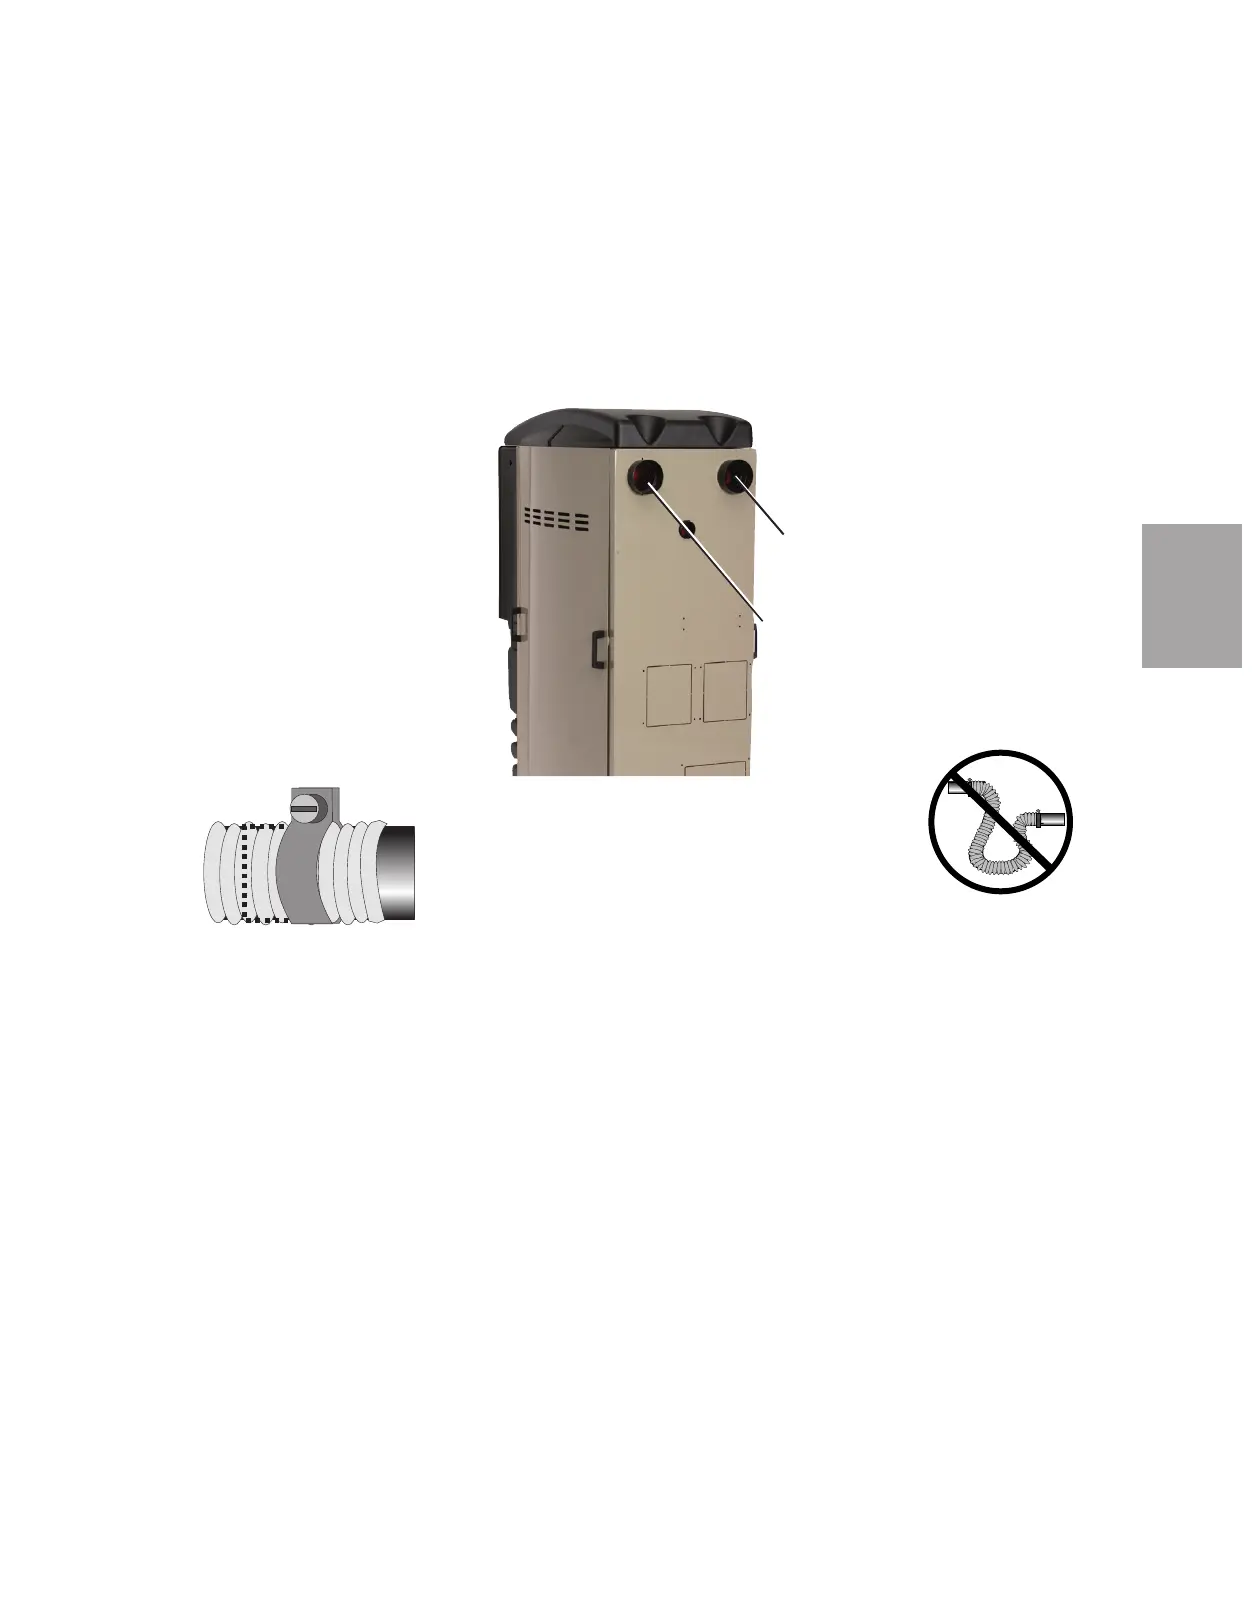
C o n n e c t i n g the Ai r Ho s es
Using the two flexible hoses provided, connect the inlets and outlets of the drying hop-
per to the dryer. If you have positioned the dryer on the floor or mounted it to an option-
al floor stand, make sure the dryer is located as close as possible to the hopper to reduce
heat loss. (10 ft {3.05 m} of hose supplied)
NOTE: If you have ordered an insulated hose, it should be installed between the dryer outlet and
the hopper inlet, see step 2.
1 Attach one hose from the return air
inlet of the dryer to the return air
outlet from the top of the hopper.
2 Attach one hose from the delivery
air outlet of the dryer to the delivery
air inlet of the hopper.
3 Secure hoses with clamps.
The hose clamp should be secured at
least 1/4 in. {0.64 cm} from the end of
the inlet or outlet tube.
C o n n e c t i n g the Dr y e r t o the Ho p pe r
W 150 has a 2 1/2 inch {63.5 mm} inlet and outlet hose connections.
W 200, W 300 and W 400 have a 5 inch {127 mm} inlet and outlet hose connections.
If your dryer hose connection and your hopper hose connection are not the same
size, you will need a hose adapter. Contact Conair Parts 1-800-458-1960.
NOTE: Do not allow the
flexible hoses to kink or
crimp.
✐
Return
Air Inlet
NOTE: Water to cooler
should be turned off
when the dryer is not
running to prevent
condensation
.
✐
Dry
Delivery
Air
✐
 Loading...