UGH025-0504 Thermolator TW Series
TROUBLESHOOTING 6-29
IMPORTANT: Always
refer to the wiring dia-
grams that came with
your Thermolator to
locate specific electrical
components. Illustrations
in the User Guide are
intended to be represen-
tative only.
Unscrew the locking screws on the wiring harness and
remove the wires.
Shut off the cooling water in feed.
Drain the Thermolator using the drain plugs
located at the rear of the unit.
Remove the four bolts that hold the heater
element in place. Use a 15/16-inch socket with 1/2-inch
drive.
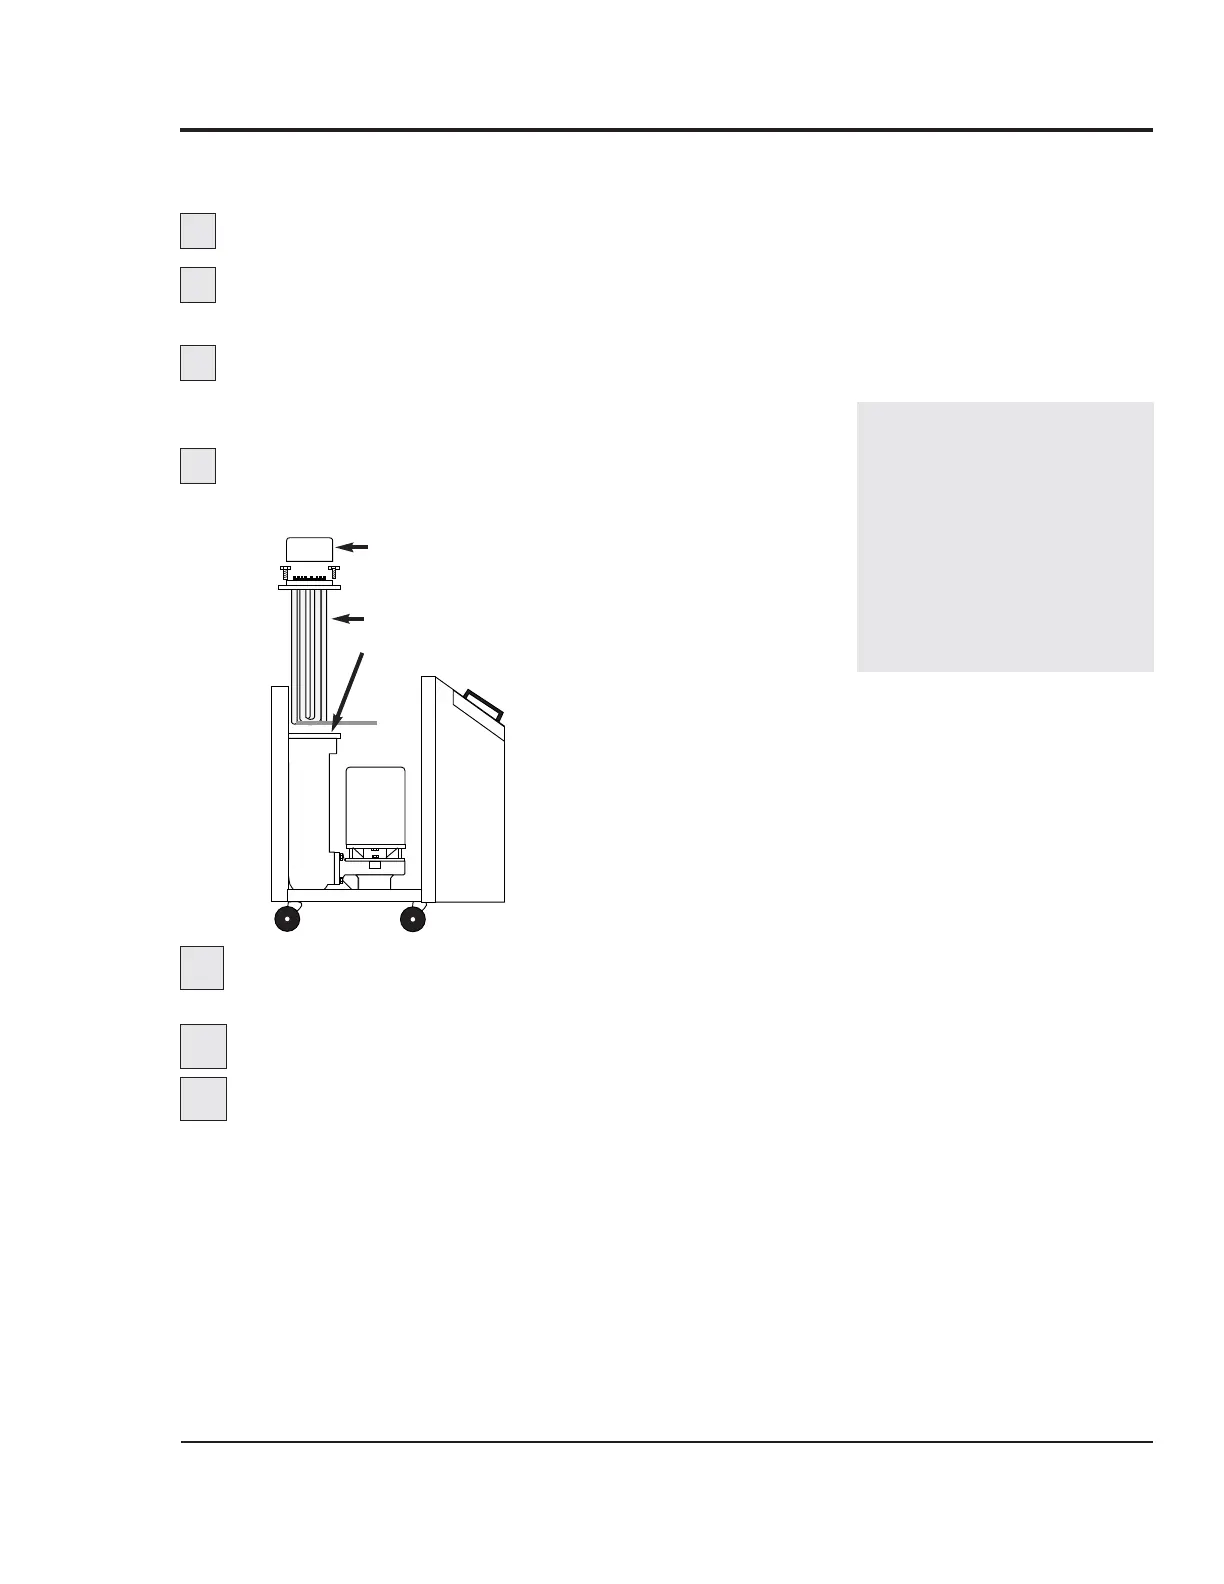
Lift the heating element out of the heater tube.
Lift the element straight up.
5
6
7
Heater cap
Heater element
Heater gasket
Lift the heating element out of the heater
tube.
Lift the element straight up.
Replace the heater gasket if it is worn.
Reverse these steps to install the new heater
element and reassemble the unit.
9
10
8
11
REPLACING
HEATER
ELEMENTS
CONTINUED
 Loading...