Thermolator TW Series UGH025-0504
6-30 TROUBLESHOOTING
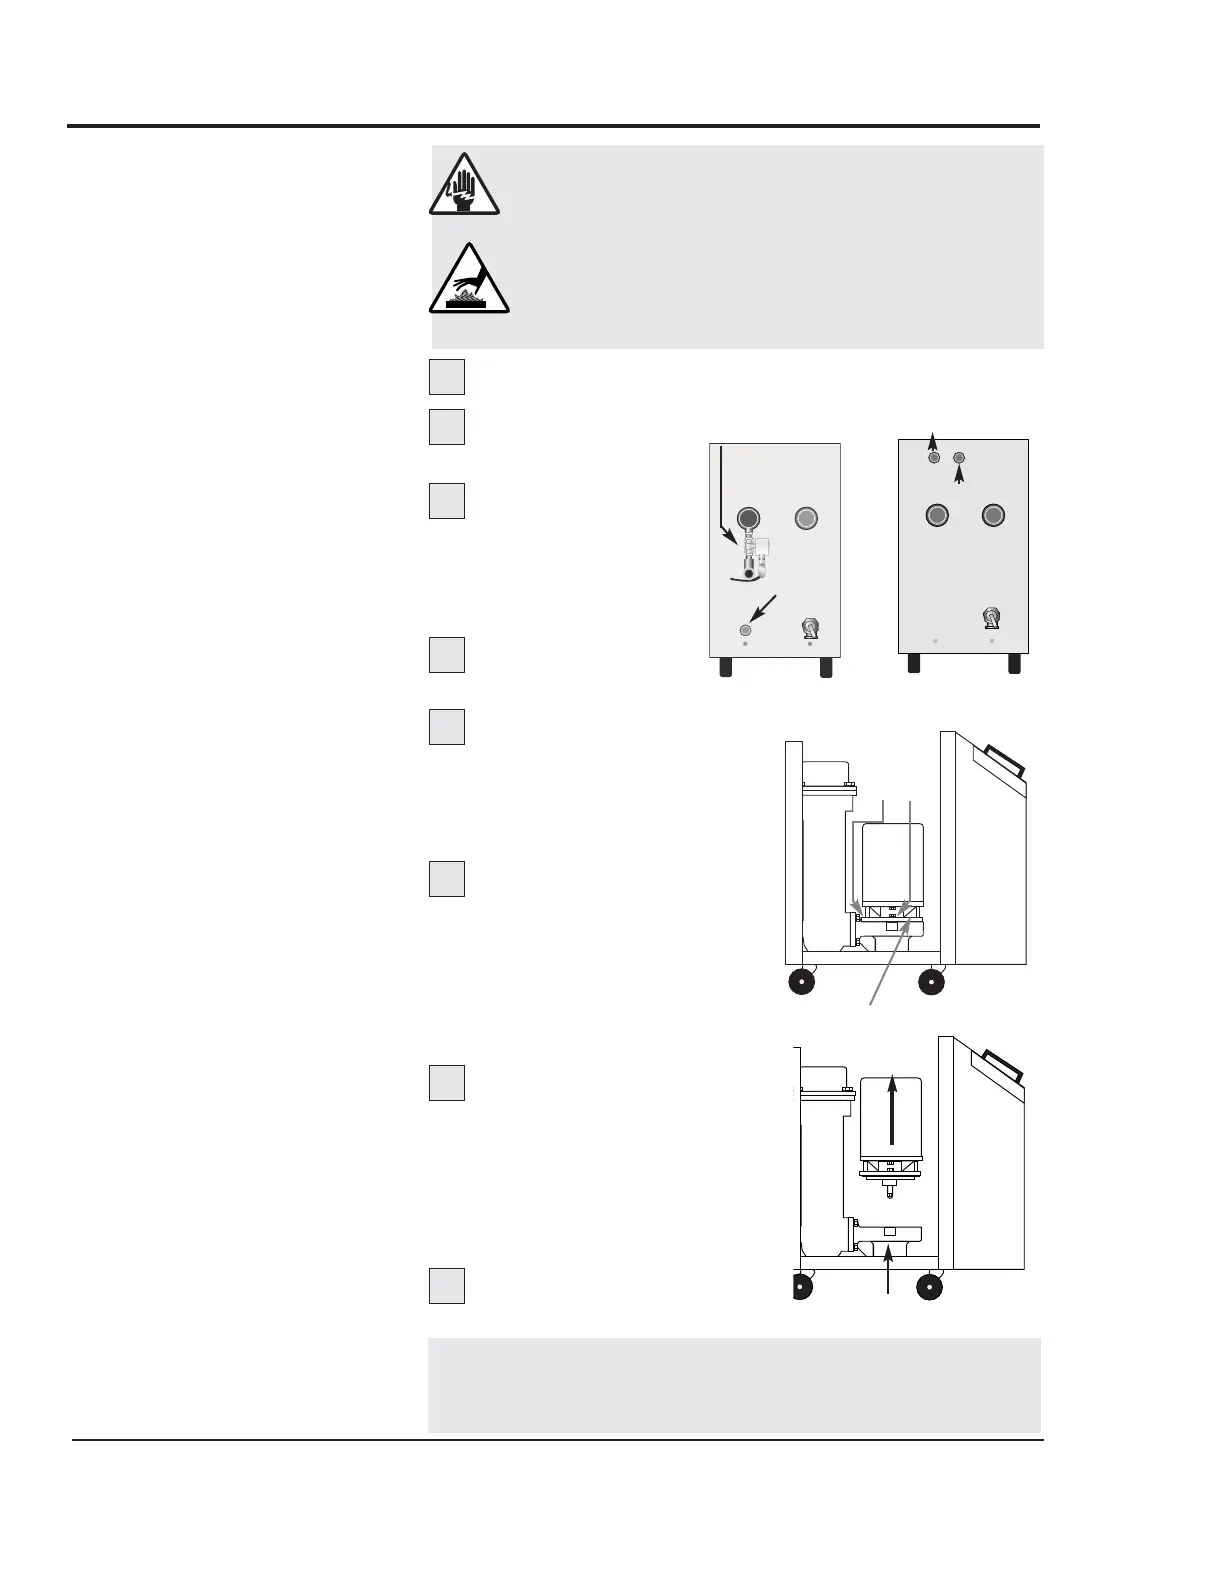
REMOVING
THE
PUMP
Disconnect and lockout the main power.
Shut off the
cooling water in feed.
Drain the unit of
all fluid. Remove the
relief valve at the rear
of the unit using a 1/4-
inch allen key.
Remove the top
and side panels..
Remove the seal flush
line. Use a 1/2-inch open-
end wrench to remove the
flush line from the connec-
tion on the pump adapter.
Remove the pump
assembly bolts. Use a 9/16-
inch open-end box wrench
to remove the bolts holding
the pump to the volute. The
bolt in the rear will require
a 9/16-inch crows foot wrench.
Lift the pump assembly
straight up to remove. The pump
can now be replaced or disas-
sembled for repair. Extra long
leads so the motor can be
removed with disconnecting the
wires.
Reverse the steps to
reassemble the unit.
NOTE:
Before restarting, close all drain openings using
sealant on the threads and reprime the pump. Do not start
until the pump is completely filled with water.
1
2
3
4
5
6
7
8
Cooling
water in
DIRECT INJECTION
CLOSED CIRCUIT
ISOLATED CIRCUIT
Cooling
water out
Cooling water out
Cooling water in
WARNING: Electrical shock and
hot surface hazards
Before attempting maintenance of any kind
on the Thermolator, you must stop the unit;
disconnect and lockout the main power
supply; and allow the unit to cool to less than
100°F (38°C)
Pump seal flush line
Pump
assembly
bolts
Volute
 Loading...