15
1210
A minimal amount of maintenance performed on a regular basis will assure proper function and
prolongthelifeofyourSkiErg.ThePMwillkeeptrackofaccumulated,orlifetime,meters.Thiswill
helpyoudeterminewhentoperformmaintenanceprocedures.ToviewlifetimemetersonthePM
pushMainMenu/MoreOptions/Utilities/ProductID/MoreInformation.
Every 500,000 meters (approximately 50 hours of use)
Untwist the Cords
As you grasp the handles to use your SkiErg, you may be inadvertently twisting the cords, much
like what would happen to the cord on a telephone hand set. Over time, this may cause the cords
to twist around each other inside the SkiErg resulting in a “lumpy” feeling when you pull on the
handles. This may cause premature wear of the cord.
Follow this procedure periodically to untwist the cords. This is easiest done with two people.
1.Pulloutbothhandlesasfarastheygo.
2. Hold the cords at the top bracket allowing the handles to dangle and spin freely.
3. Run your hand down the length of each cord to untwist the cord.
4. Return the handles to the top position.
5. Repeat the process starting at step #1 at least two times.
Inspect the Cords
There are three separate cords and one bungee cord to inspect.
Important! All cords are of a specific type and should be replaced
with the appropriate Concept2 replacement cord if significant wear
or damage is observed. See below for a description of cord wear/
damage.
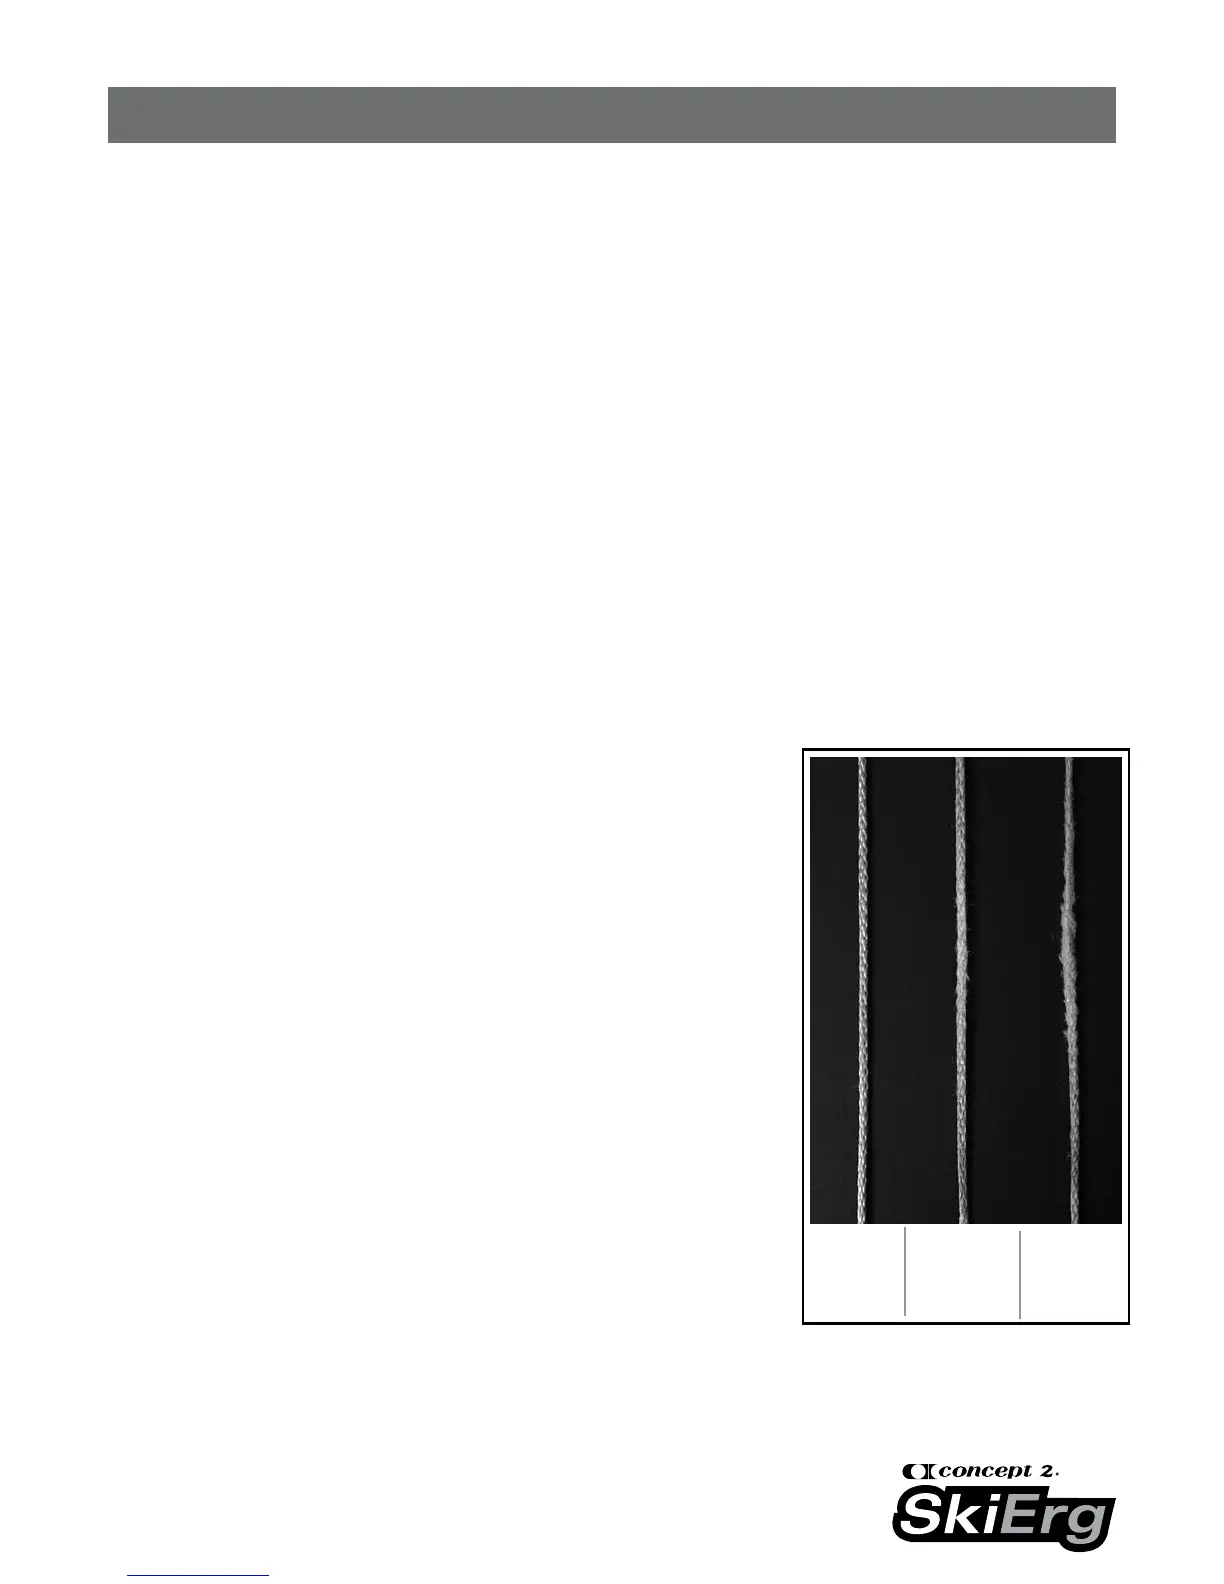
Cord Inspection:
1. The handle cord is a single cord connected to both handles and
can be easily inspected by pulling the handles all the way out and
visually checking for wear. See below for a description of cord
wear.
2. To inspect the cords working inside the vertical frame, the lower
rear cover must be removed.
If the SkiErg is mounted to a wall it must be removed for this
inspection.
• Removethelowerrearcoverbyremovingthesixscrews.This
willexposethecordthatwindsontotheywheelspool,the
handlecordthatwindsontothespool(thisisaseparatecord
from the one attached to the handles), and the bungee cord.
• Haveahelperslowlypulltheskipolegriphandlesallthewayoutandobservethecondition
ofthecords.Pullingthehandlesoutwillallowyoutoseetheentireworkinglengthofthese
three cords.
MAINTENANCE
New
cord
Acceptable
wear.
Still
usable.
Excessive
wear.
Replace
cord.