Real-Time Clock VFC400-USB User Guide 30
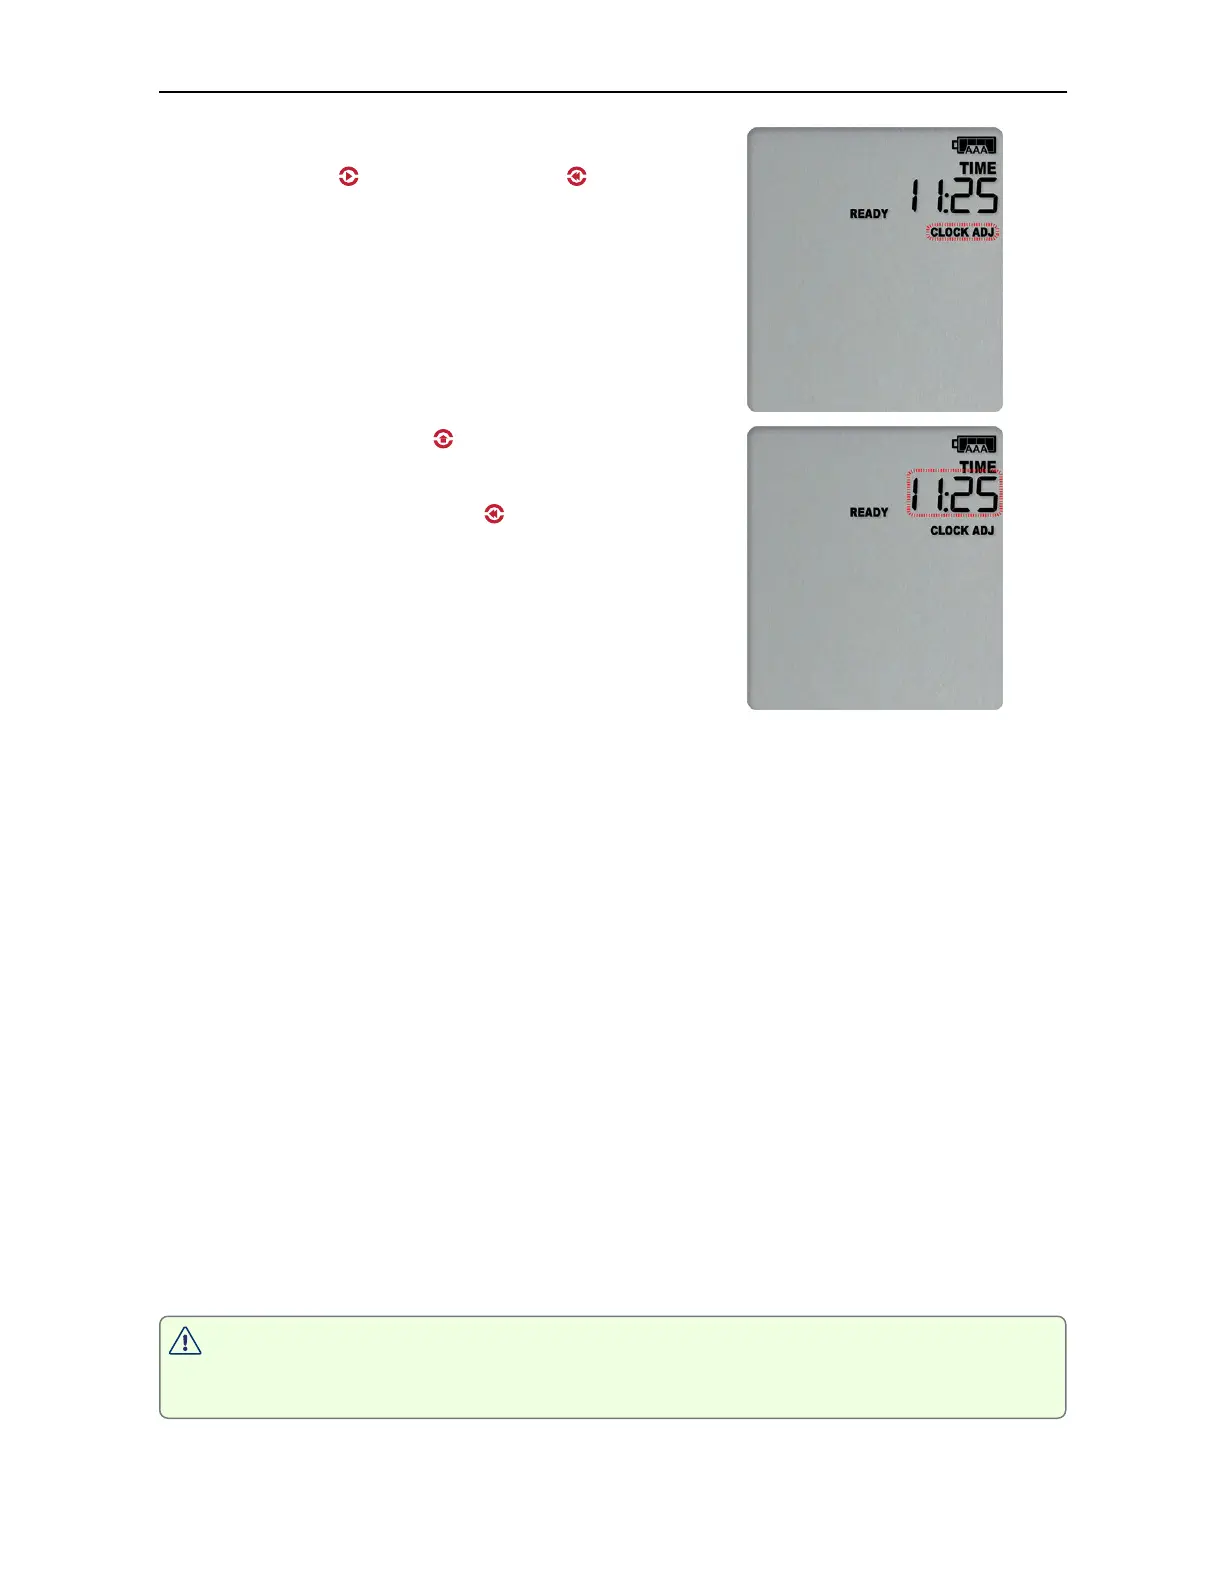
To adjust the time, press and hold the
START/CLEAR/STOP ( ) and REVIEW/MARK ( ) buttons
simultaneously. Keep holding both buttons firmly for
a period of 8 seconds. During this period the
CLOCKADJ symbol flashes. Release the buttons within
two seconds after the CLOCKADJ symbol remains
permanently lit, and the time starts blinking. The
clock can now be adjusted.
Press the Channel button ( ) to increment the clock
in 15-minute intervals.
Press the REVIEW/MARK button ( ) to decrement the
clock in 15-minute intervals.
Press the START/CLEAR/STOP button to store the value
shown on the screen.
To abort adjusting the time zone and return to the
original settings, please wait for 30 seconds until the
time no longer blinks.
You will need to observe the following rules while adjusting the time:
l
Internally, the logger always retains its clock in UTC. You cannot adjust the clock
beyond the allowed time zone limit of +15 hours and -12 hours from UTC (these are
the same values you see as allowed time zone values in Control Solutions VTMC
during configuration).
For example, if 13:25 is the currently displayed time, and the logger is configured
with Hawaiian time zone (-10h when in daylight saving), the earliest time would be
11:25 (-12h).
l
You cannot adjust the time across midnight.
l
You will hear three short beeps if you try to increase or decrease the time zone
beyond the allowed limit.
l
An inspection mark is placed in the logged readings, regardless of whether you
adjusted the time zone or not.
l
You cannot use the time zone adjustment to correct small errors in the displayed
time. To do this, please re-configure the unit with Control Solutions VTMC.
NOTE: It is advised that the real time clock is only adjusted when the product is
not recording (STOPPED or READY) to avoid large shifts in day boundary data.