11
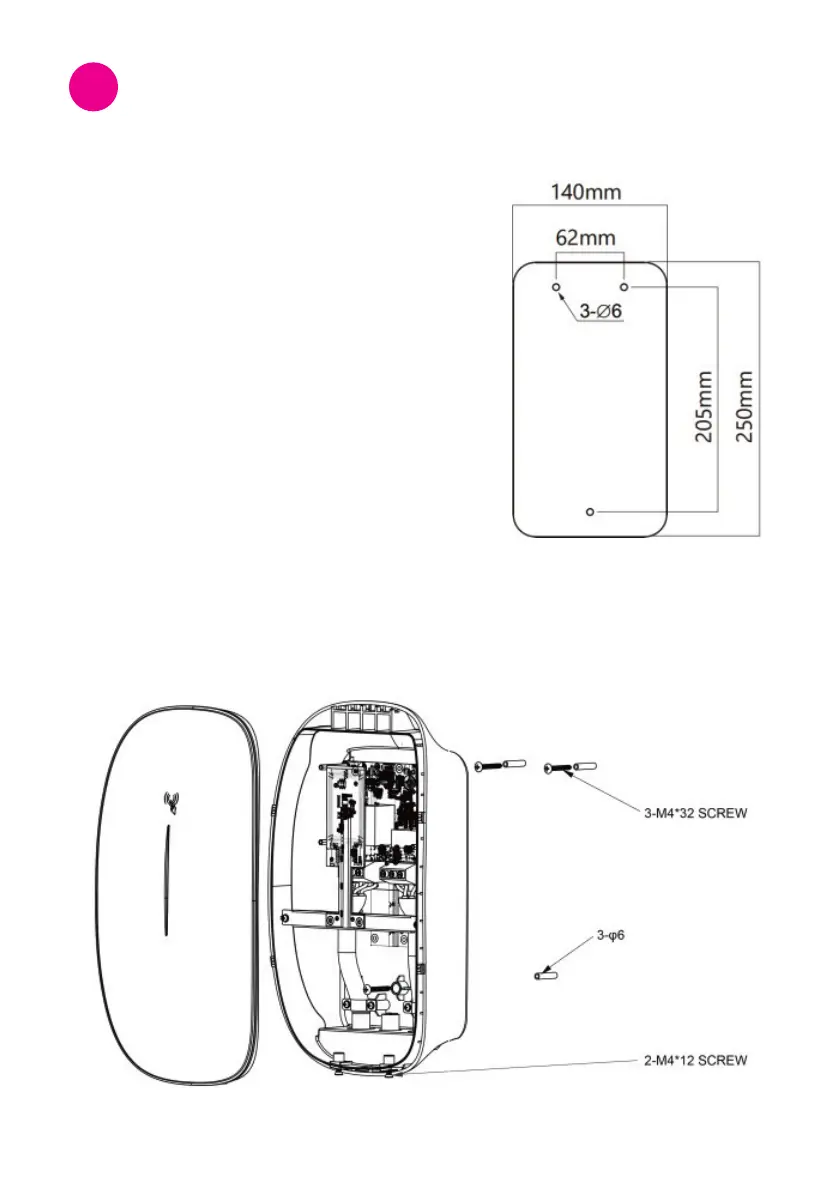
5.1 Mounting
1.UsingtheMountingTemplate,drill3xФ
6*35 mm holes in the wall and insert the wall
plugs.
2. Fix the 2 x M4*32mm self-tapping screws into
thewallplugs,leavinga5mmspace,between
the screw head and the wall.
3.Openthecharger’sfrontcover,hangthe
chargepointonthe2xM4*32mmscrews,
and secure it to the wall by inserting a third
M4 screw at the bottom of the charge point.
4.Securethecentrelockingscrewatthebase
and seal it with the supplied cap.
5.Installpowerinputcablesasrequired.
6.Closethefrontcoverandlockthetwosocketheadscrewsatthebottomwithan
Allen key.
Installation Details
5
WALL PLUG