Preface Material
MA1000 Installation and Configuration Guide 25
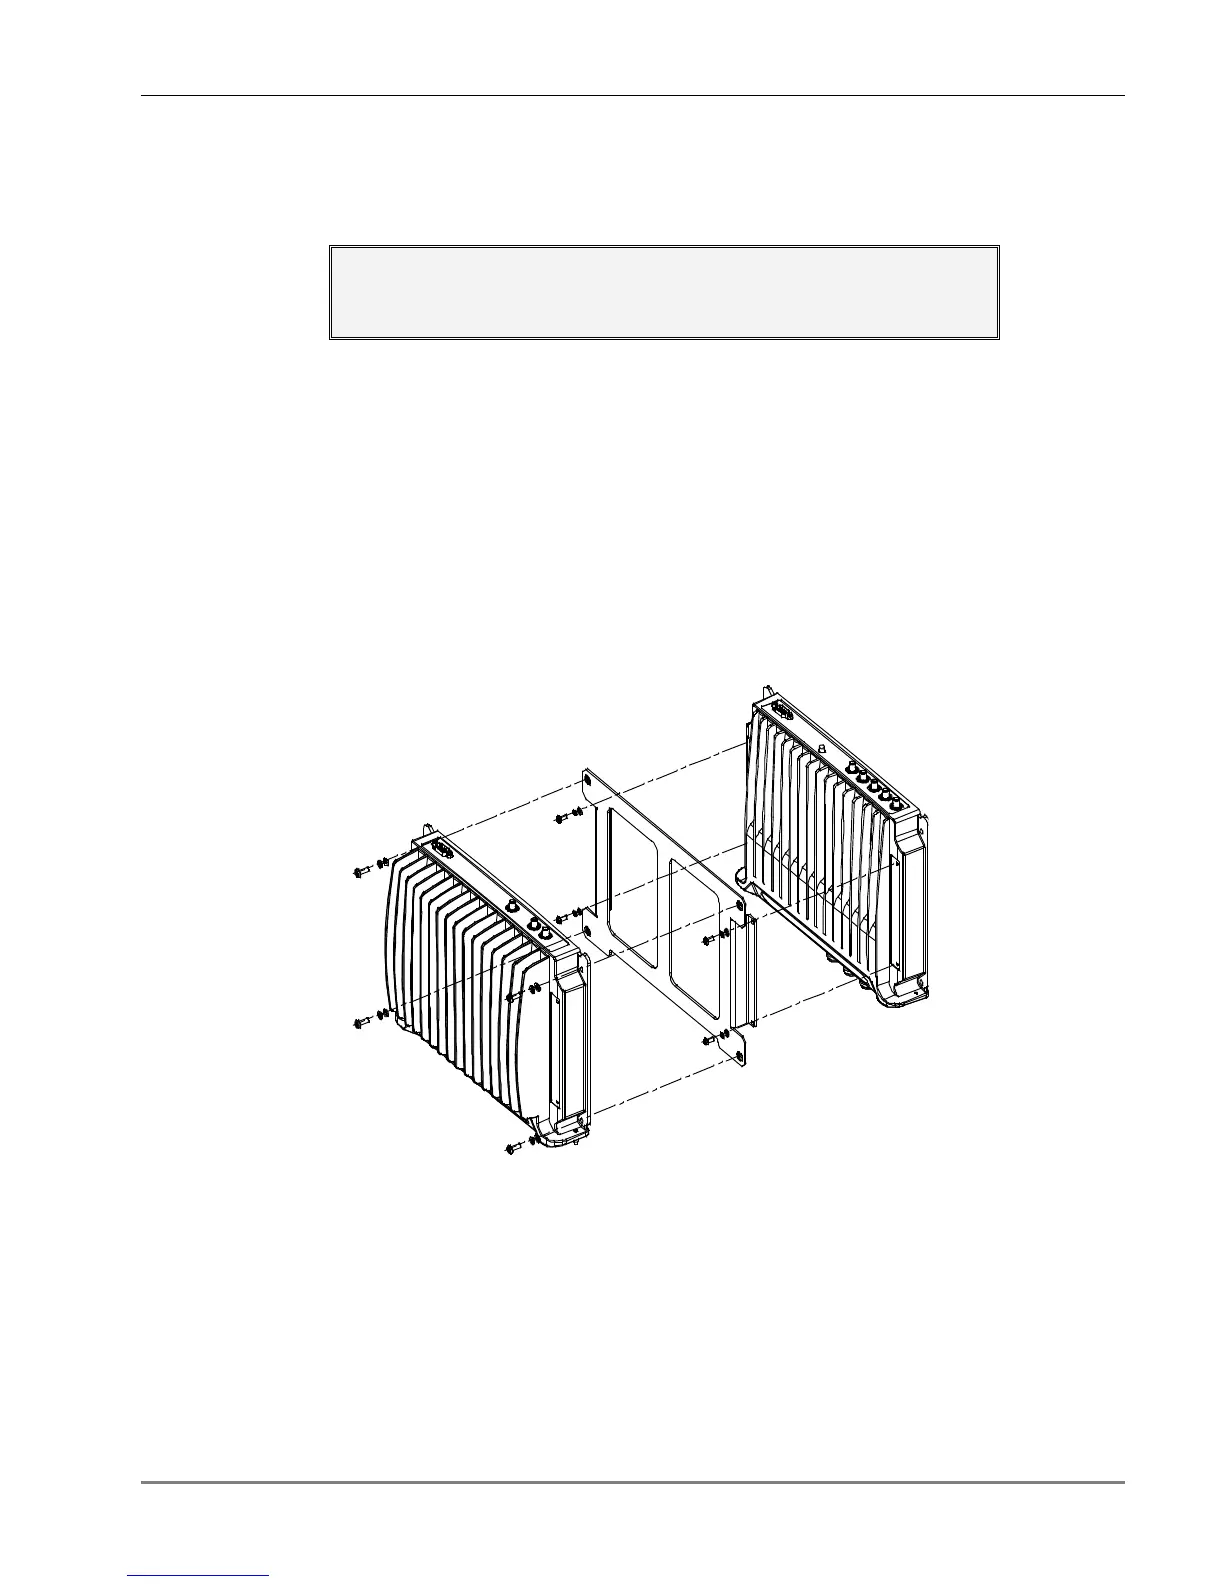
4.3.2.1 Assembly and Connections
Refer to Figure 19.
ATTENTION!
To prevent damaging the SMA connectors,
be sure to tighten using a torque of 8lb.
1. Position the supplied bracket on the 1000 RHU and secure the bracket to the 1000 RHU
using the four supplied 6-32 NC screws.
2. Position the RHU Add-on unit on the bracket and secure the Add-on to the bracket using
the four supplied 8-32 screws.
3. Interconnect the 1000 RHU and RHU Add-on SMA Uplink, Downlink and High
connectors on the rear panels of both units using the three straight jumpers.
4. Interconnect the 1000 RHU and RHU Add-on D-type 9-pin connectors on the rear panels
of both units using the supplied flat-cable.
5. Connect the power to the RHU Add-on front-panel DC connector.6.
Figure 19. RHU Add-on to 1000 RHU Assembly