CowTech Ciclop 3D Scanning Guide
Connecting the Camera
Plug in the camera and press the Connect Icon on the top left
corner of the screen. If all goes well, you will see live footage from
the camera in the middle segment of the Scanning Workbench. If
you’re having issues with this step, there are a number of possible
solutions. Please see the end of this document for troubleshooting
help.
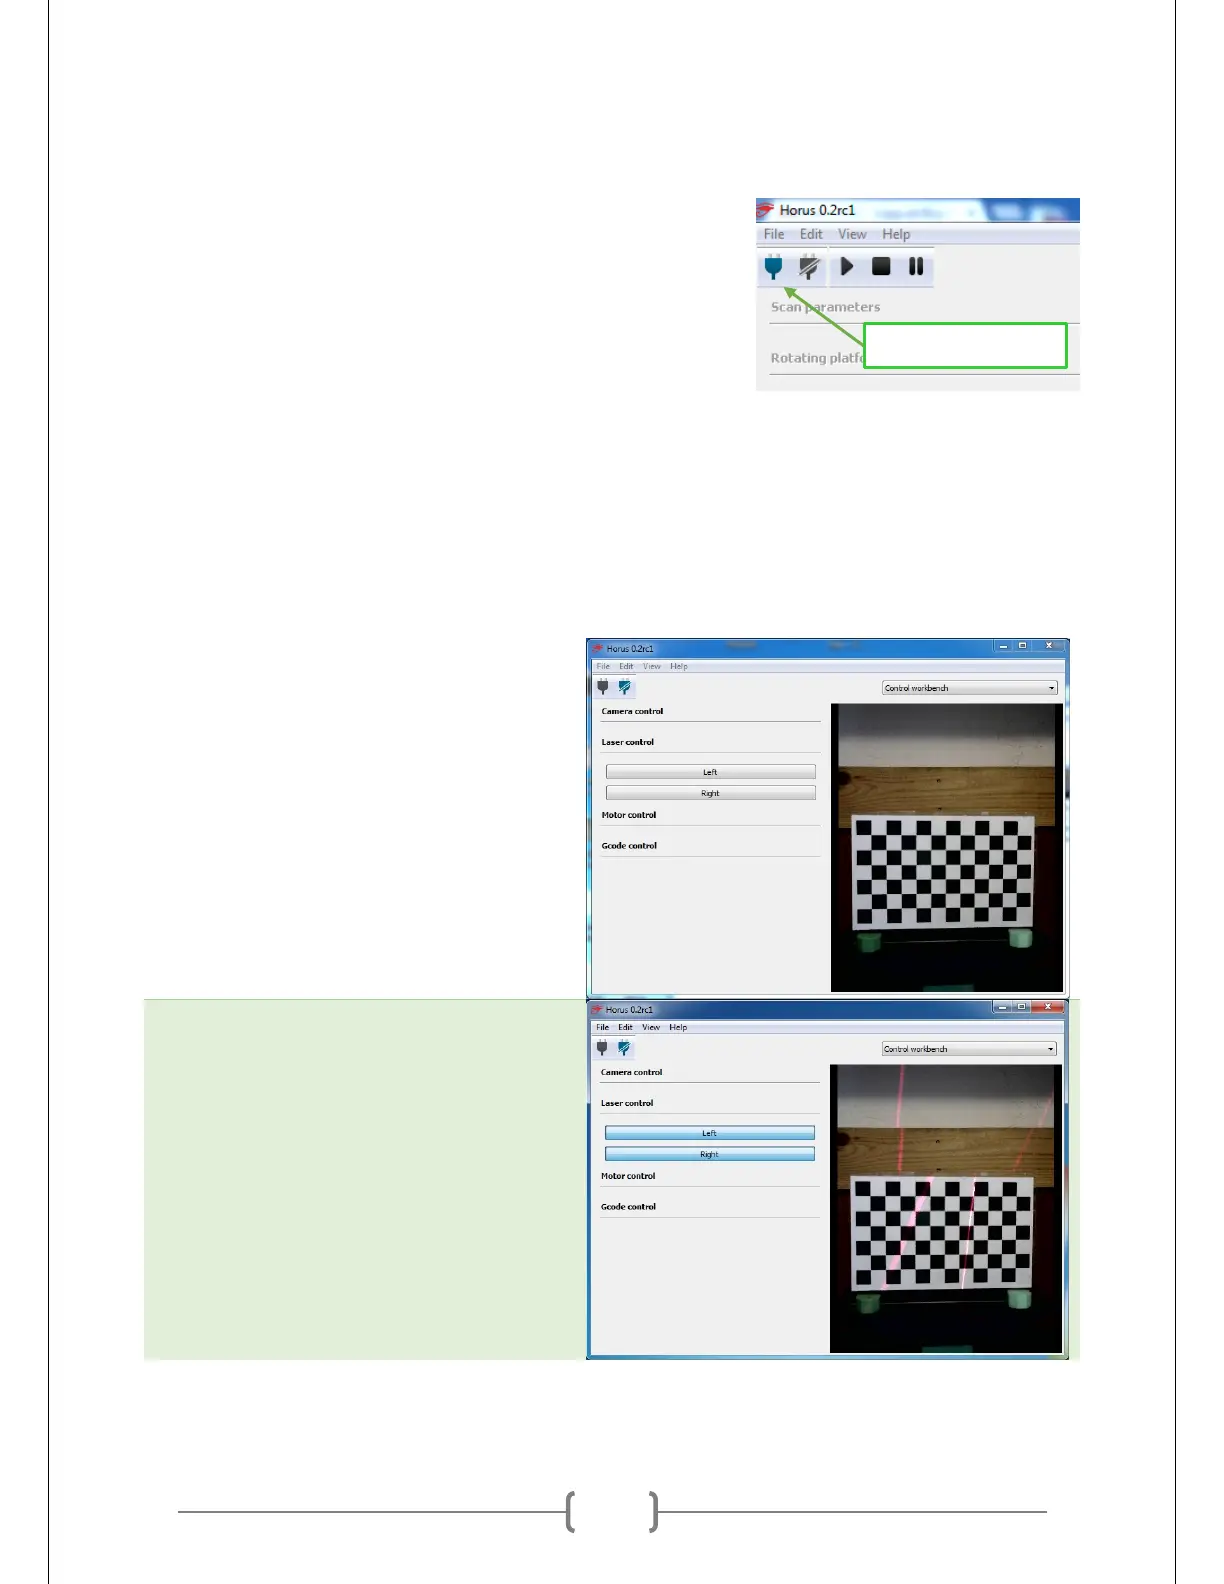
Using the Control Workbench
The Control Workbench helps you test the different components of the scanner. You can use it to
troubleshoot any issues you may have with the motors, lasers, or camera. The button on the left side of
the workbench can control all of these components.
We’ll use the Control Workbench to make sure that our lasers and object are in a good position to scan.
Vertically Align the Lasers
Place the calibration pattern on the table.
The calibration pattern comes with your
scanner, and it’s fairly important. Don’t
lose it! Be sure that it is as perfectly
perpendicular with the table as possible.
If the calibration pattern is skewed, you
may get some skewed scans after
calibration.
Turn on the left and right lasers. Use the
buttons on the left side of the Scanning
Workbench. In the picture at right, you
can see that the left laser is much broader
(and therefore dimmer) than the right
laser. This needs to be fixed.