CowTech Ciclop 3D Scanning Guide
Things to Have Before Starting
There are a number of items you will want to have on hand before you begin scanning.
Assembling the Hardware
You will need a fully assembled Ciclop. If you haven’t done so yet, please refer to the “downloads” section
of the CowTech website for assembly instructions:
http://www.cowtechengineering.com/downloads
It is important to build the scanner in the order prescribed by the assembly instructions. Some parts in the
assembly are press fit and cannot be taken apart again without risking damage. It pays to get it right the
first time.
Assembling the Electronics
The following sections will walk you through the process of putting the electronic components of the
scanner together. This section is here so that you do not break any of your scanner’s parts. Please follow it
carefully.
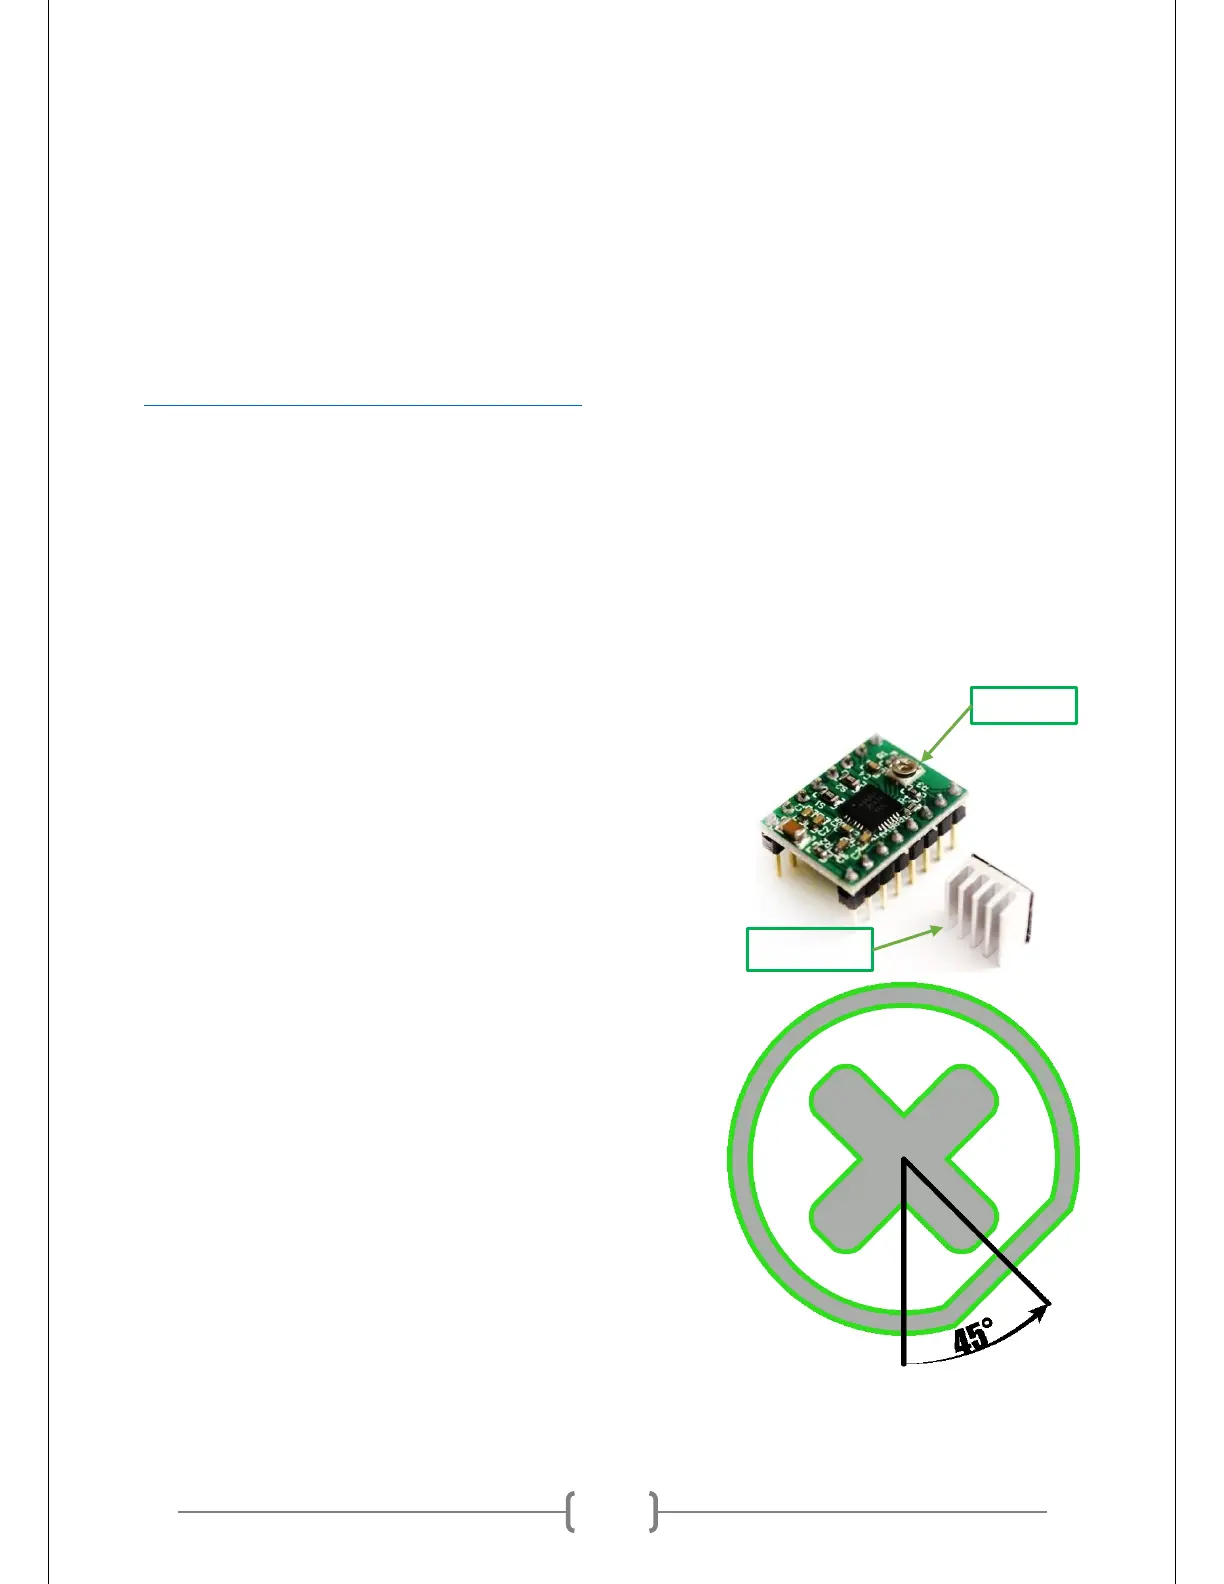
Calibrating the Stepper Motor Driver (the Easy Way)
At right is a picture of the Stepper Motor Driver. This component
of the scanner should be handled with care. It can be shorted out
and ruined with improper handling. Please carefully follow the
instructions in this document to ensure that it works properly.
The screw shown in the picture at right controls how much
electrical current is given to the Ciclop’s stepper motor. This motor
spins the scanning table, which allows the scanner to get a 360°
view of an object. You want to ensure that this screw is adjusted
to the right position. Too much electrical current, and the
motor may eventually fail or the Stepper Motor Driver may
overheat. Too little electrical current, and the motor will not
turn properly and results in inaccurate scans.
Orient the Stepper Motor Driver such that the screw is on the
bottom and the black square is above it. See the section below
titled “Plugging in the Boards and Components” for a picture of
this orientation. The screw has a flat side. The flat side of the
screw is normally pointing straight down. Using a Phillip’s head
screwdriver, turn the screw 45° counterclockwise. This
corresponds to the hour hand’s position on a clock at 4:30. See
the diagram at right.
If your Stepper Motor Driver is having issues, we highly
recommend consulting the more detailed calibration guide presented at the end of this document.