16
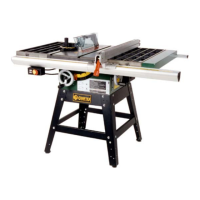
BASIC CUTTING TECHNIQUES
RIPPING
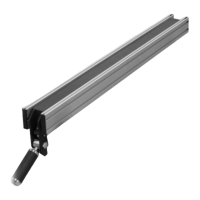
1. Lock the rip fence by pressing the fence lock lever down. Remove the mitre gauge.
2. Raise the blade so that it is about 3.2mm (0.13”) higher than the top of your work piece.
3. Hold the work piece flat on the table against the rip fence. Keep the work piece about
25mm away from the blade
4. Turn the saw on and allow the blade to come up to speed. Both hands can be used in
starting the cut. When there is approximately 305mm (12”) left to be ripped, use a push
stick to finish the cut to avoid any accidents with your near hand.
5. Keeping the work piece against the table and fence slowly feed the work piece rearward
all the way through the saw blade. Continue pushing the work piece until it is clear of
the guard and it falls off the rear of the table. Do not overload the motor.
6. NEVER try to pull the work piece back with the blade moving. Turn the power switch off,
wait for the blade to stop fully turning, raise the anti-kickback pawls if necessary and
slide out the work piece.
7. When sawing materials of great length or panels, always use a work support. A
sawhorse, roller or outfeed assembly can provide adequate support for long work
pieces. Make sure that the work support is the same height as the table saw.
8. NEVER push or hold onto the “free” or “cut off” portion of the work piece.