Edge Jointing
In edge jointing the aim is to get a
perfectly flat and square edge on
your board. This requires using a
straight cutting router bit.
WARNING!
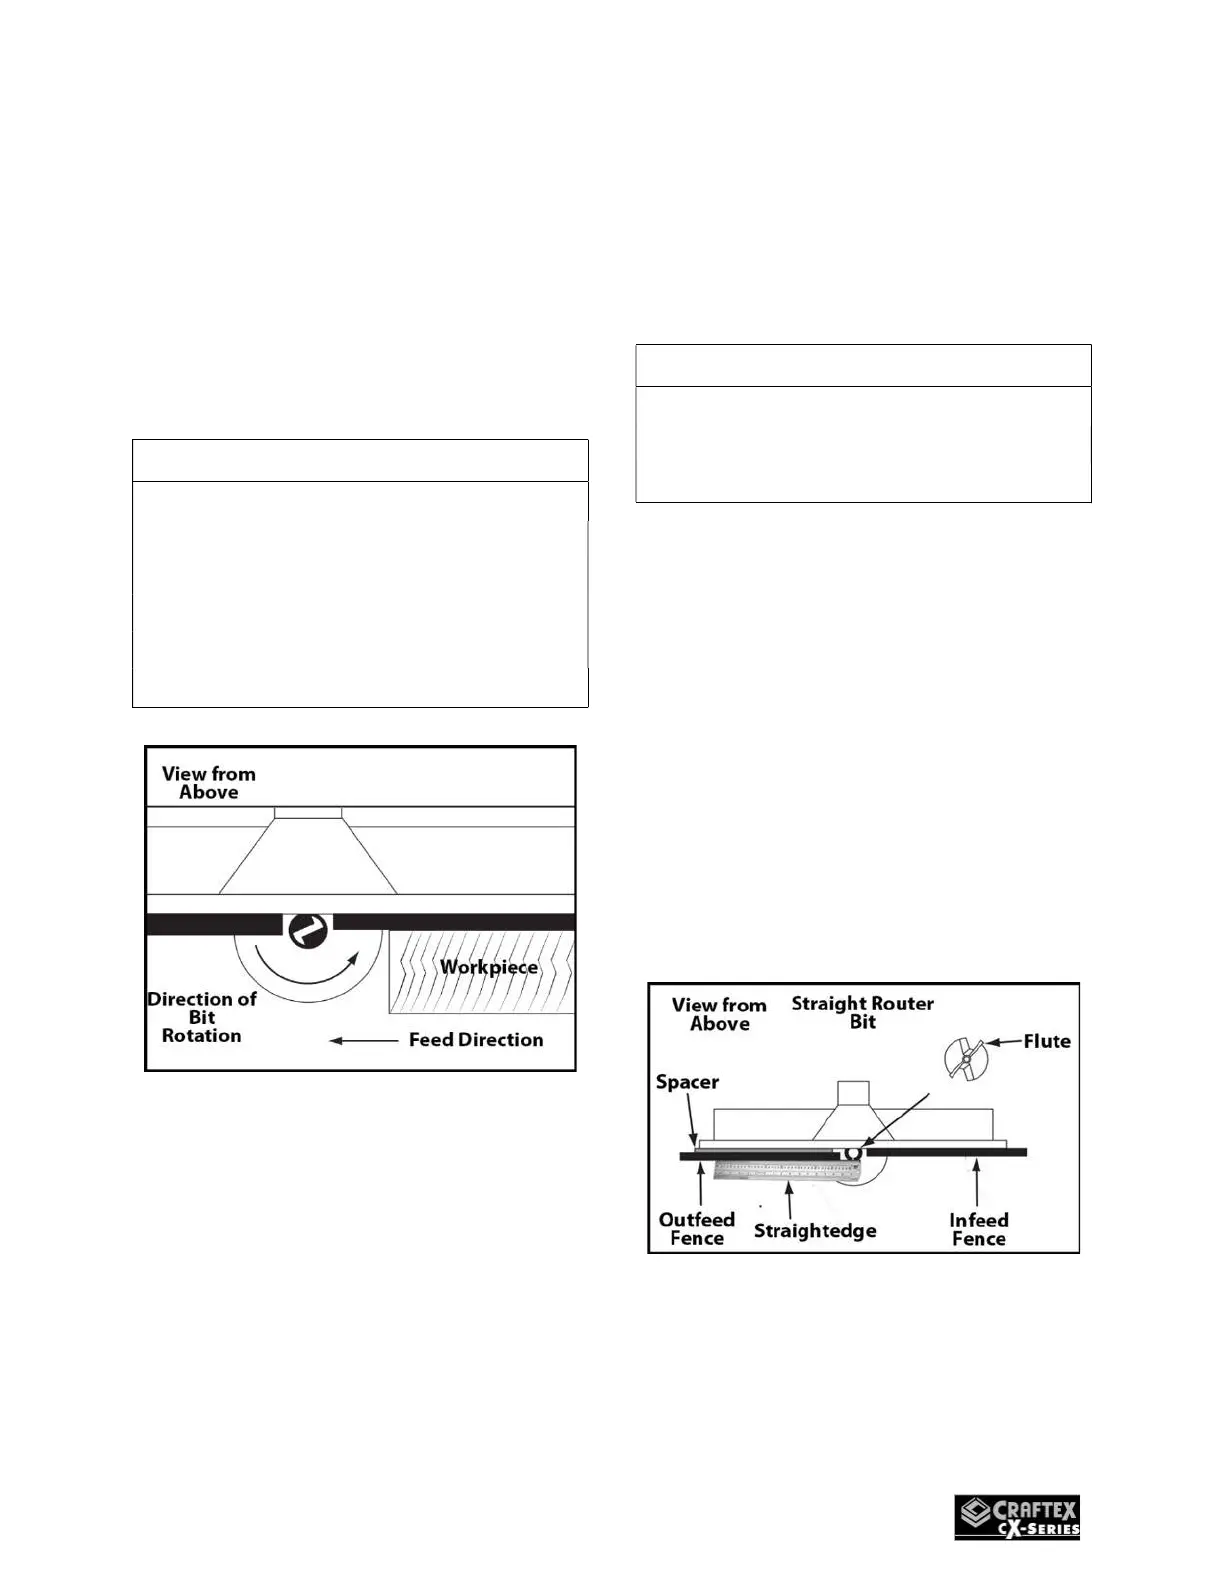
Always feed the workpiece against
the router bit rotation direction, as
illustrated below. Otherwise the
workpiece be aggressively pulled out
of your hands, drawing them into the
spinning router bit.
1. DISCONNECT THE MACHINE
FROM POWER!
2. Install a straight cutting router
bit into the router.
3. Install the table insert ring.
4. Insert a spacer (Not included)
between the outfeed fence and the
fence base. The spacer width will
determine the amount of material
that will be removed on each pass.
IMPORTANT
DO NOT take any more than 1/16” off
on each pass. This will reduce the risk
of kickback and possible injury.
5. With the router lift handle,
raise the router bit to just above the
top of the workpiece, and then rotate
it by hand until the cutting flute is
perpendicular with the fence.
6. Place a straightedge against
the outfeed fence and adjust the
fence base so the straightedge is also
against the flute of the router bit.
(Fig.51)
Figure 51
7. Make sure the fence is square
with the table T-slot (see instructions
re Fig.45)
 Loading...


