10
INSTALLING NEW BELT
After the old belt has been removed
proceed as follows:
1. Make sure the arrowheads marked on
the back of the sanding belt point to the
direction indicator attached on the belt
guard.
2. Place and center the new belt on both
the rollers.
3. Tighten the belt tens ion by s hifting the
belt tension control lever downwards.
BELT TRACKING
ADJUSTMENT
Belt tracking means where the belt rides on
the rollers . The belt should always be
centered on both the rollers.
To adjust the sanding belt tracking:
1. Turn the s ander on f or 2 or 3 seconds
and see c arefully if the belt tracks on a
centered path across both the rollers
and turn it off.
If the sanding belt is not riding the rollers on
a centered path, adjustment is necessary.
2. Turn off the sander and disconnect the
cord from the power source.
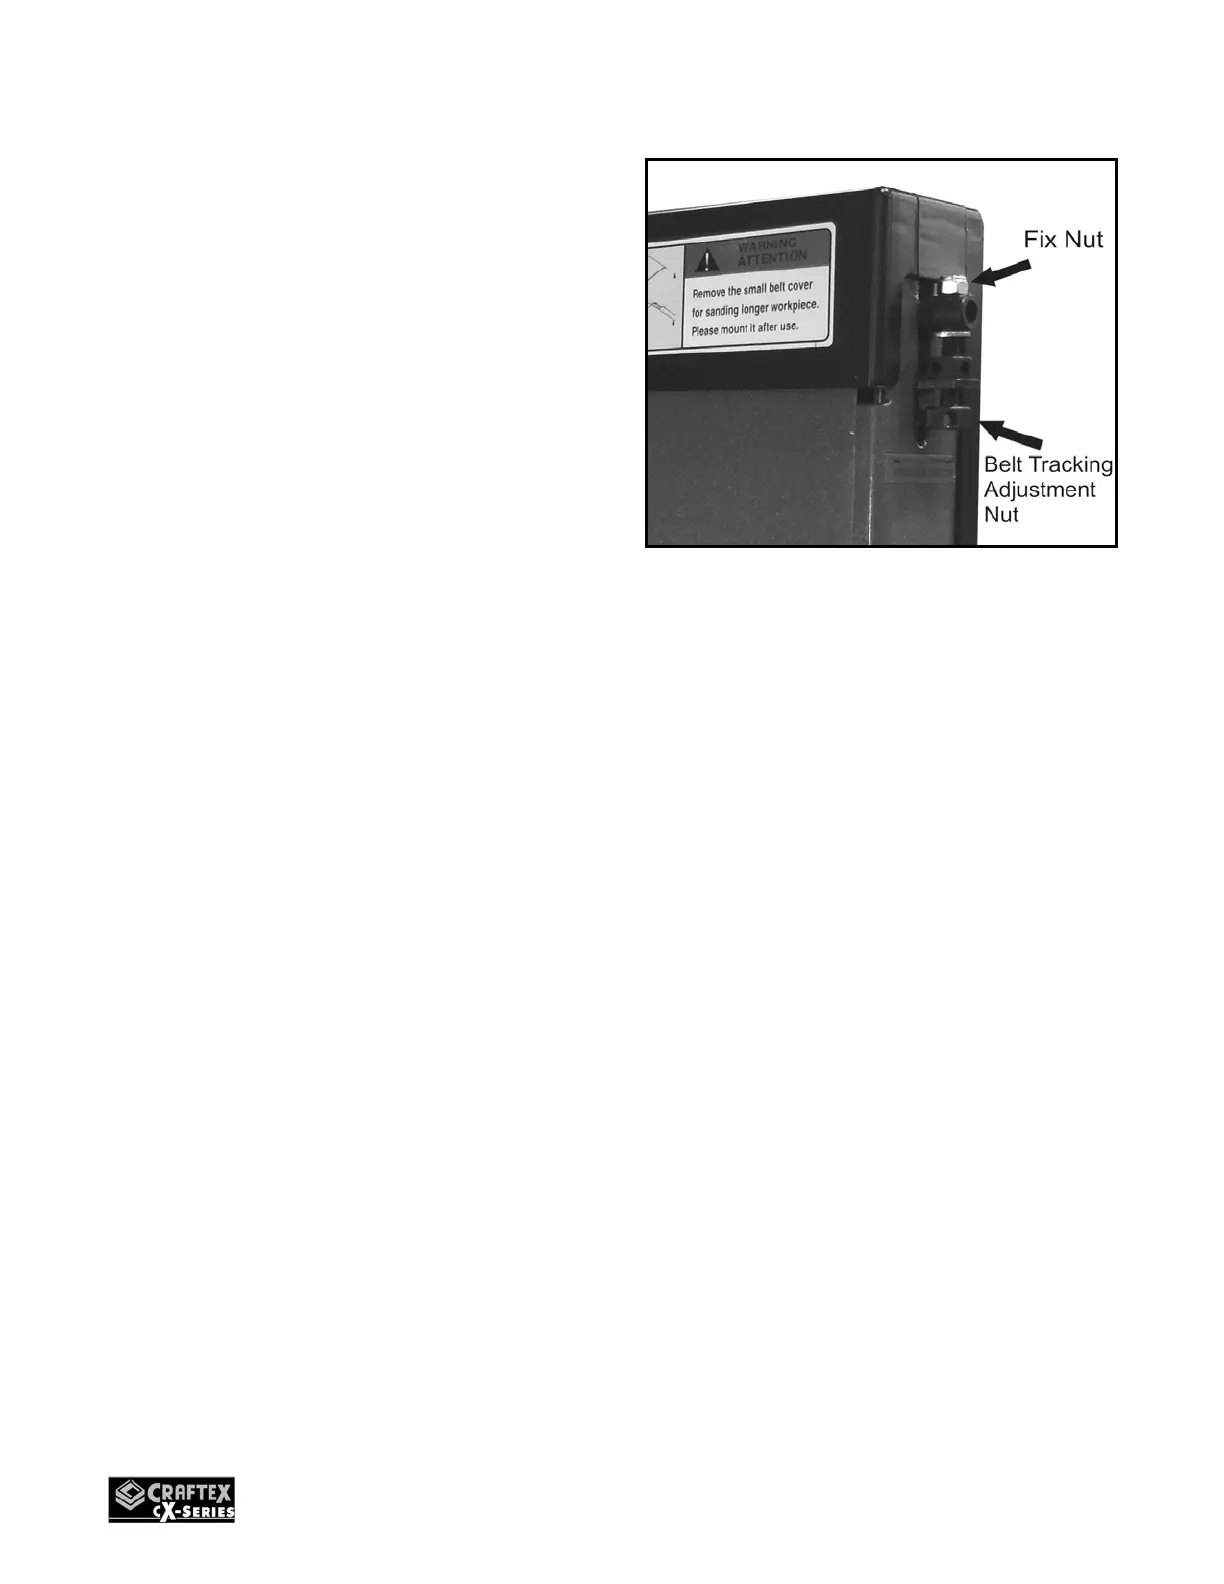
3. Loosen the fix nut shown in figure-9.
Figure-9 Belt Tracking adjustment
4. Check if the sanding bel t is tracking left
or right. Turn the adj ustment nut (shown
in figure-9) counter-clock to move the
belt right. Turn the adjustment nut
clockwise to move the belt left.
5. Connect t he machine to the power
source and turn it ON. Observe the
blade tracking on the rollers.
If the blade is tracki ng in the center, the
adjustment is properly done.
If the belt is still not tracking in the center,
repeat step 2 to 5.