12
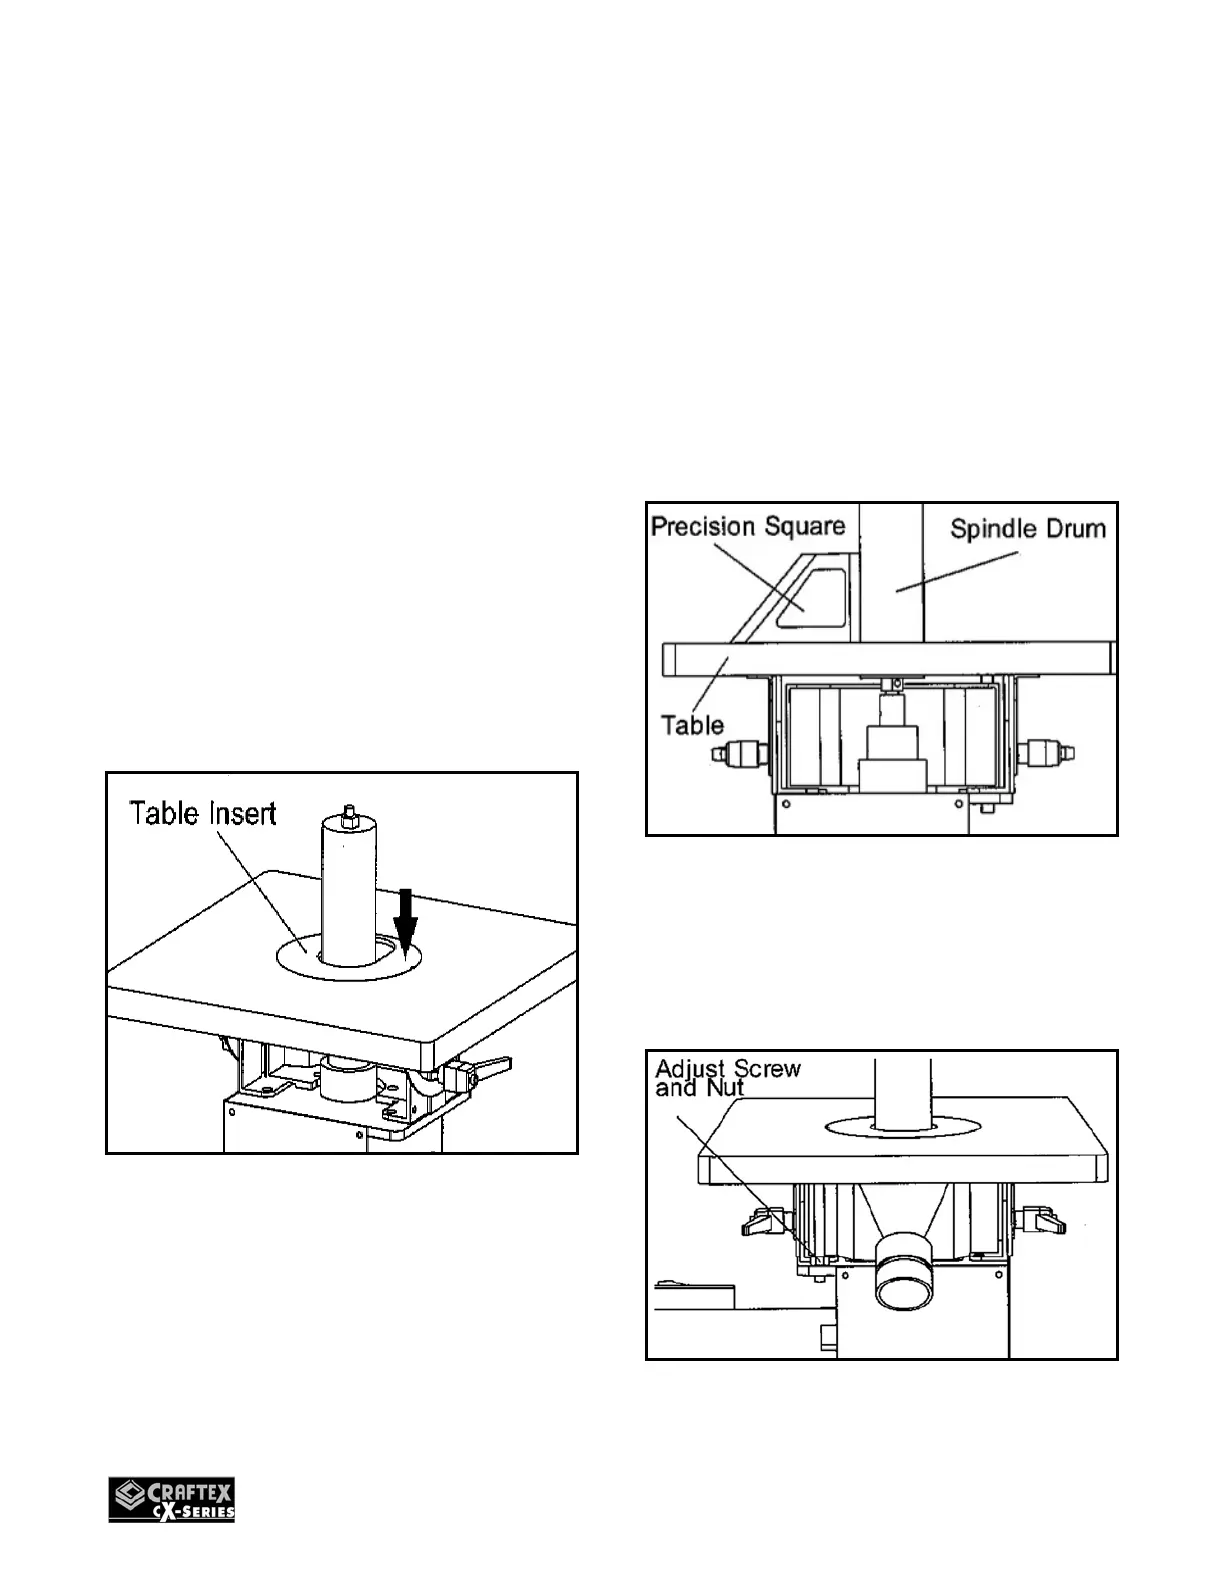
REPLACING THE TABLE
INSERT
The CX500 is supplied with 4 table inserts;
1. Select a proper table insert according to
the spindle drum installed.
2. Make sure to use the table ins ert that
comes closest to the spindle drum
without touching it.
3. Remove the old ins ert and clean the
insert hole on the table. Make sure there
is no dust and debris left which can
cause the insert to be out of height
alignment with the table.
4. Place the new ins ert over the spindle
drum on the table and make s ure it is
flat with the table surface.
Figure-12 Replacing the table insert
ALIGNING TABLE TO THE
SPINDLE
1. Turn off the sander and disconn ect the
cord from the power source.
2. Set the table at a 90° position
horizontally.
3. Place a s quare on the table with one
side touching against the spindle.
Figure-13 Placing the square
4. Use an open-end wrench to turn the
machine leveling adjustment nut
(located under the rear end of the table)
on the rear support screws.
Figure14- Turning the adjustment nut

 Loading...