ADJUSTMENTS
Priortooperatingyourtiller,carefullyreadandfollowall instructions
below.Performall adjustmentstoverifyyourtiller isoperatingsafely
andpropery.
Clutch Cable
NOTE:Servicethe enginewithoil andgasolinebeforecheckingthis
adjustment.Referto theseparateEngineOperator'sManualpacked
withyourtillerforproperfuel andengineoil recommendations.
1. Positionthetiller so thefrontcounterweightis againsta solid
object,suchas a wall.
2. Withthegearselectionleverin NEUTRAL,starttheengine.Refer
tothe separateEngineOperator'sManual.
3. Standingonthe rightsideofthe tiller,examinethebelt(insidethe
beltcover).It shouldnotbeturning.
.
Donot putyourfingersunderthebelt cover.
f
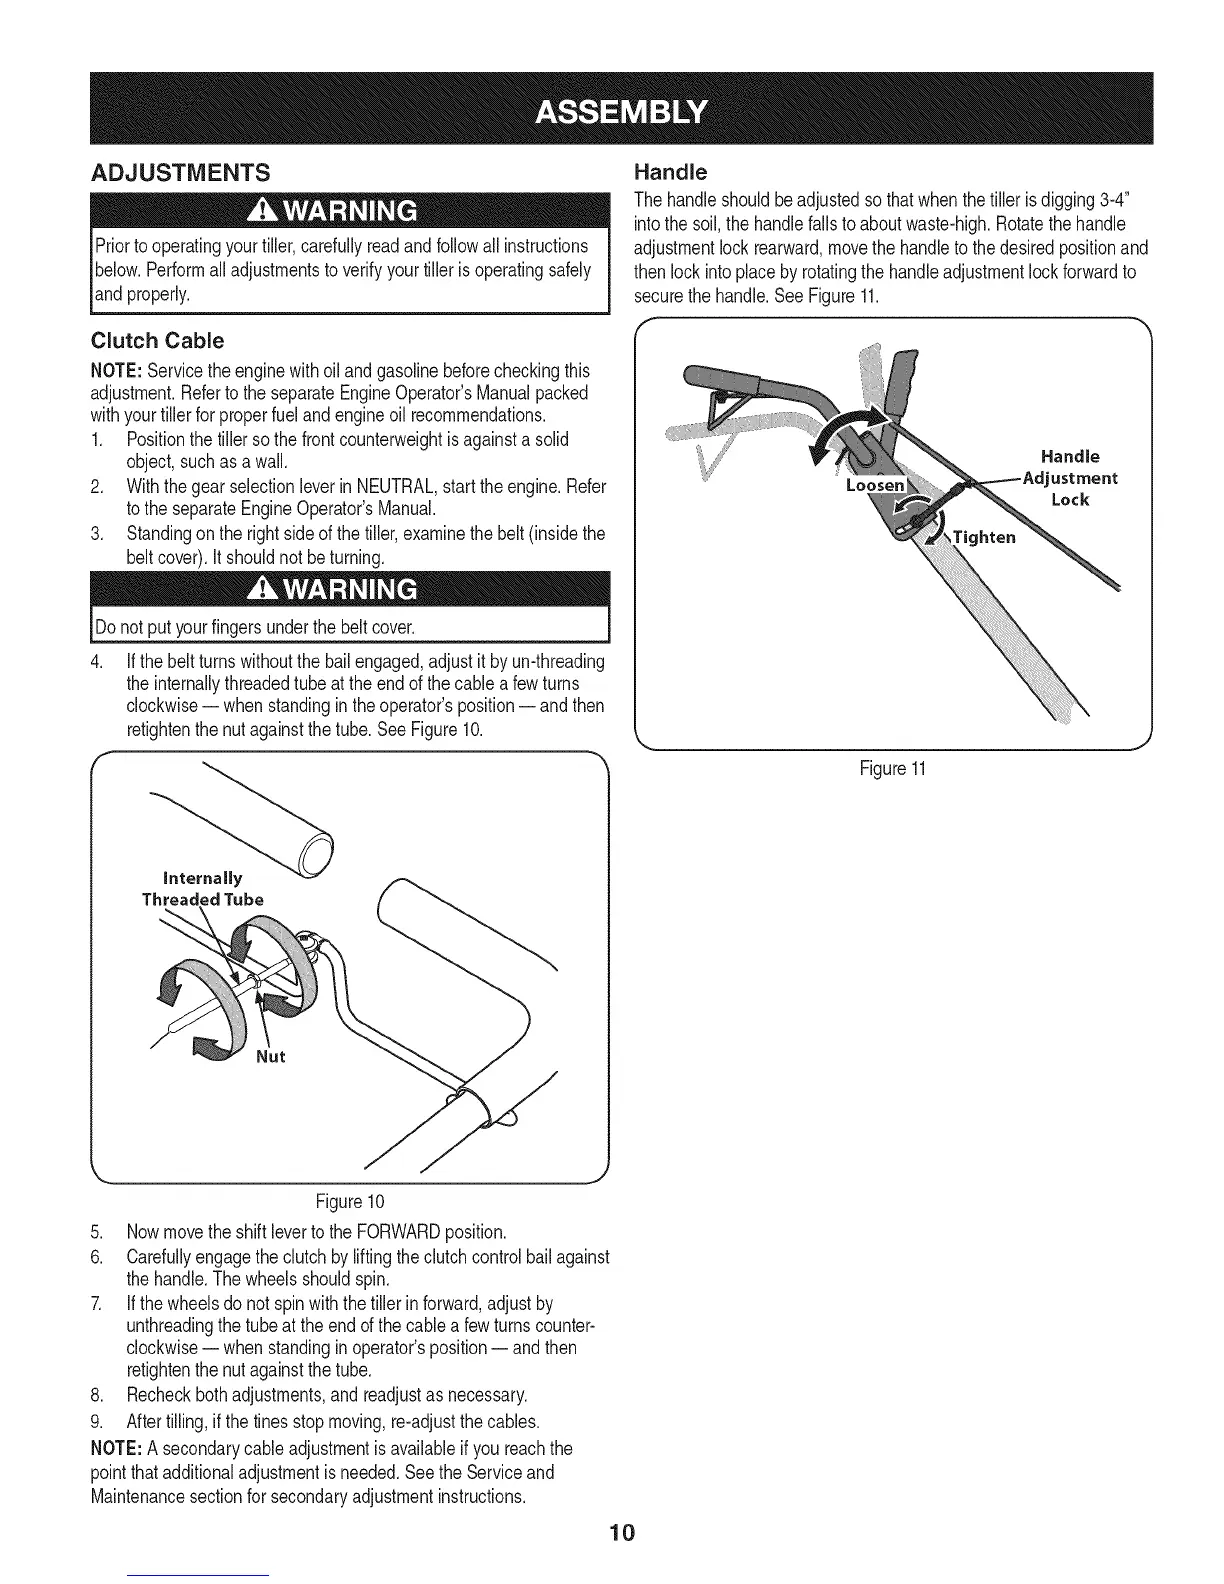
If thebeltturnswithoutthebailengaged,adjustit by un-threading
theinternallythreadedtubeat theendof thecablea fewturns
clockwise-- whenstandingin theoperator'sposition-- andthen
retightenthenutagainstthetube.SeeFigure10.
Internally
ThreadedTube
Handle
Thehandleshouldbeadjustedsothatwhenthetiller isdigging3-4"
intothe soil,the handlefallsto aboutwaste-high.Rotatethehandle
adjustmentlock rearward,movethe handleto thedesiredpositionand
thenlockintoplaceby rotatingthehandleadjustmentlockforwardto
securethehandle.SeeFigure11.
Loosen
tighten
Handle
ustment
Lock
Figure11
Figure10
5. Nowmovethe shiftlevertothe FORWARDposition.
6. Carefullyengagetheclutchbyliftingtheclutchcontrolbailagainst
thehandle.Thewheelsshouldspin.
7. If thewheelsdo notspinwiththetiller inforward,adjustby
unthreadingthetube atthe endofthe cablea fewturnscounter-
clockwise-- whenstandingin operator'sposition-- andthen
retightenthenutagainstthetube.
8. Recheckbothadjustments,andreadjustas necessary.
9. Aftertilling,if thetinesstopmoving,re-adjustthecables.
NOTE:A secondarycableadjustmentisavailableifyou reachthe
pointthatadditionaladjustmentisneeded.Seethe Serviceand
Maintenancesectionfor secondaryadjustmentinstructions.
10