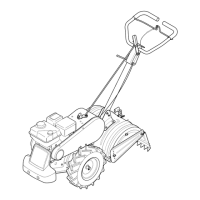
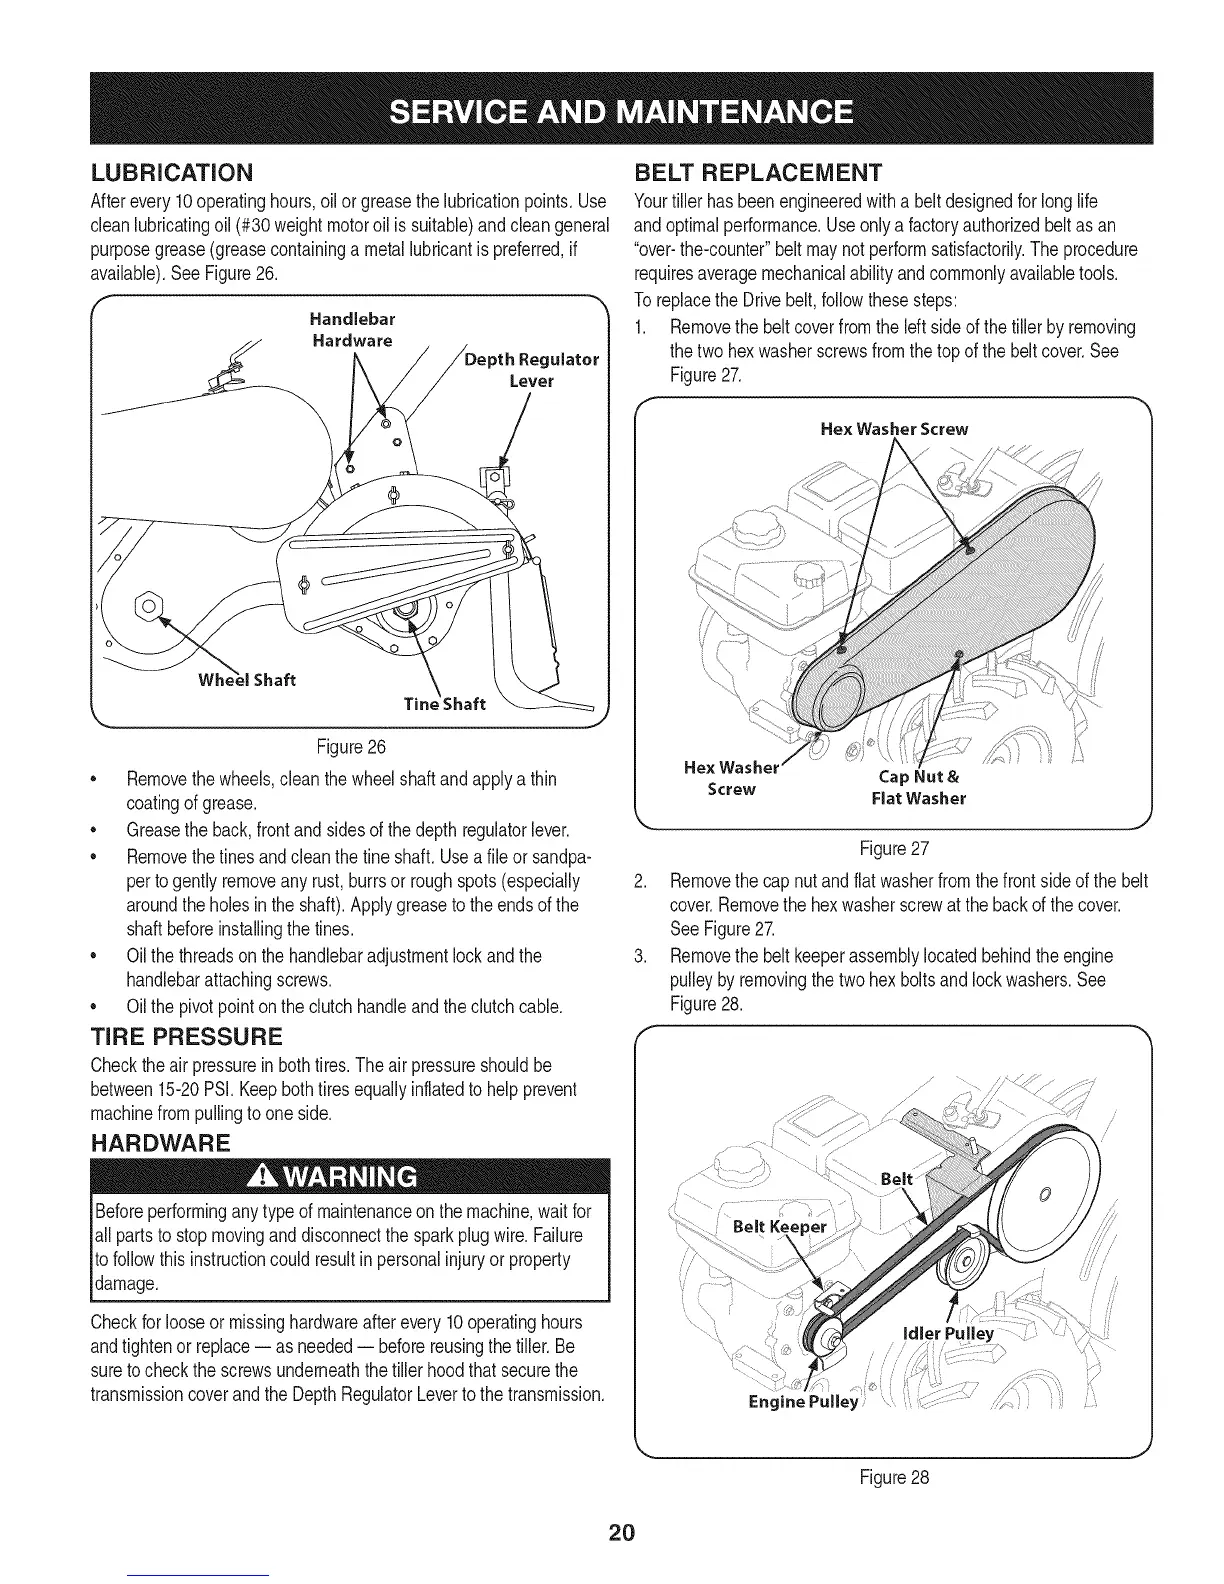
LUBRiCATiON
Afterevery10operatinghours,oilor greasethe lubricationpoints.Use
cleanlubricatingoil (#30weightmotoroil issuitable)andcleangeneral
purposegrease(greasecontaininga metallubricantispreferred,if
available).SeeFigure26.
_'_ Handlebar
Hardware
Regulator
Figure26
• Removethewheels,cleanthewheelshaft andapplya thin
coatingofgrease.
• Greasethe back,frontandsidesof thedepth regulatorlever.
• Removethetinesandcleanthe fineshaft.Usea file or sandpa-
pertogentlyremoveanyrust,burrsor roughspots(especially
aroundtheholesintheshaft).Applygreasetothe endsof the
shaftbeforeinstallingthe tines.
• Oilthe threadsonthe handlebaradjustmentlockandthe
handlebarattachingscrews.
• Oilthe pivotpointonthe clutchhandleandthe clutchcable.
TiRE PRESSURE
Checktheair pressurein bothtires.The airpressureshouldbe
between15-20PSI.Keepbothtiresequallyinflatedto helpprevent
machinefrompullingto one side.
HARDWARE
Beforeperformingany typeof maintenanceonthe machine,waitfor
all partsto stopmovinganddisconnectthesparkplugwire.Failure
tofollowthis instructioncouldresultinpersonalinjuryor property
damage.
Checkfor looseor missinghardwareafterevery10operatinghours
andtightenor replace-- as needed-- beforereusingthe tiller.Be
sureto checkthe screwsunderneaththe tillerhoodthatsecurethe
transmissioncoverandthe DepthRegulatorLeverto thetransmission.
BELT REPLACEMENT
Yourtillerhasbeenengineeredwith a beltdesignedforlonglife
andoptimalperformance.Useonlya factoryauthorizedbeltasan
"over-the-counter"beltmaynot performsatisfactorily.Theprocedure
requiresaveragemechanicalabilityandcommonlyavailabletools.
Toreplacethe Drivebelt,followthesesteps:
1. Removethebeltcoverfromtheleft sideofthe tillerby removing
thetwo hexwasherscrewsfromthe topof the beltcover.See
Figure27.
Hex Washer Screw
He× Washel
Cap Nut &
Screw Flat Washer
Figure27
Removethe capnutandflatwasherfromthefrontsideofthe belt
cover.Removethehexwasherscrewat thebackof thecover.
SeeFigure27.
Removethe beltkeeperassemblylocatedbehindtheengine
pulleybyremovingthetwohex boltsand lockwashers.See
Figure28.
...............................
/ 7\
...........!..... Idler Pulley
Figure28
2O