9
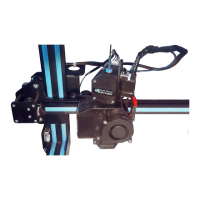
Install X-axis Passive Block
• Snap the brass sleeve on the left side of the X-axis timing belt into the extruder
back support plate.
• Attach the X-axis passive block to the X-axis profile.
Note: Be cautious not to screw it down, ensuring the X-axis passive block can slide along
the X-axis profile.)
• After looping the X-axis timing belt around the X-axis passive block, snap the
brass sleeve at its right end into the extruder back support plate.
• Push the X-axis passive block to the right to tension the X-axis timing belt to the
same state as the Y-axis timing belt, then tighten the set screw on the X-axis
passive block.
Note: Push to the right and tighten the retaining screws.
Install the X-axis Kit and Adjust Tightness
• Fit the X-axis kit into the Z-axis profile, aligning the V-wheels on the left and right
sides with the slot in the profile and ensuring the T-rod nut is aligned with the T-
rod.
Note: Adjust the eccentric spacers on the left and right if the passive blocks on both
sides cannot fit in.
Install the Top Gantry Profile and Profile Cover
• Secure the top gantry profile to the upper end of the gantry using four M5×25
screws.
• Attach the profile covers to the ends of the top gantry profile.
• Tighten the two retaining screws on the Z-axis passive block.
Install the Material Rack and Barrel
• Assemble the material rack and barrel.
• Thread the two M5×8 screws through the material rack and then screw on the M5
T-nuts.
Note: There is no need to fully tighten it.
• Finally, secure these components to the top gantry profile.

 Loading...
