Installing the All Purpose Cooler 9
Cat. No. 01023621
Position the Unit
NOTE Per Culligan Corporate policy, you must install an external leak controller during install of the All Purpose Cooler
(Part # D1018733)
1. Locate the unit as close to an electrical connection and feedwater water supply as possible with a 3 inch (8
cm) clearance at both sides and back of the unit.
2. Mount the unit on a firm flat surface so that it cannot topple over.
3. Level the machine using the adjustable feet.
CAUTION! The machine should not be exposed to direct sunlight, heat sources, or an ambient
air temperature above 90°F (32°C) or below 37°F (3°C).
NOTE The water supply and electrical supply should be within 6 ft (1.8 m) of the unit for ease of installation.
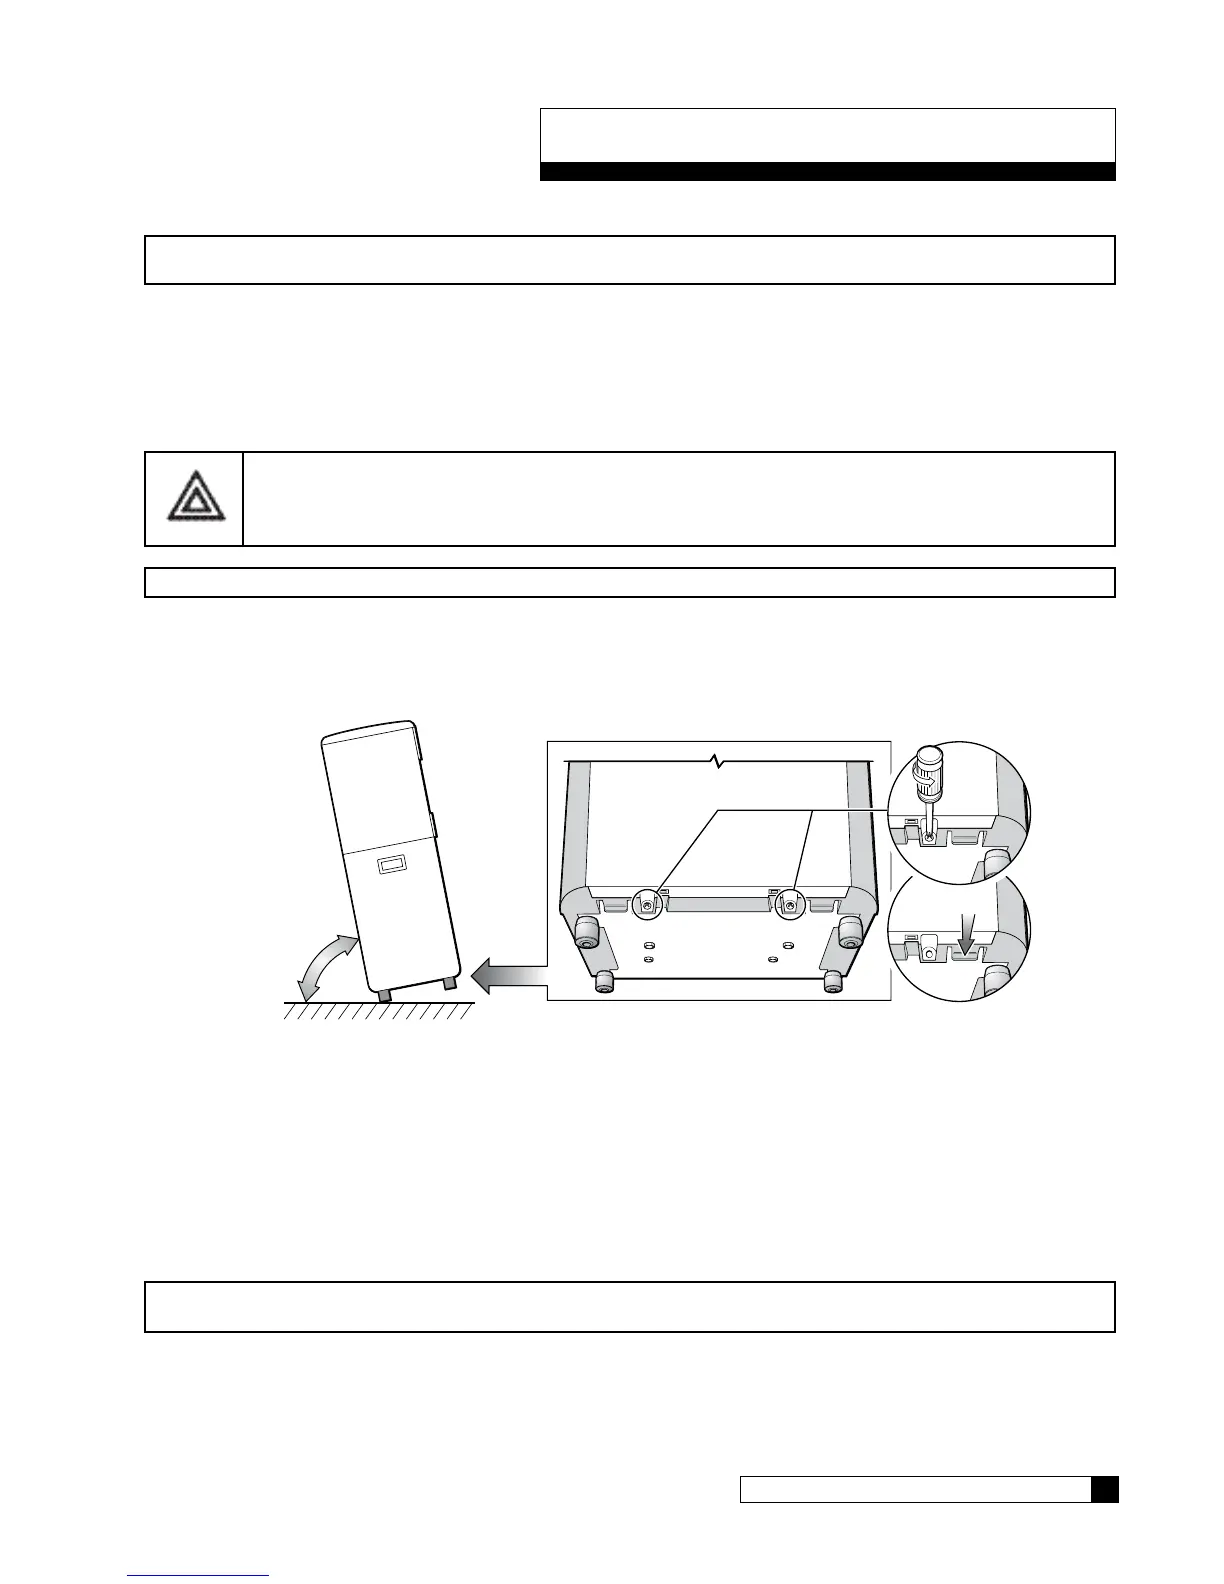
4. Remove the lower front cover. This is retained by two screws located under the front edge at the bottom of
the cover and two clips in the same location.
5. Remove the screws and push clips up to release. To gain easier access to the screws, tilt the unit backward
at an angle of 10 degrees.
10°
Figure 3. All Purpose unit balancing screws.
Establish the Water Connection
1. Establish the water connection.
2. The use of a pressure regulator is recommended for water supplies that have pressure fluctuations. This
should be installed on the water supply before the inlet connection to the unit. Minimum operating pressure
for the unit to work suitably is 40 psi (2.8 bar). The ideal operating pressure is of 60 psi (4.1 bar).
NOTE At pressures higher than 80 psi (5.5 bar), the unit will not function correctly and can lead to leaks.
Pressure below 40 psi (2.8 bar) will require the use of a booster pump for proper RO performance.
3. Set pressure regulators at 60 psi (4.1 bar).
4. Flush the water supply pipe until it runs clear before making the water connection to rear of the unit.
Installing the All Purpose Cooler




 To Next Page