ASSEMBLY INSTRUCTIONS
— CONTINUED
14
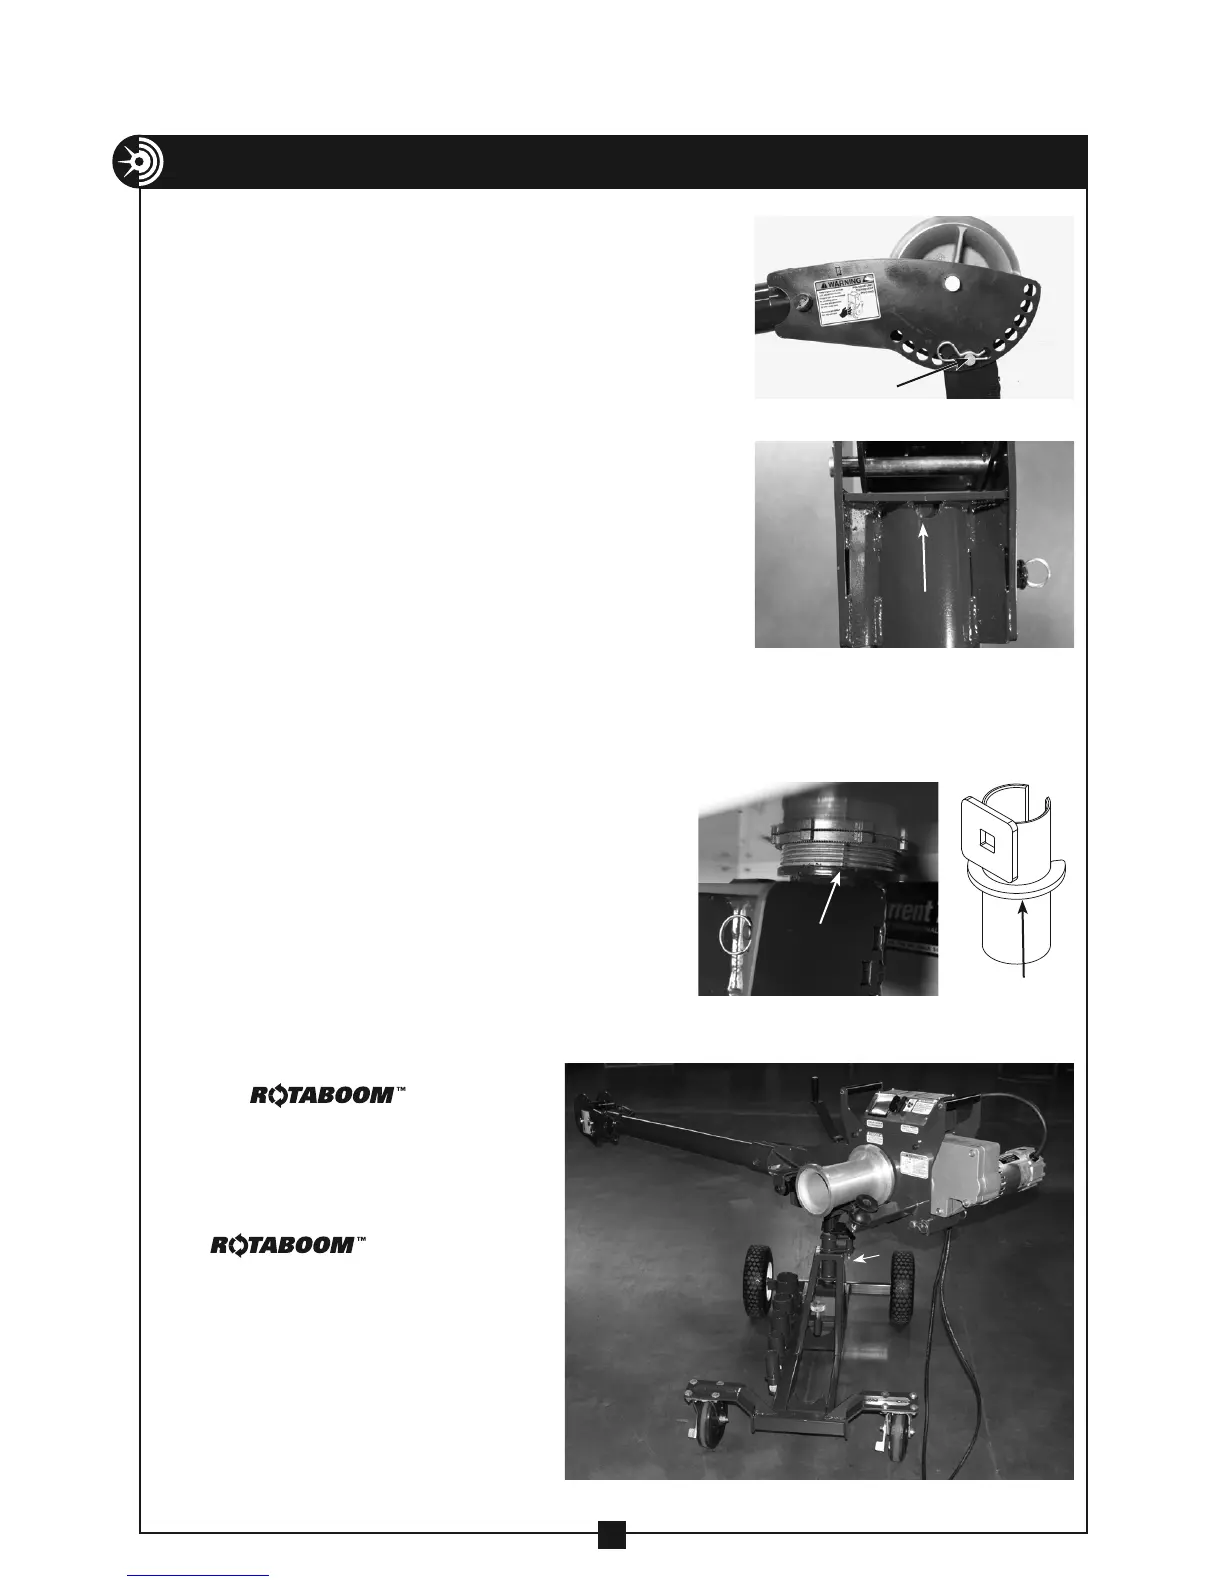
2. If only one boom tube is needed, slide the Model
#1840-S nose unit (or #1840 optional nose unit)
onto the boom tube you installed in Step #1. (See
Photo 14a). Determine the type of pull to be made
(up pull, down pull, side pull) and turn the nose
unit accordingly. Pull the spring-loaded boom pin
located on the nose unit and fully insert the nose
unit until it completely fills the sight hole. (See
Photo 14b). Rotate the nose unit until the spring-
loaded boom pin locks it into the proper position
for the pull. Ensure the spring-loaded retainer
pin is fully engaged in the boom tube before
proceeding to the next step.
3. Choose the correct size coupling for the size
conduit that you will be pulling in and install it
into the coupling adapter on the nose unit. (See
coupling selection on pg. 10).
4. To insert the coupling into the conduit, unlock
the two swivel casters on the carriage and position the cable puller near the pull
sight. Using the boom height adjustment handle, raise or lower the boom until
the slip-in coupling fully seats in the conduit. The coupling is fully seated when
the coupling ring makes contact with the
conduit you are pulling in. (See Photo 14c).
It may be necessary to adjust the angle
of the coupling so that it seats properly in
the conduit. To do this, remove the spring
clip from the angle adjustment pin on the
nose unit, remove pin, and adjust the angle
of the coupling. When the correct angle is
achieved, re-insert the pin and secure with
the spring clip.
5. The Puller Mount offers a
patented feature known as
the that gives
the Puller Mount the ability
to swivel approximately 45
degrees in two directions. This
allows the puller to be used
in tighter spaces. To use the
, pull down
on the spring loaded retainer
pin located under the puller
mount and swivel the puller
as needed (see photo 14d).
Once the pull is completed
and you are ready to transport
the puller, return the puller
mount to the center position
and ensure the spring loaded
retainer pin snaps into place.
14a
14b
14c
14d
Sight Hole
Spring loaded
retainer pin
Coupling
Ring
Coupling
Ring
Nose Angle
Adjustment Pin