2 — INSTALLATION AND WIRING
Curtis 1353 CANopen Expansion Module Manual – June 2017 Return to TOC
pg. 6
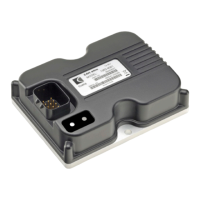
CONNECTIONS
All connections are made through the 23-pin AMPSEAL connector. e mating plug housing is
AMP p/n 770680-1, and the contact pins are AMP p/n 770520-3. e connector will accept 20 to 16
AWG wire with a 1.7 to 2.7 mm diameter thin-wall insulation.
Note that the 1353’s pins are not sealed until the mating connector is fully engaged and locked.
e cable harness connector has a silicone rubber seal that is an integral part of the module’s sealing.
e 23 individual pins are characterized in Table 1.
CAUTION
81
2316
9 15
Wiring recommendations
Power and ground (Pins 1, 2, 9)
e B+ and B- cables should be run close to each other between the module and the battery. For
best noise immunity the cables should not run across the center section of the module.To prevent
overheating these pins, the wire gauge must be sucient to carry the continuous and maximum
loads that will be seen at each pin.
Driver outputs (Pins 15–23)
e driver outputs produce high frequency (16 kHz) pulse waves that can radiate RFI noise. e wire
from the module to the load should be kept short and routed with the return wire back to the module.
CANbus (Pins 7 and 8)
It is recommended that the CAN wires be run as a twisted pair. However, many successful applications
at 125 kbit/s are run without twisting, simply using two lines bundled in with the rest of the low
current wiring. CAN wiring should be kept away from the high current cables and cross it at right
angles when necessary. If the 1353 is at the end of the CANbus, the bus needs to be terminated by
externally wiring a 120Ω ½W resistor across CAN High and CAN Low.
All other low current wiring (Pins 3, 5–6, 10–14)
e remaining low current wiring should be run according to standard practices. Running low
current wiring next to the high current wiring should always be avoided.