Chapter 3 Quick Start Guide
This section describes the quick start operational test of the DuraCOR 311.
Recommended Equipment
To use the DuraCOR 311 in the lab environment, the recommended equipment includes:
Appropriate cables, such as CBL-C31X-01
A power source applied at connector J1, 9-36VDC input, 28 VDC nominal. A power cable is
included in the breakout cable set.
HDMI monitor, USB keyboard and mouse, other peripheral devices as desired.
Breakout Cable Set
The interfaces and cabling of the DuraCOR 311 can be tested prior to installation in the target system to
ensure full operational capability. Full benchtop testing can be performed by using an appropriate cable
set for this system, such as the CBL-C31X-01 breakout cable set. CBL-C31X-01 is available for purchase
from Curtiss-Wright to support lab or bench testing purposes. A custom set of cables may be made
specifically for the intended target system, vehicle, or craft; refer to Chapter 4 on Connector Descriptions
for connector pinouts and descriptions.
Power-on Sequence
To install the DuraCOR 311, follow these steps:
1. Connect a power cable to port J1 on the DuraCOR 311 (use the cable from the breakout cable set or
an equivalent power cable)
2. Connect the other end of the power cable to the unpowered DC power source
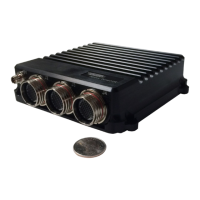
3. Connect the remaining cables to the corresponding ports on the DuraCOR 311
J2 – USB, ETH, Remote On/Off, etc.
J3 – HDMI, COM ports, GPIO, etc.
J4 – Only required if internal expansion cards have been installed.
4. Connect the HDMI port to a display and turn the display on.
5. Connect all other necessary interface devices (keyboard, mouse, etc.)
6. Apply power