12
Using the Right Air Intake | Utilisation de l’entrée d’air droite
Использование правого всасывающего патрубка
E & DL Series
Séries E & DL
Серия E и DL
To use the air intake located on the right side of the vacuum:
Pour utiliser l’entrée d’air située du côté droit de l’appareil :
Для использования всасывающего патрубка, расположенного с правой стороны пылесоса,
выполните следующие действия:
1. Using a at screwdriver, loosen the clamp collars and remove the rubber coupling from the
left air intake.
À l’aide d’un tournevis plat, desserrer les colliers de serrage et retirer la bague de caoutchouc
de l’entrée d’air gauche.
С помощью плоской отвертки ослабьте хомуты и снимите резиновую муфту с левого
всасывающего патрубка.
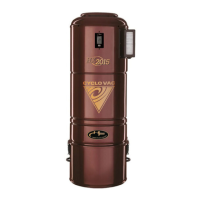
2. Remove the adaptor from the left air intake (gure 8).
Retirer l’adaptateur de l’entrée d’air gauche (gure 8).
Снимите переходник с левого всасывающего патрубка (рисунок 8).
3. Remove the cap on the right air intake and put it on the left air intake. Making sure that
the tabs are aligned with the notches, push the cap completely in (see gures 5 and 6 on
page11).
Retirer le bouchon de l’entrée d’air droite et le mettre sur l’entrée d’air gauche. En s’assurant
que les encoches sont alignées, enfoncer le bouchon au maximum (voir gures 5 et 6 de la
page 11).
Снимите заглушку с правого всасывающего патрубка и установите ее на левый
всасывающий патрубок. Совместите выступы с пазами и плотно прижмите заглушку (см.
рисунки 5 и 6 на странице 11).
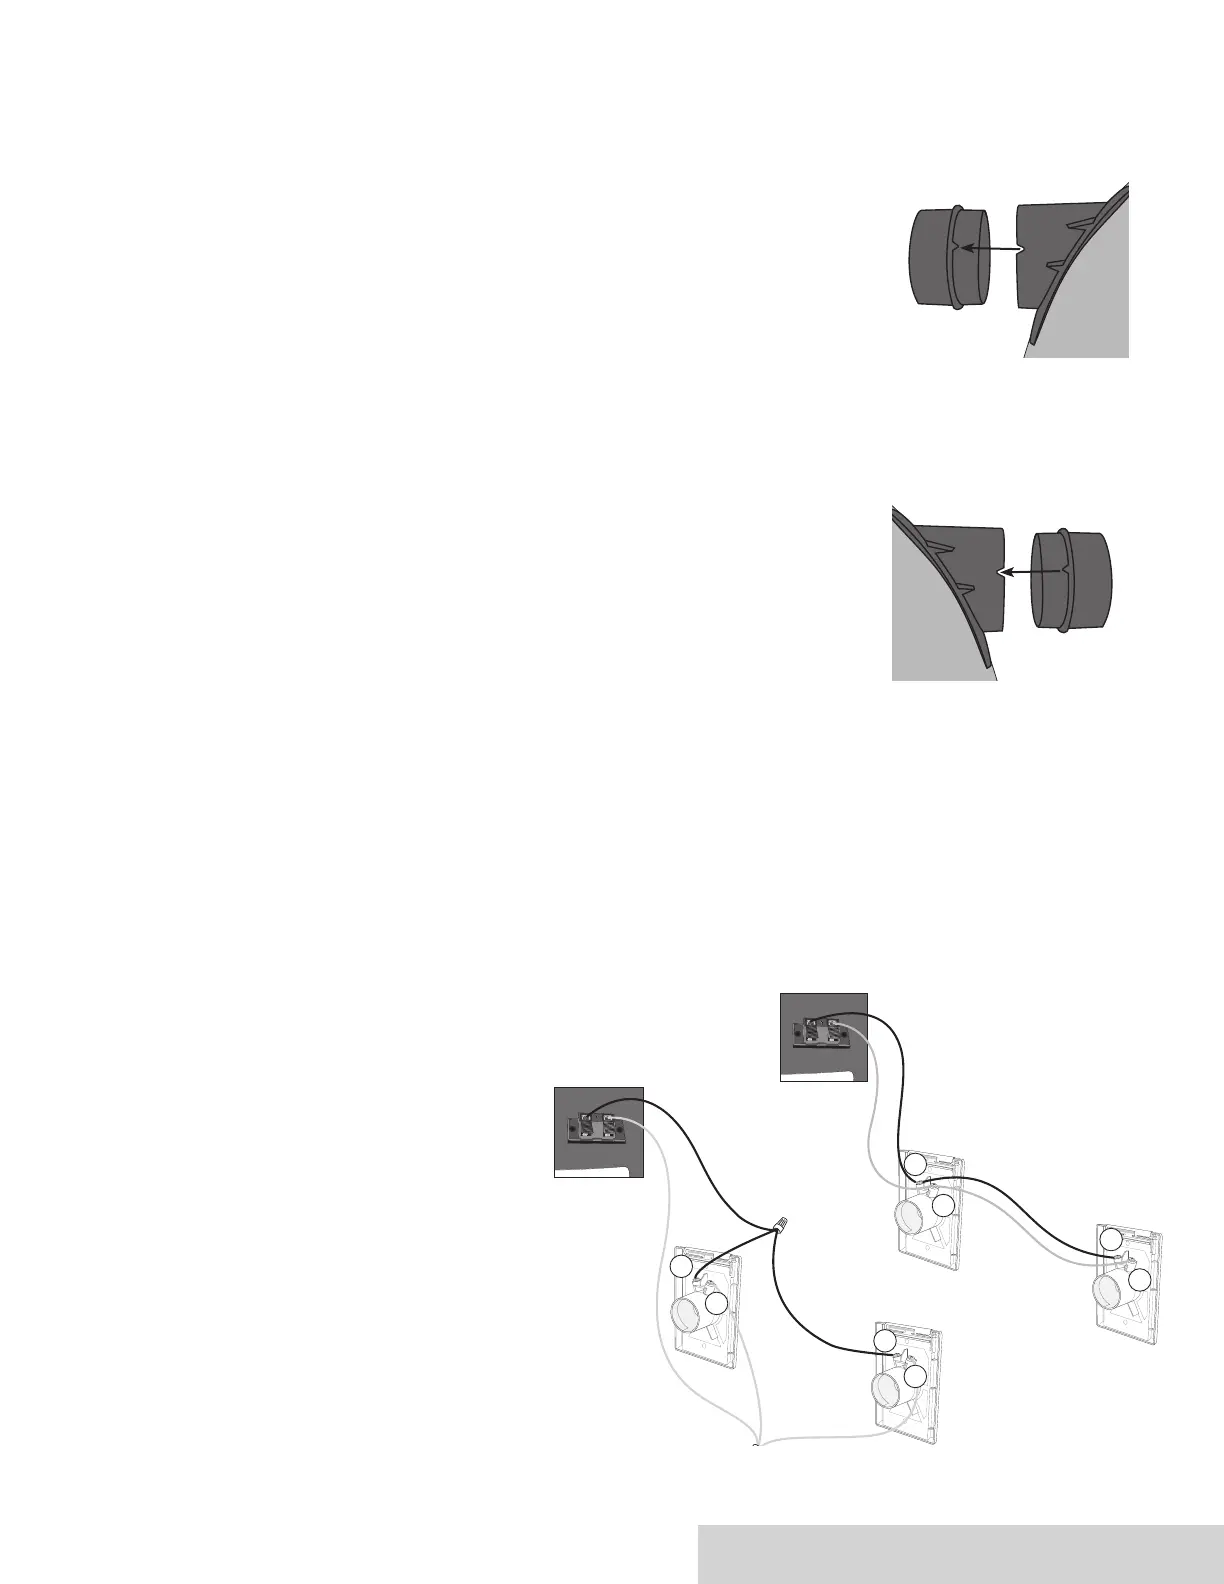
4. Put the adaptor in the right air intake and, making sure that the tabs are aligned with the
notches, push it completely in (gure 9).
Insérer l’adaptateur dans l’entrée d’air droite et, en s’assurant que les encoches sont alignées, enfoncer l’adaptateur au maximum
(gure 9).
Вставьте переходник в правый всасывающий патрубок. При установке переходника совместите выступы на переходнике с
пазами всасывающего патрубка (рисунок 9).
5. Put the rubber coupling on the right air intake and tighten the clamp collars using a at screwdriver.
Placer la bague de caoutchouc sur l’entrée d’air droite et resserrer les colliers de serrages à l’aide d’un tournevis plat.
Установите резиновую муфту на правый всасывающий патрубок и затяните хомуты с помощью плоской отвертки.
Dos & Don’ts | Trucs et astuces
Общие правила
Installing Inlets
Installation des prises
УСТАНОВКА ПНЕВМАТИЧЕСКИХ РОЗЕТОК
When installing your vacuum inlets, we recommend
that the principle of electric polarity be taken into
account. Ensure that the wire connected onto contact
A on inlet 1 is the same as that connected to contact A
on inlet 2, and so on. Do not cross, reverse or inter-
change wires.
Nous vous recommandons de respecter le principe
de la polarité électrique lors de l’installation des prises
murales. Vérier que le l connecté à la borne A de la
prise 1 est le même qui est connecté à la borne A de la
prise 2, et ainsi de suite. Ne pas inverser les ls.
При установке пневматических розеток необходимо
учитывать электрическую полярность. Проверьте,
чтобы провод, присоединяемый к контакту А
на пневморозетке 1 соответствовал проводу,
присоединяемому к контакту А на пневморозетке
2, и так далее. Не меняйте местами провода и не
нарушайте полярность.
Installation | Installation | УСТАНОВК А
A
A
B
B
INLET | PRISE
ПНЕВМОРОЗЕТКА 1
INLET | PRISE
ПНЕВМОРОЗЕТКА 1
INLET | PRISE
ПНЕВМОРОЗЕТКА 2
INLET | PRISE
ПНЕВМОРОЗЕТКА 2
A
A
B
B
gure | рисунок 8
gure | рисунок 9