10
Unit Installation | Installation de l’appareil
Установка пылесоса
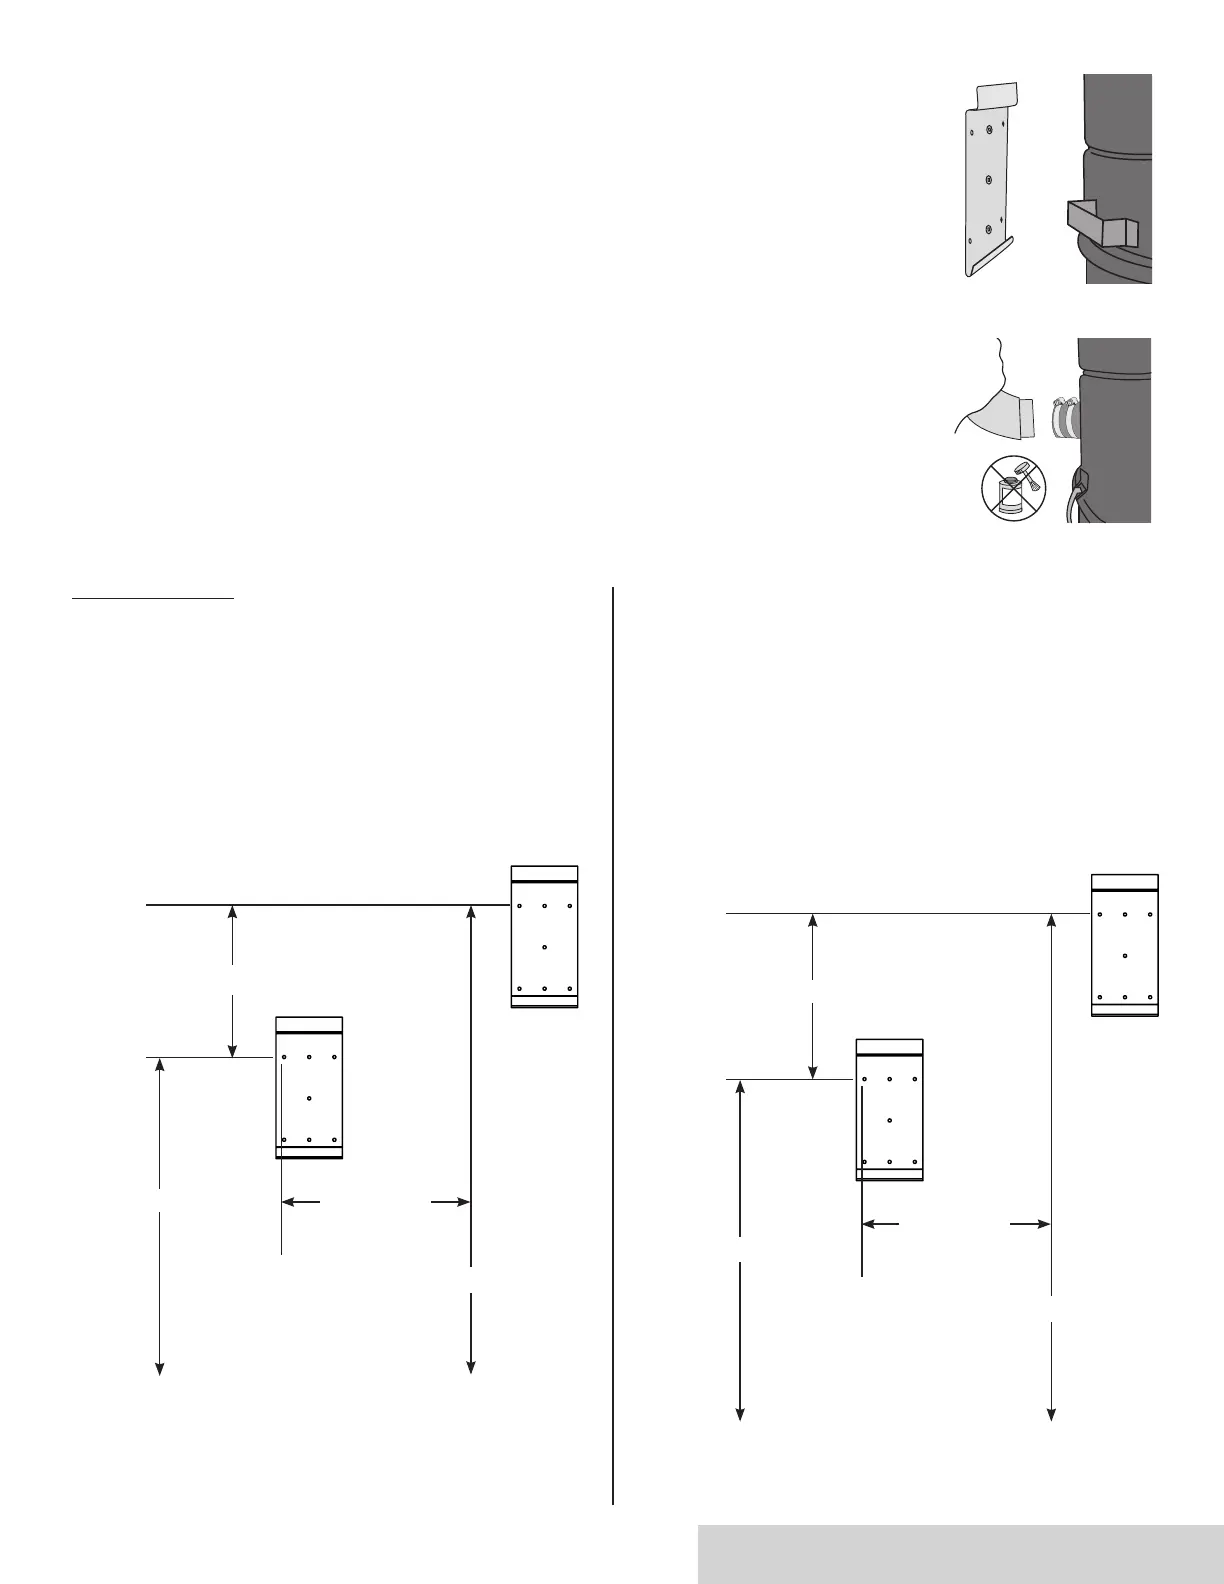
Using the wall bracket provided with your vacuum cleaner, secure the unit to the wall (gure 1), at a
height allowing easy access to change the bag or empty the canister.
À l’aide du support mural fourni avec votre aspirateur, xer votre unité au mur (gure 1) à une hauteur qui permet
un accès facile pour l’entretien des ltres, de la cuve et/ou des sacs.
Используя монтажное крепление, которое входит в комплект поставки пылесоса, прикрепите пылесос
к стене (рисунок 1) на высоте, обеспечивающей свободный доступ для обслуживания контейнера
и/или замены мешков для сбора пыли.
Contrary to all other connections in the piping system, do not glue the last tting to your unit. Use the
provided rubber seal and clamp collars to secure the last tting to the air intake and obtain an air-tight t
(gure 2).
Contrairement à tous les autres joints de tuyauterie, ne pas coller en permanence le dernier raccord à votre unité.
Utilisez la bague de caoutchouc et les colliers de serrage pour xer le dernier raccord à l’entrée d’air et assurer
l’étanchéité (gure 2).
В отличие от всех других соединений трубопроводов, не приклеивайте последний фитинг к устройству.
Для присоединения последнего фитинга к всасывающему патрубку и получения герметичного
соединения используйте предусмотренные резиновые уплотнения и хомуты (рисунок 2).
GX/DL/HX7515:
In series | En série | Последовательное соединение
Please follow these instructions to properly install the mounting
plates:
Veuillez suivre ce schéma d’installation pour installer les plaques
de montage correctement :
Для правильной установки монтажных пластин обратитесь к
данной инструкции:
Installation | Installation | УСТАНОВК А
gure | рисунок 1
gure | рисунок 2
156.29 cm
156.29 cm
44.675 cm
45.403 cm
53.82 cm
211.63 cm
199.15 cm
41.434 cm
DL 7515