DVG-7111S User’s Manual Telephone Interface Description
D-Link Systems, Inc. 6
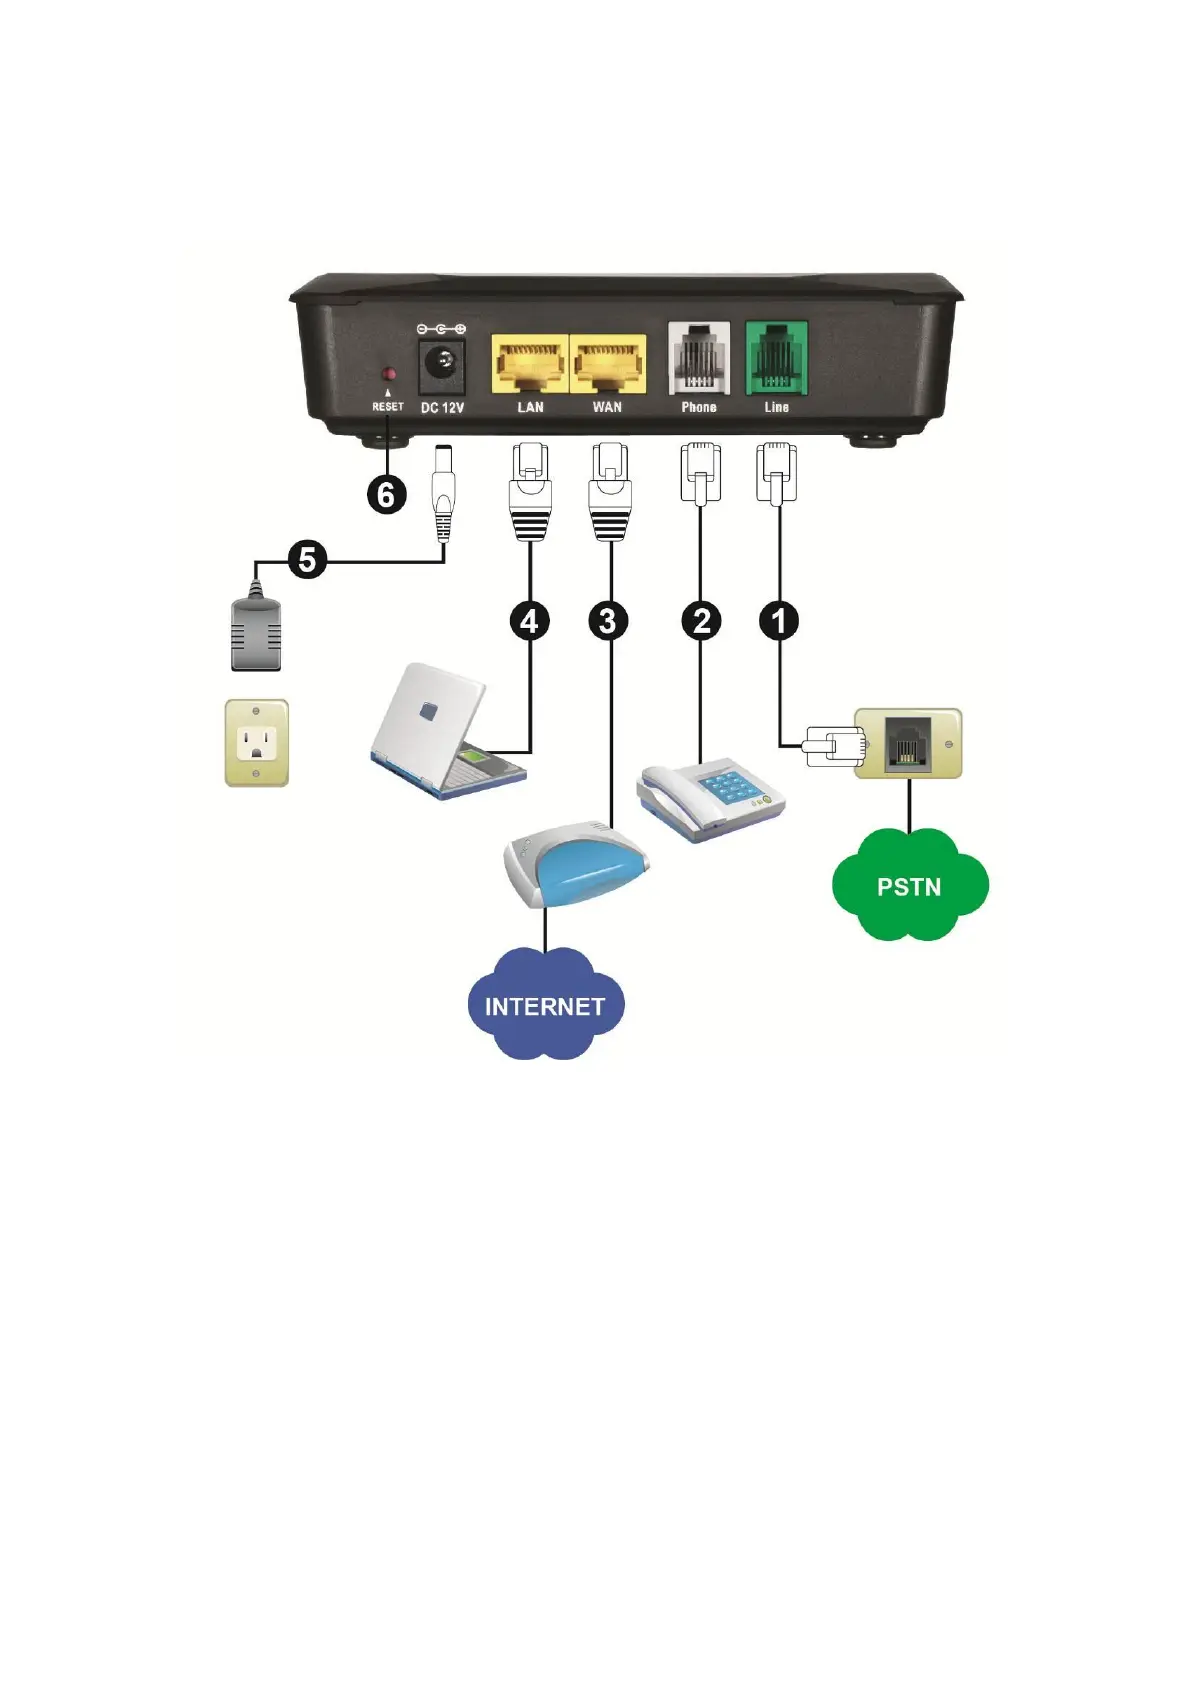
Rear Panel
1. Line: Connect to your original telephone line on the wall jack with RJ-11 cable.
2. Phone Port: Connect to your phones using standard phone cabling (RJ-11).
3. WAN: Connect to your broadband modem using an Ethernet cable.
4. LAN: Connect to your Ethernet enabled computers using Ethernet cabling.
5. Power Receptor: Receptor for the provided power adapter.
6. Reset : Use to Restore to factory default :
(1) Power on.
(2) Press and hold the reset button for 5 seconds.
(3) Release the reset button. Factory settings will be restored.
WARNING: DO NOT connect any phone port directly to a PSTN line (FXS to PSTN) or to an
internal PBX line (FXS to PBX extension). Doing so may damage your VoIP TA.
POWER Connects to
the power adapter
(comes with VoIP TA)
FXS ports 1 ~ 6
(telephone connectors)
Connects to phone sets
FXO ports 7,8
(PSTN line connectors)
Connects to PSTN lines
LAN ports 1 ~ 4