DXS-1210 Series 10 Gigabit Ethernet Smart Managed Switch Hardware Installation Guide
7
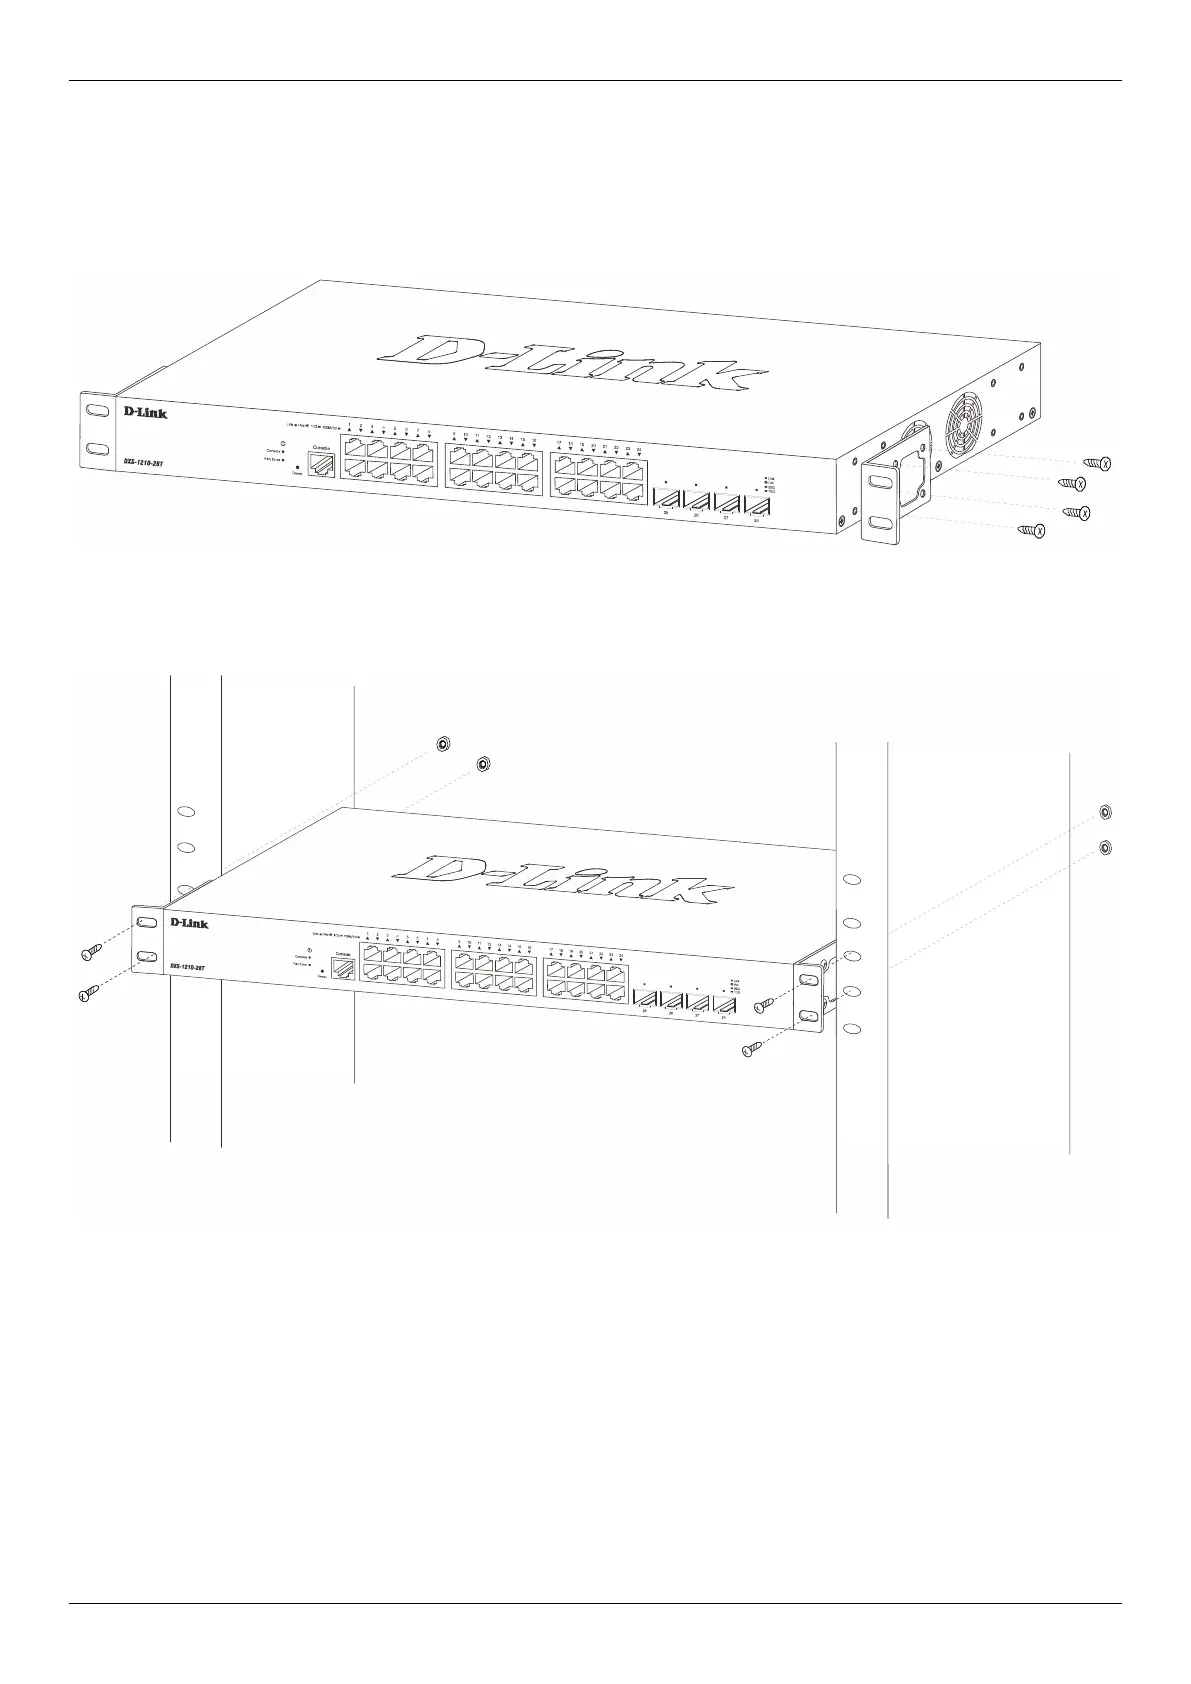
Installing the Switch in a Standard 19" Rack
This section is used to guide the user through installing the Switch into a switch rack. The Switch can be mounted in a
standard 19"(1U) rack using the rack mounting kit included in the package contents.
Fasten the mounting brackets to the sides of the Switch using the screws provided.
Figure 3-2 Attaching rack-mount brackets to the Switch
Fasten the mounting brackets in any available open space in the rack using the screws provided.
Figure 3-3 Installing the Switch in a Rack
Make sure that there is adequate space around the Switch to allow for proper airflow, ventilation, and cooling.
 Loading...