43
3.4.2 Disk Array Management
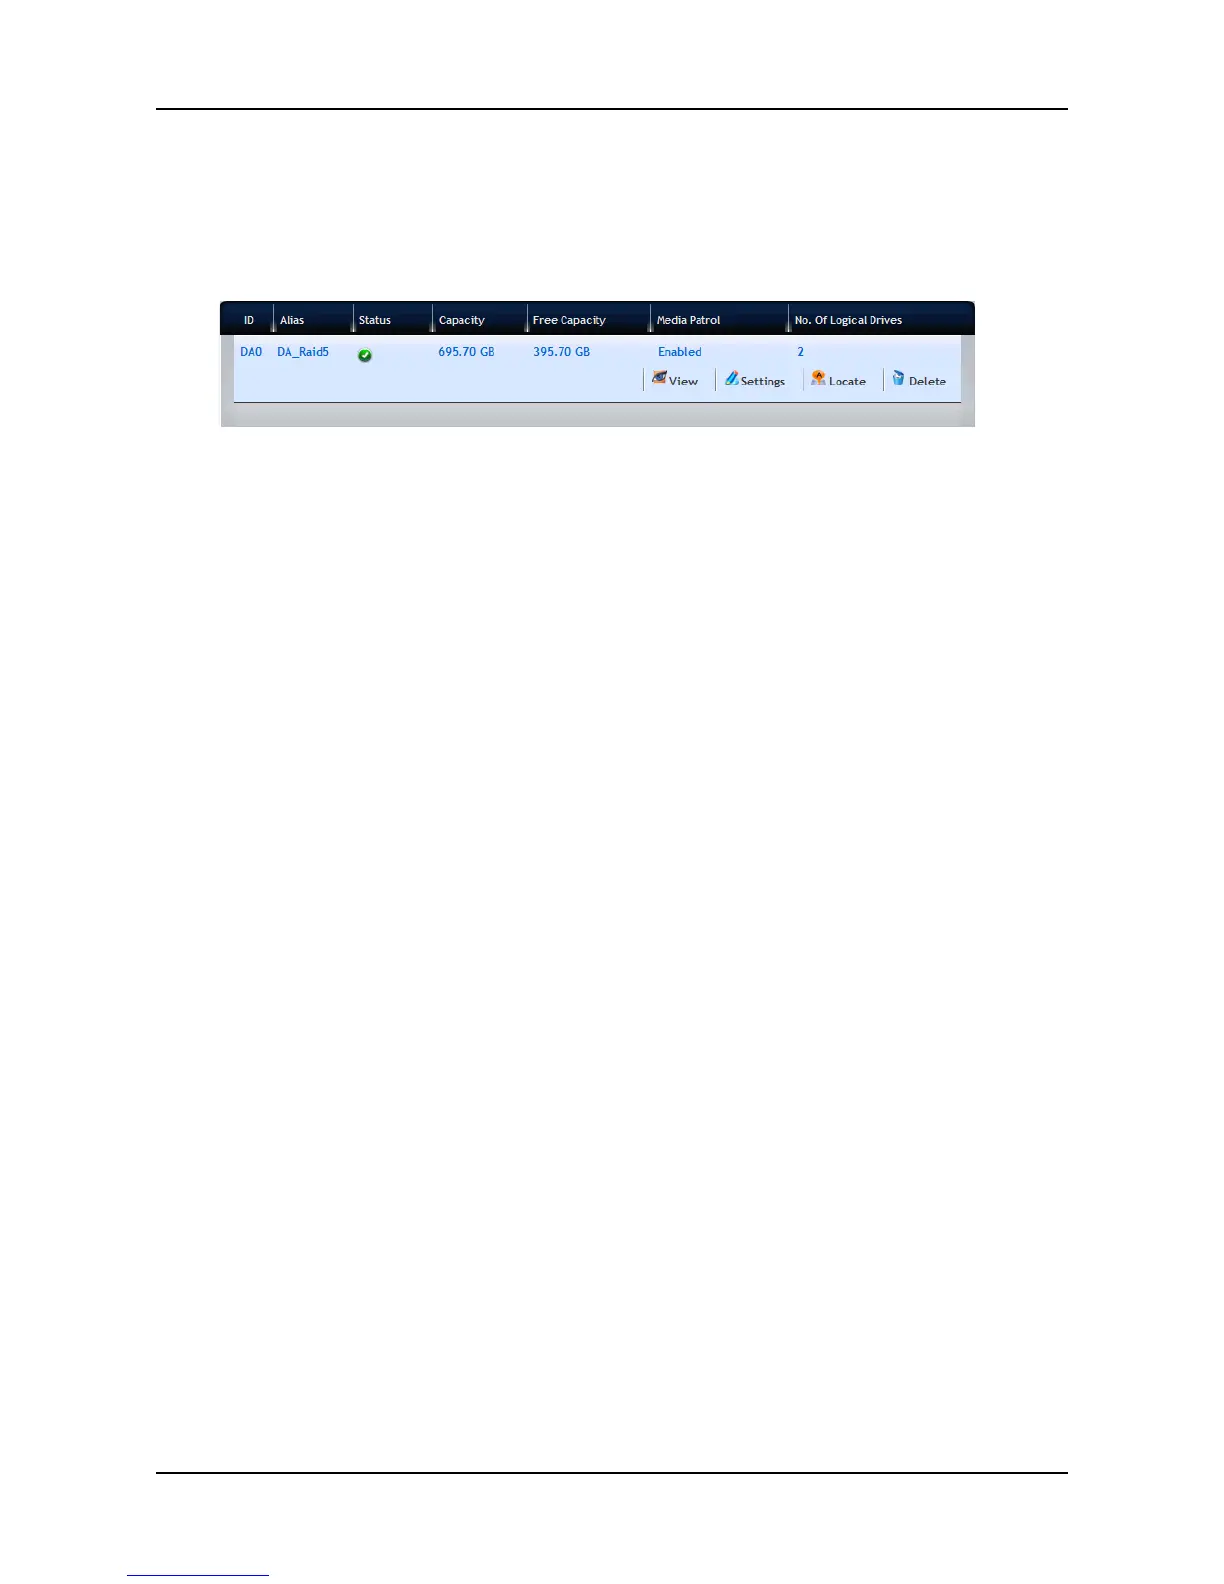
1. Click Storage tab > Disk Array. The list of disk arrays appears.
2. Move your mouse over the disk array you want to display the options of
the disk array, including:
− View – Select to view disk array status in the Information tab:
Disk Array ID – DA0, DA1, DA2, etc.
Alias – If assigned
Operational Status – OK is normal
Media Patrol – Enabled or disabled on this array
PDM – Enabled or disabled on this array
Power Management
Total Physical Capacity – Data capacity of the array
Configurable Capacity – Maximum usable capacity of the
array
Free Capacity – Unconfigured or unused capacity on the
physical drives
Max Contiguous Free Capacity – Unconfigured or unused
capacity in contiguous sectors on the physical drives
Number of Physical Drives – The number of physical
drives in this array
Number of Logical Drives – The number of logical drives
on this array
− Settings – Select to change or delete the alias in the Alias
field. Also, you can enable or disable Media Patrol, PDM, and
Power Management. When done, click the Save button.
− Locate – This feature causes the drive carrier’s LED to blink
for one minute to assist you in locating the physical drives that
make up this disk array.
− Delete – Select and click the Confirm button to delete a disk
array.
 Loading...