Installation 13
Put the locking screw⑦ and the enclosure⑧ back on to the hold the device⑥, and Step 4
then connect the camera to power source and the XVR device, and the live view screen
is displayed.
The adjustment way of model G (1) is different from which of model G (2). Step 5
For model G (1)
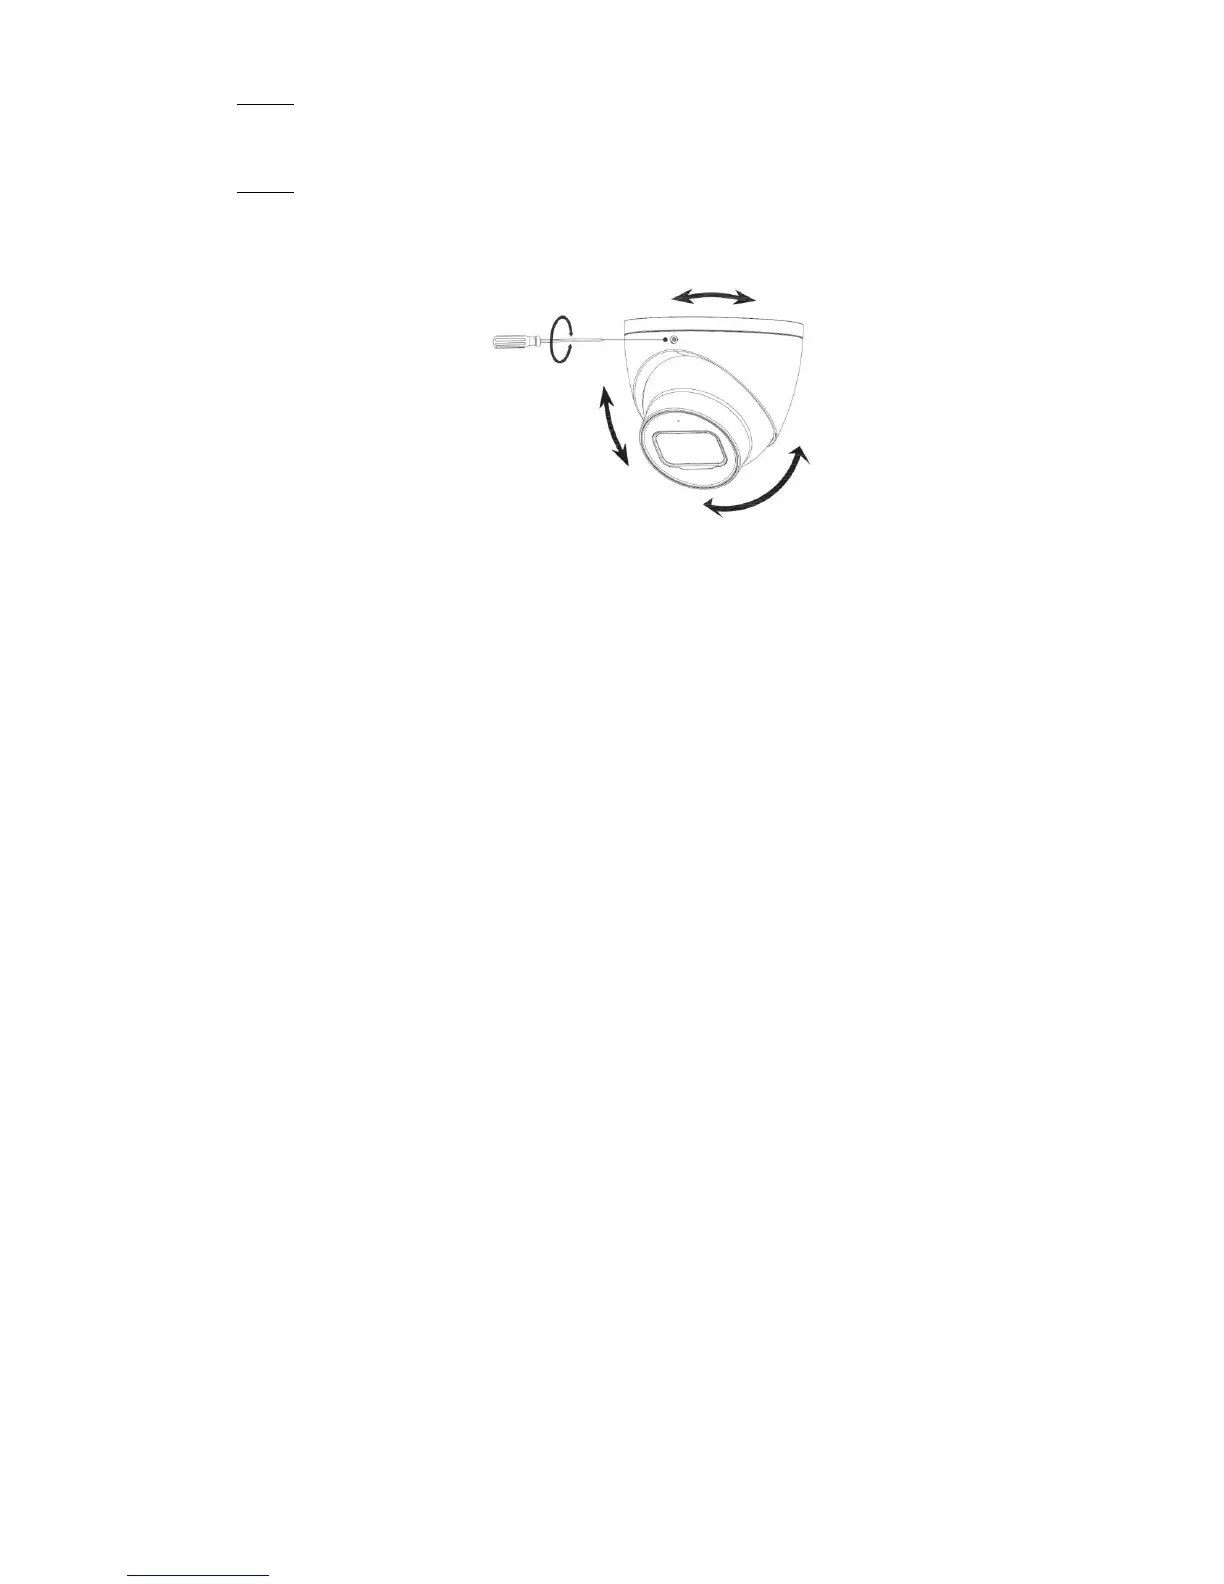
1) Aim the lens to the ideal angle, and then fasten the locking screw, see Figure 3-14.
Model G (1 and Model G (2) adjustment Figure 3-14
2) In the PTZ setting interface (Figure 4-5), click + or – at Zoom and Focus to adjust
the zoom and focus until you get clear image.
For model G (2), aim the lens to the ideal angle, and then fasten the locking screw,
see Figure 3-14.
 Loading...