3 | Components
Service manual
239
EBLA09~16DA + EDLA09~16DA
Daikin Altherma 3 M
ESIE20-06A – 2021.03
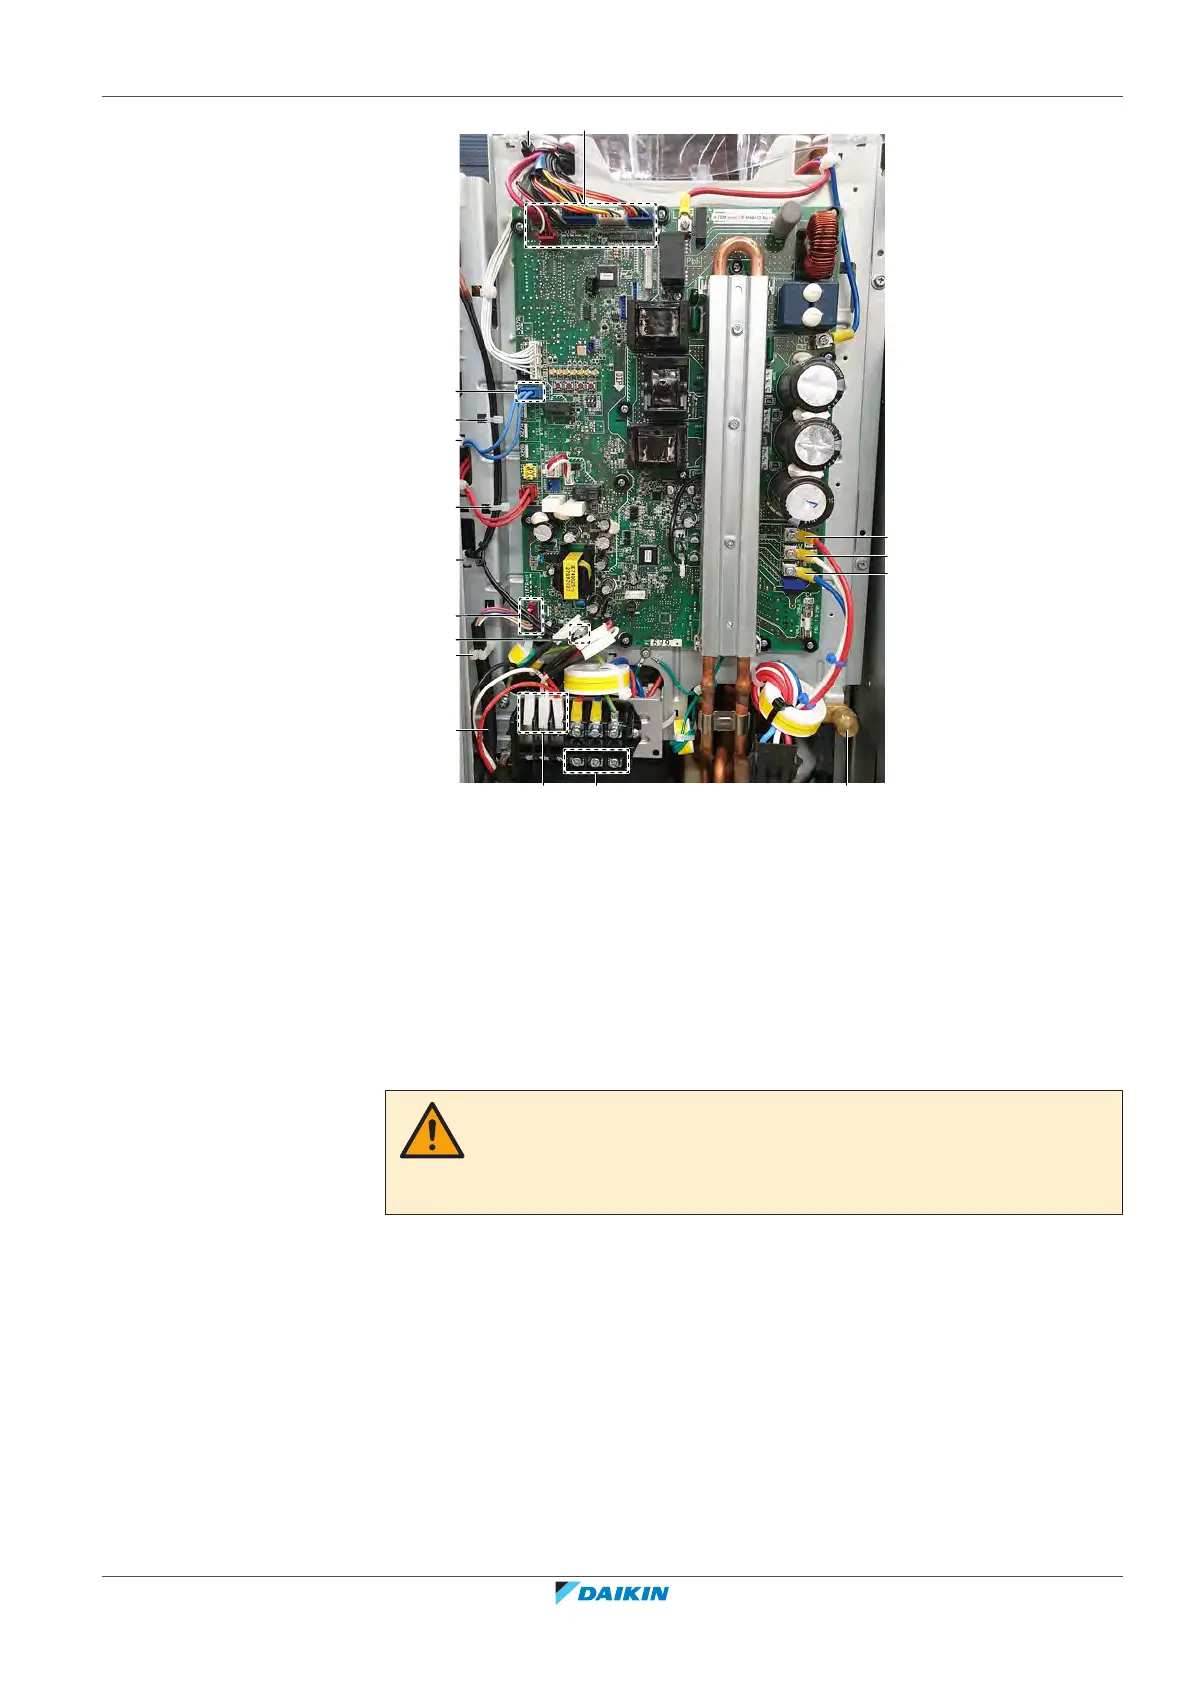
a Electrical power supply wiring
b Faston connectors (power supply towards hydro box)
c Service port
d Connector
e Tie strap
f DC fan motor harness
g Wire clip
h Compressor wiring
15 Connect the ground wire to the lower right corner of the switch box. Install
and tighten the screw.
16 Connect all connectors to the main PCB.
WARNING
When reconnecting a connector to the PCB, make sure to connect it on the correct
location and do NOT apply force, as this may damage the connector or connector
pins of the PCB.
17 Install new tie straps to fix the wiring to the switch box.
18 Install the service port to the switch box. Install and tighten the bolt.
19 Connect the electrical power supply wiring to the wire terminal.
20 Connect the Faston connectors (power supply towards hydro box) to the wire
terminal.
21 Install the protective cover sheet.
Three phase unit
1 Use a piece of cloth to remove the old thermal interface grease and clean the
heat sink surface(s) and refrigerant pipe.
 Loading...


