3 | Components
Service manual
282
EBLA09~16DA + EDLA09~16DA
Daikin Altherma 3 M
ESIE20-06A – 2021.03
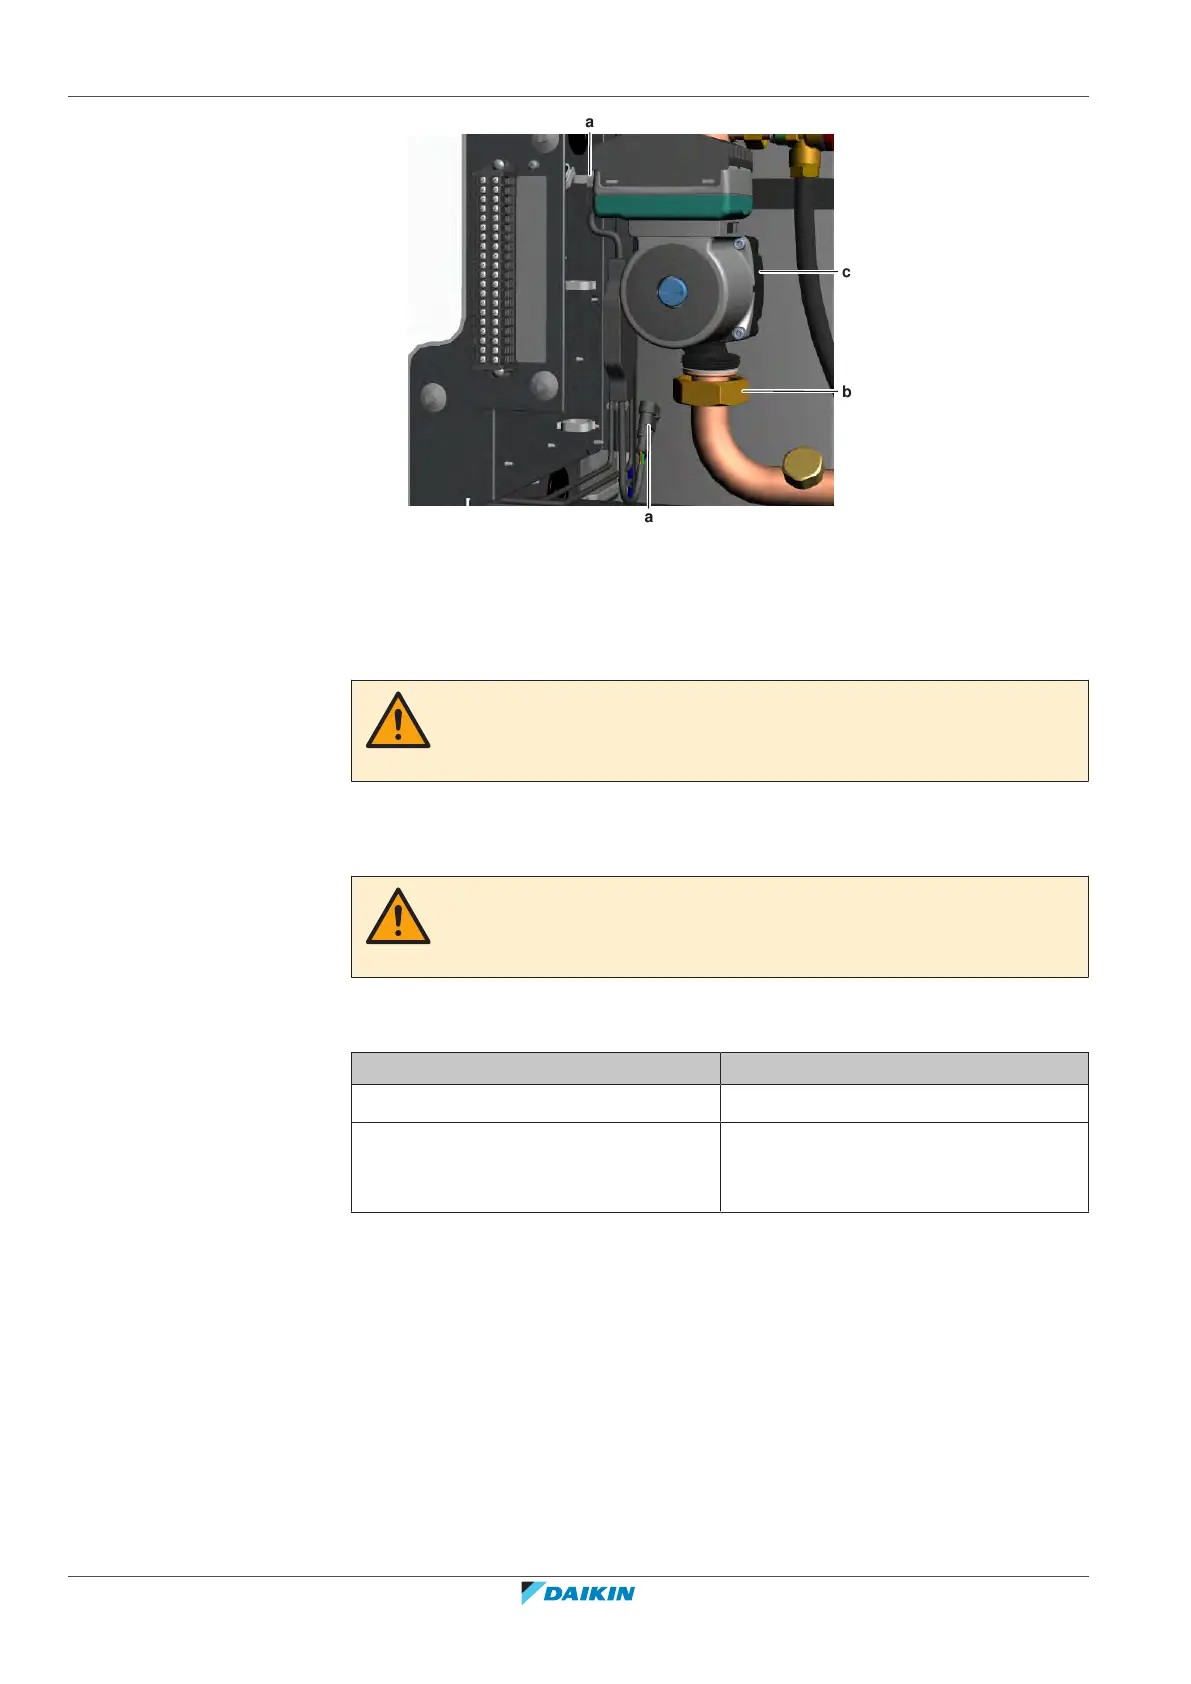
a Connector
b Nut
c Water pump housing
2 Fix the water circuit pipes to the water pump housing by tightening the upper
and lower nuts.
CAUTION
Use a counterforce when unscrewing or tightening the nuts to make sure NOT to
damage the piping.
3 Connect the connectors to the water pump motor.
4 Open the valve (if equipped) of the water circuit towards the expansion vessel.
CAUTION
Make sure to open the valve (if equipped) towards the expansion vessel, otherwise
the overpressure will be generated.
5 Open the stop valves and add water to the water circuit if needed, see
"4.3.2Repair procedures"[4302].
Is the problem solved? Action
Yes No further actions required.
No Return to the troubleshooting of the
specific error and continue with the
next procedure.
To remove the water pump wiring harness
Prerequisite: Stop the unit operation via the user interface.
Prerequisite: Turn OFF the respective circuit breaker.
Prerequisite: Remove the required plate work, see "3.17Plate work"[4230].
1 Disconnect the appropriate connector (power supply connector and/or PWM
signal connector) from the water pump.
2 Disconnect the other end of the wiring harness from the appropriate
connector:
▪ X16A on hydro PCB for power supply wiring harness
▪ X25A on hydro PCB for PWM signal wiring harness
 Loading...


