Indoor Unit SiBE01-829
78 Removal Procedure
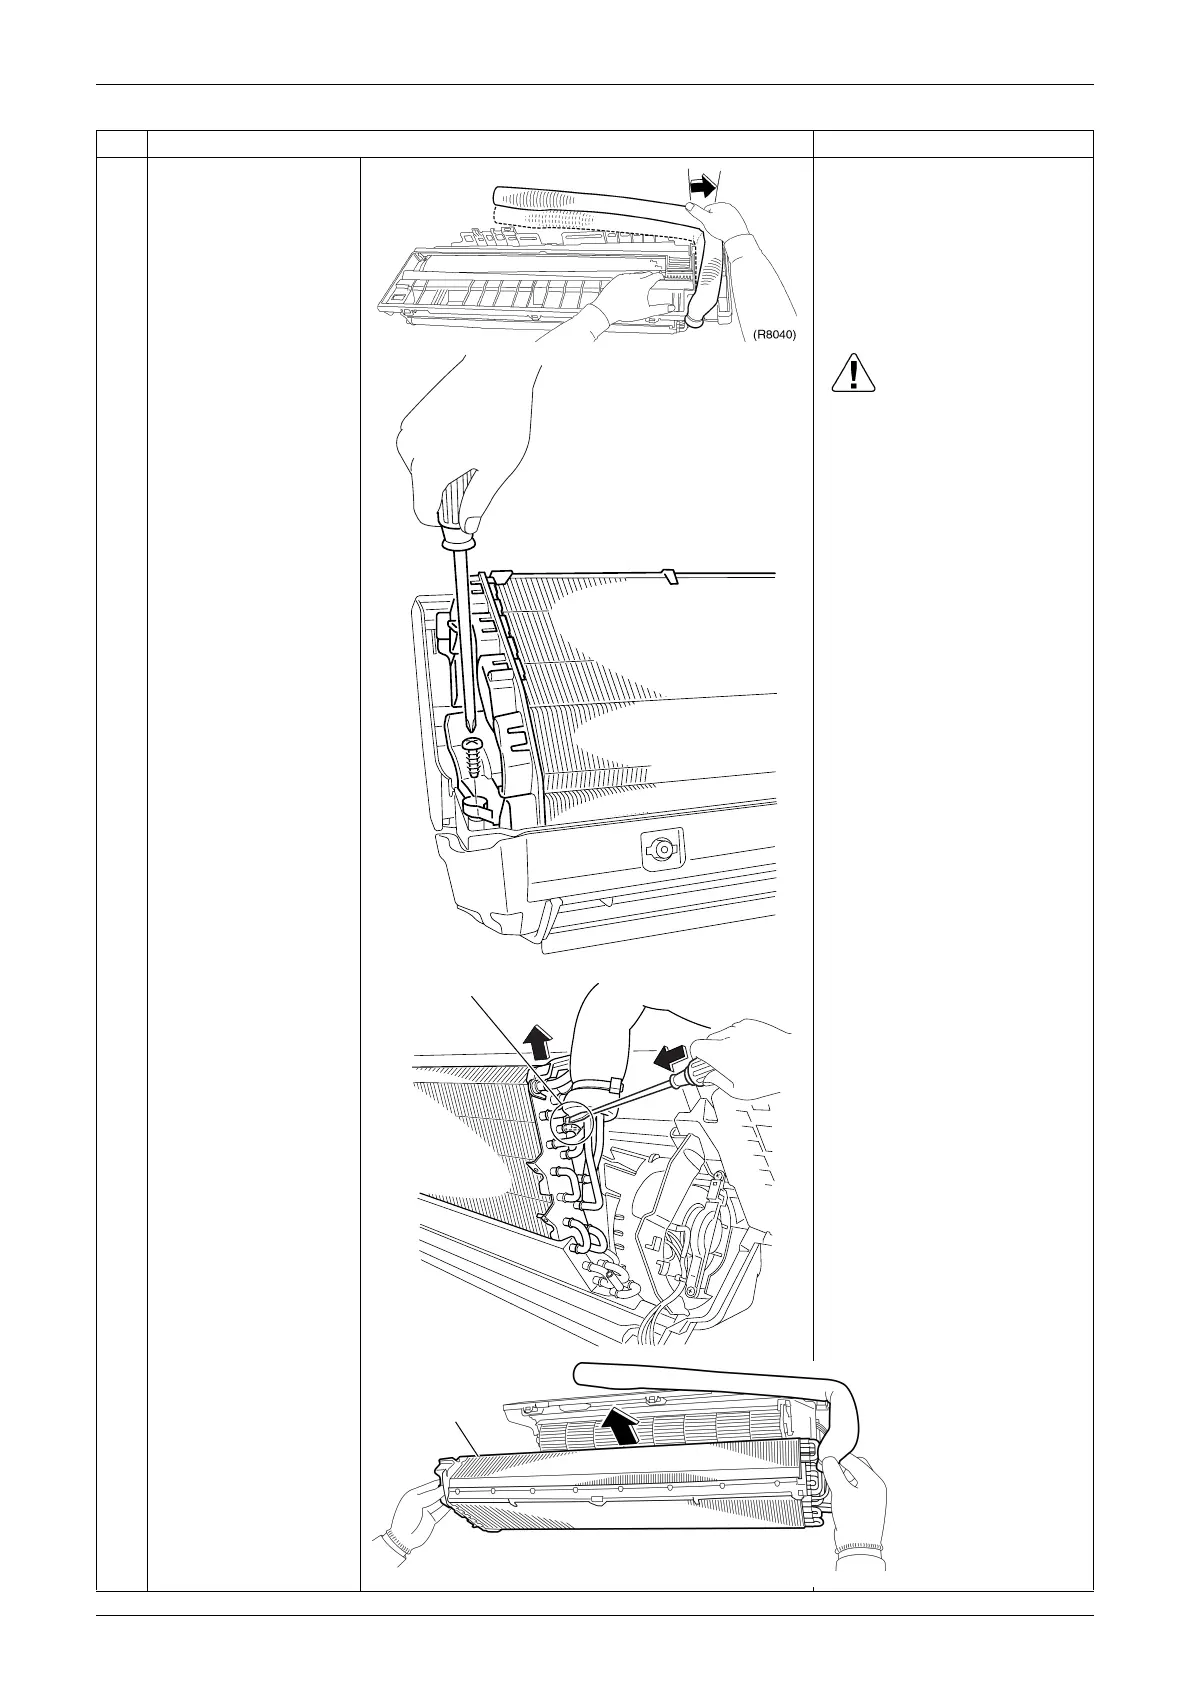
3
Widen the auxiliary
piping to the extent of
10°~20°.
At an angle of 10°~20°
4
Unscrew the fixing
screw on the left side.
Caution
When dismounting or
mounting the heat
exchanger, be sure to wear
gloves or wrap it with cloth
before proceeding to the
work. (You may be injured by
the fins.)
5
Push and undo the heat
exchanger fixing hook
on the right side and lift
up the heat exchanger.
6
Pull the heat exchanger
to the front side and
undo the hooks
completely, and then lift
it.
Step Procedure Points
(R8619)
(R8620)
Heat exchanger fixing hook
(R8043)
Heat exchanger