Do the following before plugging in the power supply cord. •
Attach the pleated fi lter
Be sure to attach the pleated fi lter
before starting the unit.
1
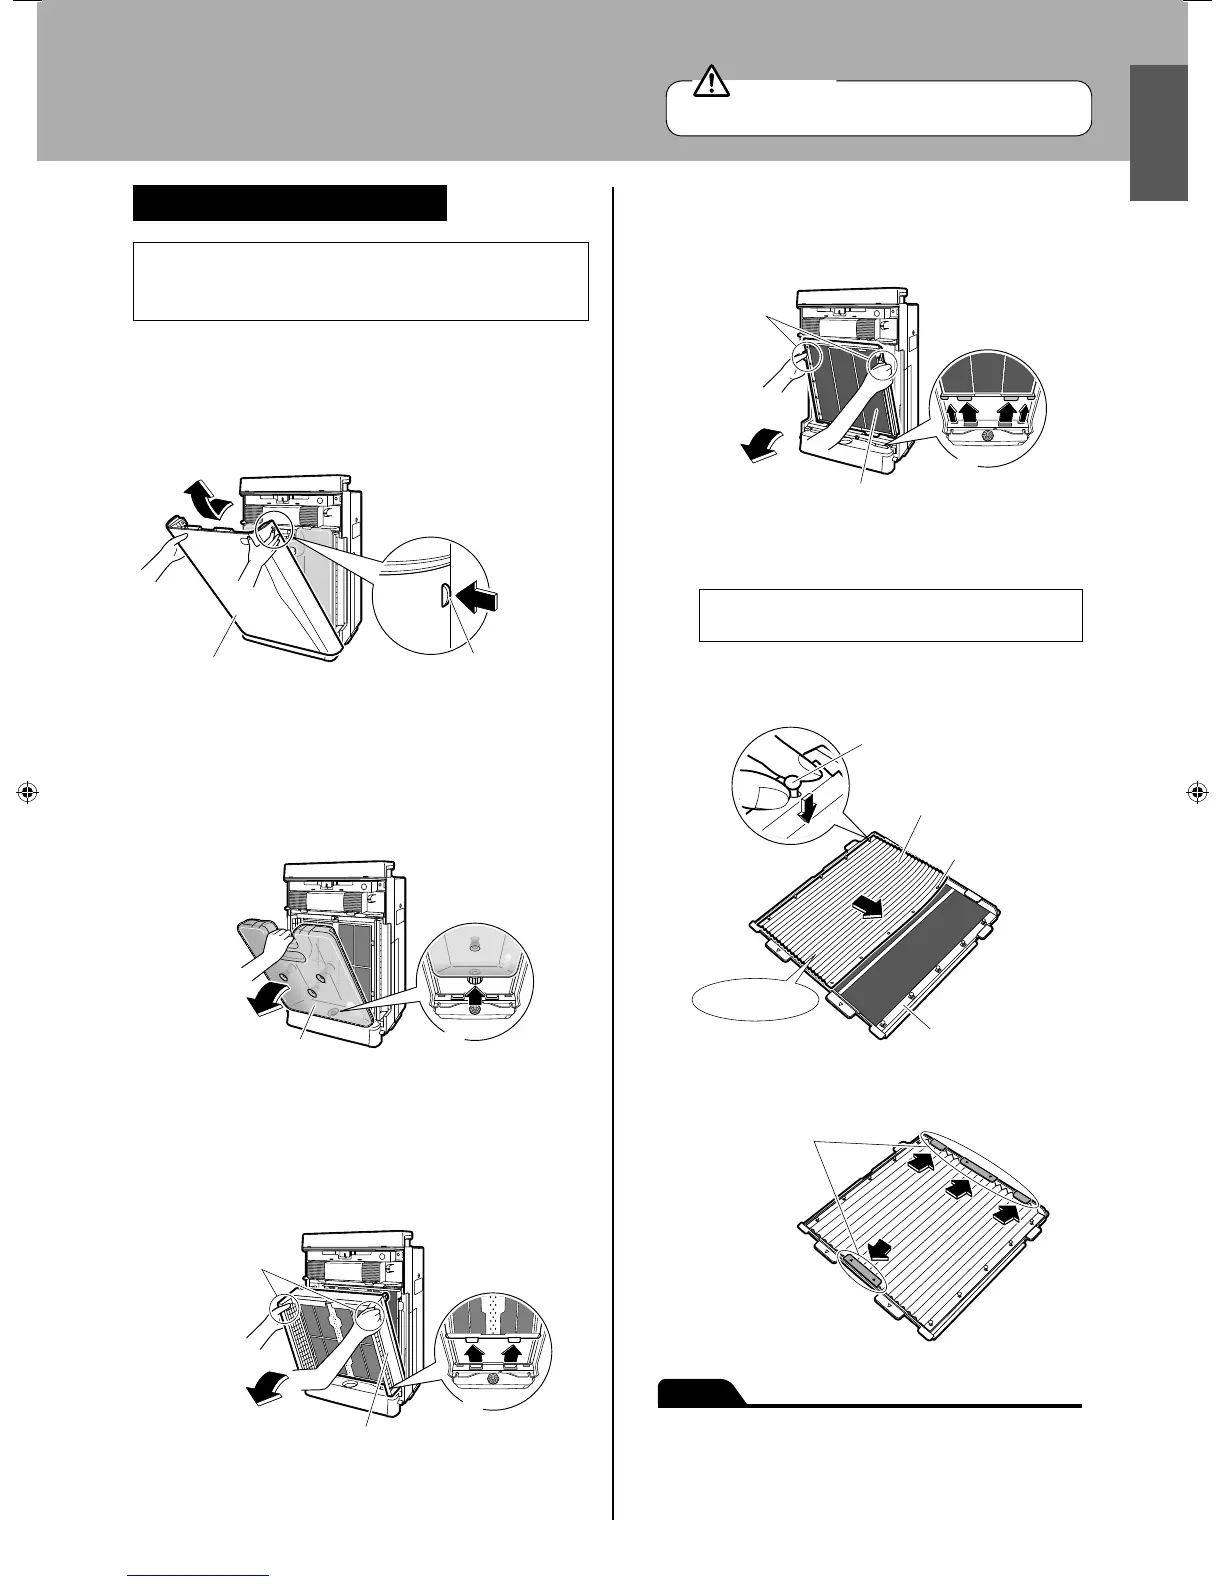
Remove the front panel.
Push the 2 projections (left and right) inwards, and pull the •
front panel upwards and remove.
Front panel
Projection
(1 each on left and right)
Push
2
Remove the water tank.
Holding the water tank by the handle, pull the tank •
upwards and out of the unit.
(1)
Pull
Water tank
(2)
Up
3
Remove the UNIT1.
Holding the UNIT1 by the handle, pull the UNIT1 upwards •
and out of the unit.
UNIT1
Handle
(1)
Pull
(2)
Up
4
Remove the deodorizing catalyst unit.
Holding the deodorizing catalyst unit by the handle, pull •
the deodorizing catalyst unit upwards and out of the unit.
Deodorizing catalyst unit
(1)
Pull
(2)
Up
Handle
5
Attach the pleated fi lter.
Attach the pleated fi lter with the white side facing to
the front.
Fit the projections (5 locations) on the left and right faces •
of the deodorizing catalyst unit into the holes (5 locations)
on the left and right of the pleated fi lter.
Deodorizing catalyst unit
Holes
(5 each on left and right)
Pleated filter
Projection
(5 each on left and right)
Face the white
side to the front
Insert the pleated fi lter underneath the tabs (4•
locations
) at
the top and bottom of the deodorizing catalyst unit.
Top and bottom tabs (4 locations)
NOTE
Always run the unit with both a pre-fi lter (green) and pleated
●
fi lter (front: white, back: blue).
Running the unit without both fi lters may lead to damage.
Unit performance drops if the pleated fi lter is attached ●
backwards.
01_EN_3P234570-1.indd 1601_EN_3P234570-1.indd 16 10/28/2008 12:02:40 PM10/28/2008 12:02:40 PM
 Loading...