18 | Piping installation
Installer and user reference guide
89
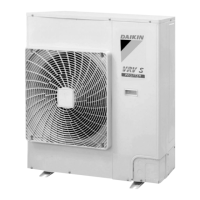
RXYSA4~6A7V/Y1B
VRV 5-S system air conditioner
4P600330-1D – 2023.02
4 Tighten the stop valve securely when opening or closing the stop valve. For
the correct tightening torque value, refer to the table below.
NOTICE
Inadequate torque may cause leakage of refrigerant and breakage of the stop valve.
5 Install the stop valve cover.
Result: The valve is now open/closed.
To handle the service port
▪ Always use a charge hose equipped with a valve depressor pin, since the service
port is a Schrader type valve.
▪ After handling the service port, make sure to tighten the service port cover
securely. For the tightening torque, refer to the table below.
▪ Check for refrigerant leaks after tightening the service port cover.
Tightening torques
Stop valve size
(mm)
Tightening torque N•m (turn clockwise to close)
Shaft
Valve body Hexagonal
wrench
Cap (valve lid) Service port
Ø9.5 5.4~6.6 4mm 13.5~16.5 11.5~13.9
Ø15.9 13.5~16.5 6mm 22.5~27.5
18.2.7 To connect the refrigerant piping to the outdoor unit
▪ Piping length. Keep field piping as short as possible.
▪ Piping protection. Protect the field piping against physical damage.
NOTICE
▪ Be sure to use the supplied accessory pipes when carrying out piping work in the
field.
▪ Be sure that the field installed piping does not touch other pipes, the bottom
panel or side panel. Especially for the bottom and side connection, be sure to
protect the piping with suitable insulation, to prevent it from coming into contact
with the casing.
1 Do the following:
▪ Remove the service cover (a) with screw (b).
▪ Remove the piping intake plate (c) with screws (d).

 Loading...