Theexhausthoseandadaptormustbeinstalledorremoved
in accordance with the usage mode.
COOL,HEAT (heat pump type) or AUTO
mode
Install
FAN,DEHUMIDIIFYorHEAT(electrical
heat type) mode
Remove
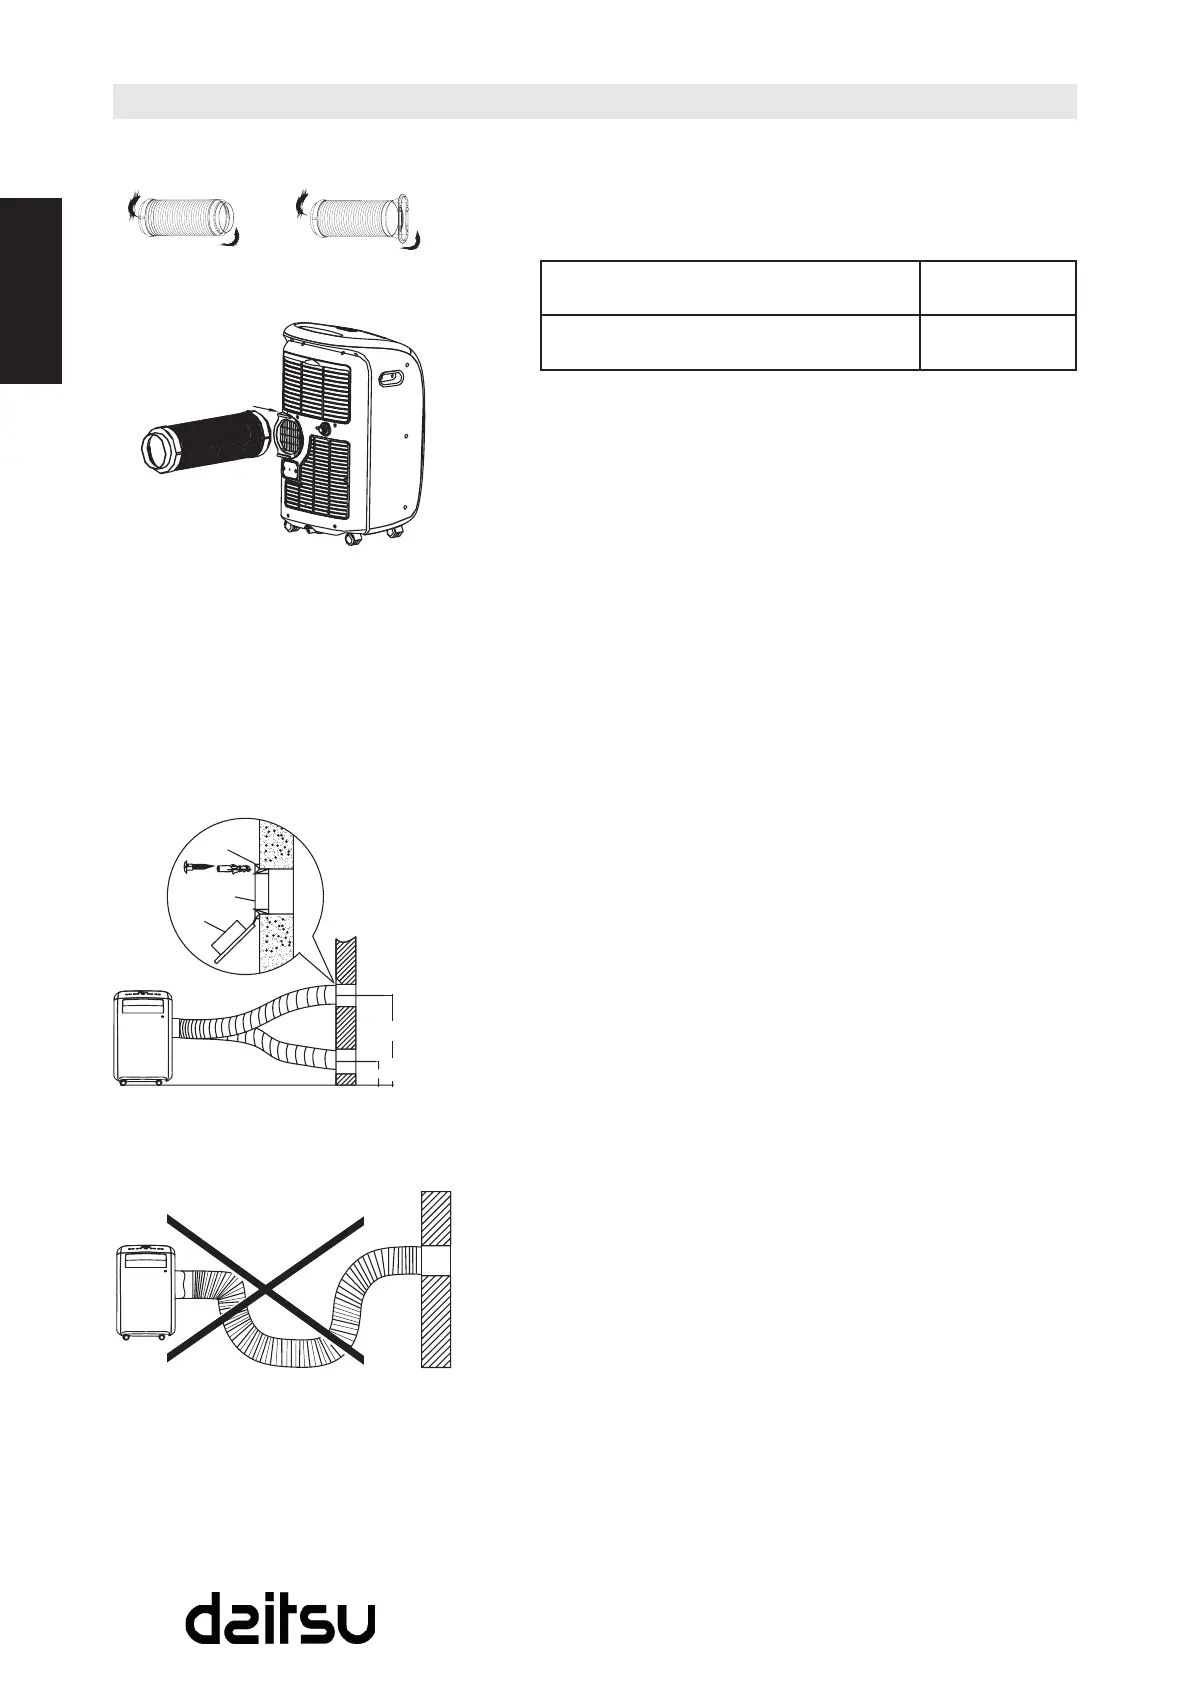
1. InstallthewindowExhaustadaptorBontotheexhaust
hose as shown in Fig.16. or Fig.17. Refer to the previous
pages for window kit installation.
2. PushtheExhausthoseintotheairoutletopeningalong
the arrow direction (See Fig.18).
Theexhausthosecanbeinstalledintothewall
(NotapplicabletotheunitswithoutadaptorA,expansion
plugs and wooden screws of Accessories )
1. Prepareaholeinthewall.InstallthewallExhaust
adaptorAontothewall(outside)byusing4expansion
plugsandwoodenscrews,besuretoxthoroughly.(See
Fig.19)
2. AttachtheExhausthosetowallExhaustadaptorA.
Note:
Cover the hole using the adaptor cap when not in use.
Theductcanbecompressedorextendedmoderately•
according to the installation requirement, but it is
desirable to keep the duct length to a minimum.
IMPORTANT:
DONOTOVERBENDTHEDUCT(SEEFig.20).
.
Exhaust hose installation
Expansion
plug position
Fig. 16 Fig. 17
Fig. 18
Fig. 19
Fig. 20
Adaptor A
Adaptor cap
max120CM
min 30 CM