CARE AND MAINTENANCE
IMPORTANT
1) Be sure to unplug the unit before cleaning or servicing.
2) Do not use gasoline, thinner or other chemicals to clean
the unit.
3) Do not wash the unit directly under a tap or using a hose.
It may cause electrical danger.
4) If the power cord is damaged, it should be repaired by
manufacture or its agency.
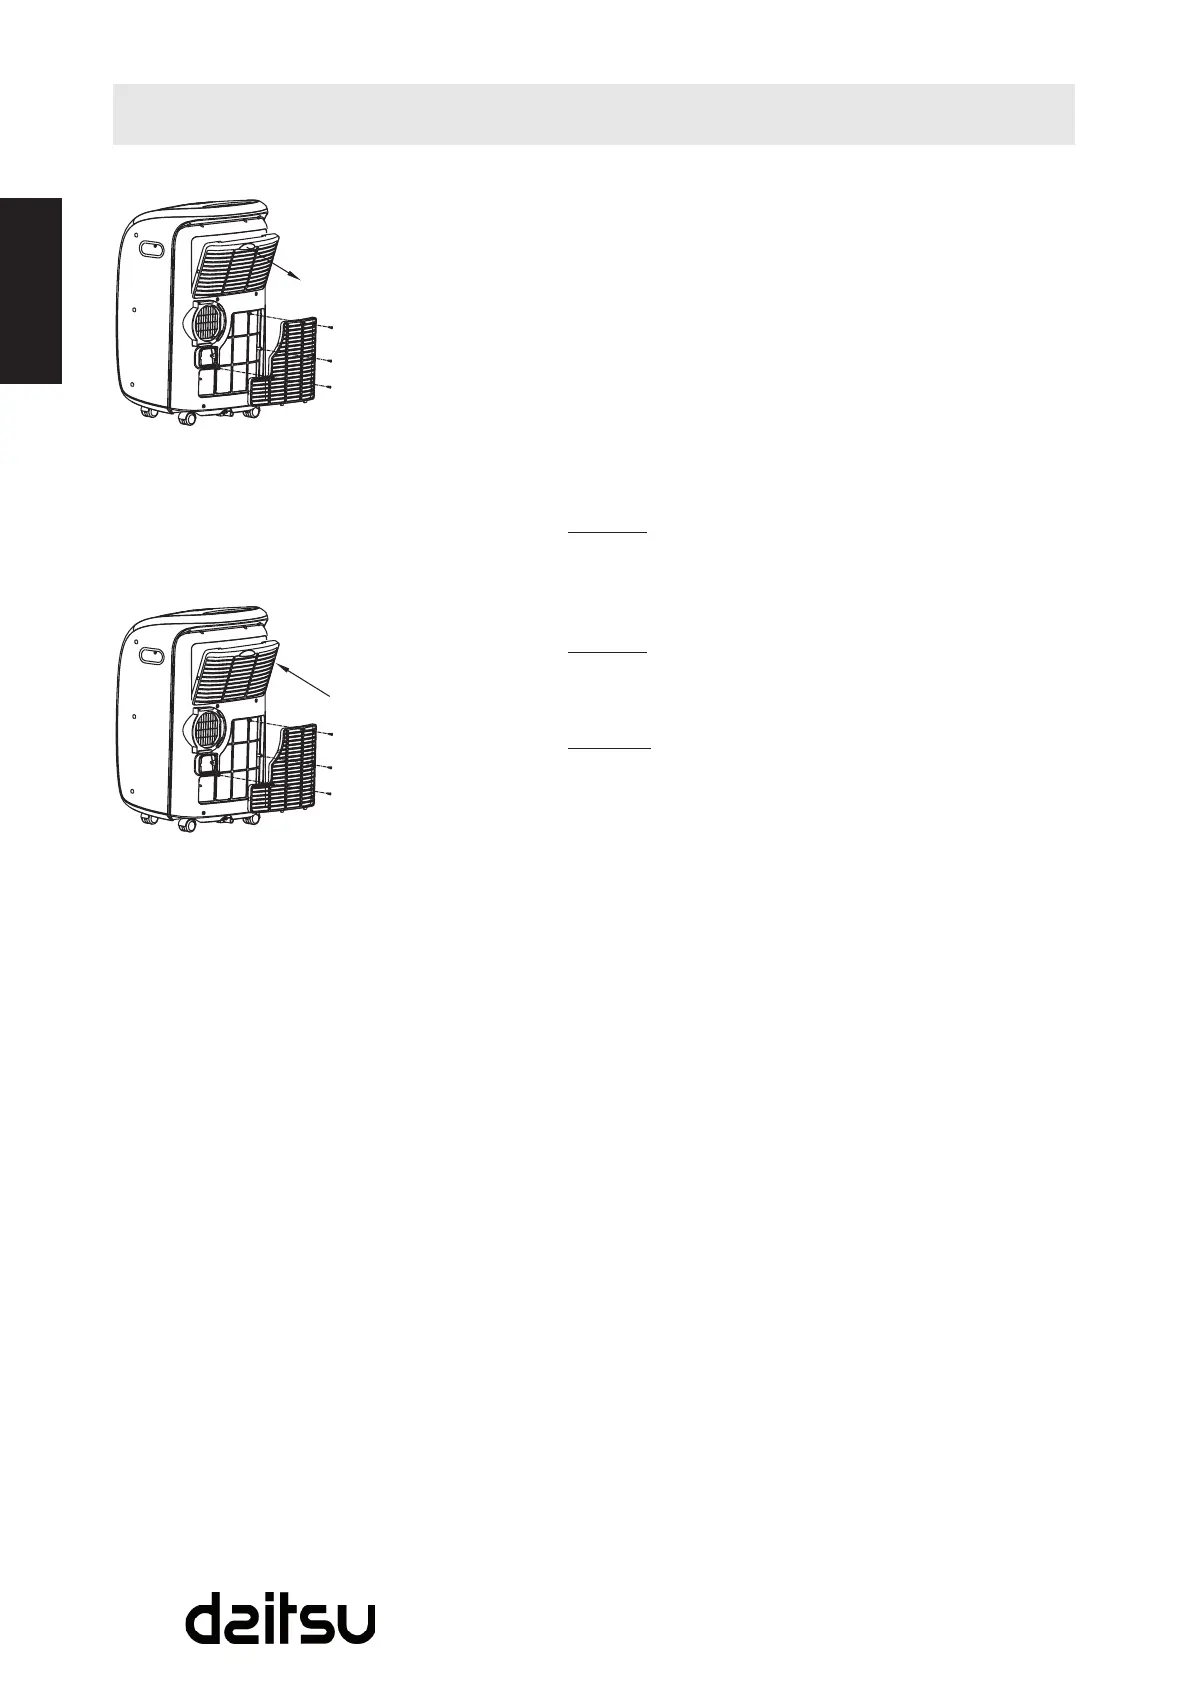
1. Air lter:
- Cleantheairlteratleastonceeverytwoweeksto
prevent inferior fan operation because of dust.
- Removal
Thisunithastwolter.Taketheupperlteroutalongthe
arrowdirection(Fig.25),thentakethelterdown.Remove
thelowerlterbylooseningthescrew,takingdownthe
airlterasshowninFig.25.
- Cleaning
Washtheairlterbyimmersingitgentlyinwarmwater
(about 40ºC/104ºF) with a neutral detergent. Rinse the
lteranddryitinashadyplace.
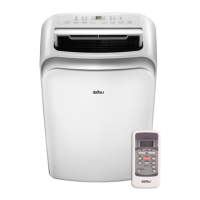
- Mounting
Installtheupperairlteraftercleaningandinstallthe
lowerlterbyusingthescrews(seeFig.26).
NOTE:
Thegrillandtheairlterareconnectedandcannotbe
separated.
2. Unit enclosure:
- Use a lint-free cloth soaked with neutral detergent to clean
the unit enclosure. Finished by a dry clean cloth.
3. Unit idle for a long time:
- Remove the rubber plug at the back of the unit and
attach a hose to drain outlet. Place the open end of the
hosedirectlyoverthedrainareainyourbasementoor
(See Fig.21-23).
- Remove the plug from the bottom drain outlet, all the
water in the bottom tray will drain out (See Fig.24).
- KeeptheappliancerunningonFANmodeforhalfaday
in a warm room to dry the appliance inside and prevent
mold forming.
- Stop the appliance and unplug it, wrap the cord and
bundle it with the tape. Remove the batteries from the
remote controller.
- Cleantheairlterandreinstallit.
- Disconnecttheexhausthose,keepitsafely,andcover
the window (wall) hole with the adaptor cap.
Upperlter(take
out)
Fig. 25
Fig. 26
Remove the
screws and
taketheairlter
down.
Upperlter
(install)
Install the lower
lterbyusing
the screws.