Do you have a question about the Danfoss FC 301 and is the answer not in the manual?
Displays the CE and UL certifications for the product.
Explains the meaning of various symbols used throughout the manual.
Lists common abbreviations used in the instruction manual.
Guidance on the proper disposal of electronic components.
Critical warnings about high voltage and necessary safety precautions.
General safety advice, including leakage current and electrical parts.
Step-by-step procedure to follow before starting any repair.
Precautions to prevent accidental motor startup during operation.
Details on the Safe Torque Off function for FC 302 and FC 301.
Instructions for correctly installing the Safe Stop functionality.
Specific guidelines for installations using an IT line supply.
An overview of the mechanical and electrical installation topics covered.
Initial steps and safety considerations before starting installation.
Lists the contents of the FC 100/300 accessory bag.
Detailed procedures for mounting the drive unit securely.
General guidelines for electrical connections, including cable types.
Instructions for connecting the main power supply and grounding.
Guidelines for connecting the motor, including shielding requirements.
Information on selecting appropriate fuses for circuit protection.
Detailed instructions for connecting control cables to terminals.
Practical wiring examples for common functions like start/stop.
Example wiring for basic start and stop control.
Example wiring for pulse start and stop control.
Example wiring for speed adjustment functions.
Example wiring for using a potentiometer for speed reference.
Explanation of switch functions for analog input and bus termination.
Steps for final configuration, motor data entry, and AMA.
Overview of the Local Control Panel (LCP) interface.
Step-by-step guide to programming using the graphical LCP.
Step-by-step guide to programming using the numerical LCP.
Guided procedure for initial setup and configuration.
A simplified setup process for basic configuration.
Details on parameter organization, conversion indices, and data types.
Electrical specifications for the input power supply.
Electrical specifications for the motor output terminals.
Technical details on programmable digital input terminals.
Specifications and usage of the Safe Stop terminal (37).
Technical specifications for analog input terminals.
Technical specifications for pulse and encoder input terminals.
Technical specifications for digital output terminals.
Technical specifications for analog output terminals.
Specifications for the 24 V DC output on the control card.
Specifications for the 10 V DC output on the control card.
Specifications for RS-485 serial communication interface.
Specifications for USB serial communication interface.
Technical specifications for the programmable relay outputs.
Recommended cable lengths and cross-sections for various connections.
Overview of the drive's protection mechanisms and operational features.
How to interpret and respond to warnings and alarms.
A comprehensive list of alarm and warning codes and their meanings.
Detailed explanation of various status word bits for diagnosis.
Details on DC link voltage warnings and troubleshooting steps.
Information on inverter overload warnings and potential causes.
Guidance on motor ETR over-temperature warnings and checks.
Alarm code for mechanical brake low condition.
Alarm code for PTC 1 Safe Stop activation.
Alarm indicating a replaced hardware component.
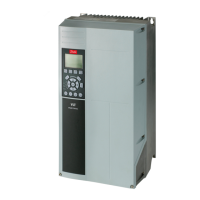
| Type | AC Drive |
|---|---|
| Output frequency | 0-1000 Hz |
| Enclosure rating | IP20, IP21, IP55 |
| Control method | Sensorless vector control |
| Communication options | RS-485, CANopen, Profibus DP |
| Ambient temperature | -10°C to +50°C |
| Supply voltage | 200-240 V, 380-500 V, 525-690 V |
| Protection class | IP20, IP21, IP55 |
| Cooling method | Forced air |
| Relative humidity | 5% to 95% (non-condensing) |
| Storage temperature range | -25 to 70 °C (-13 to 158 °F) |