18
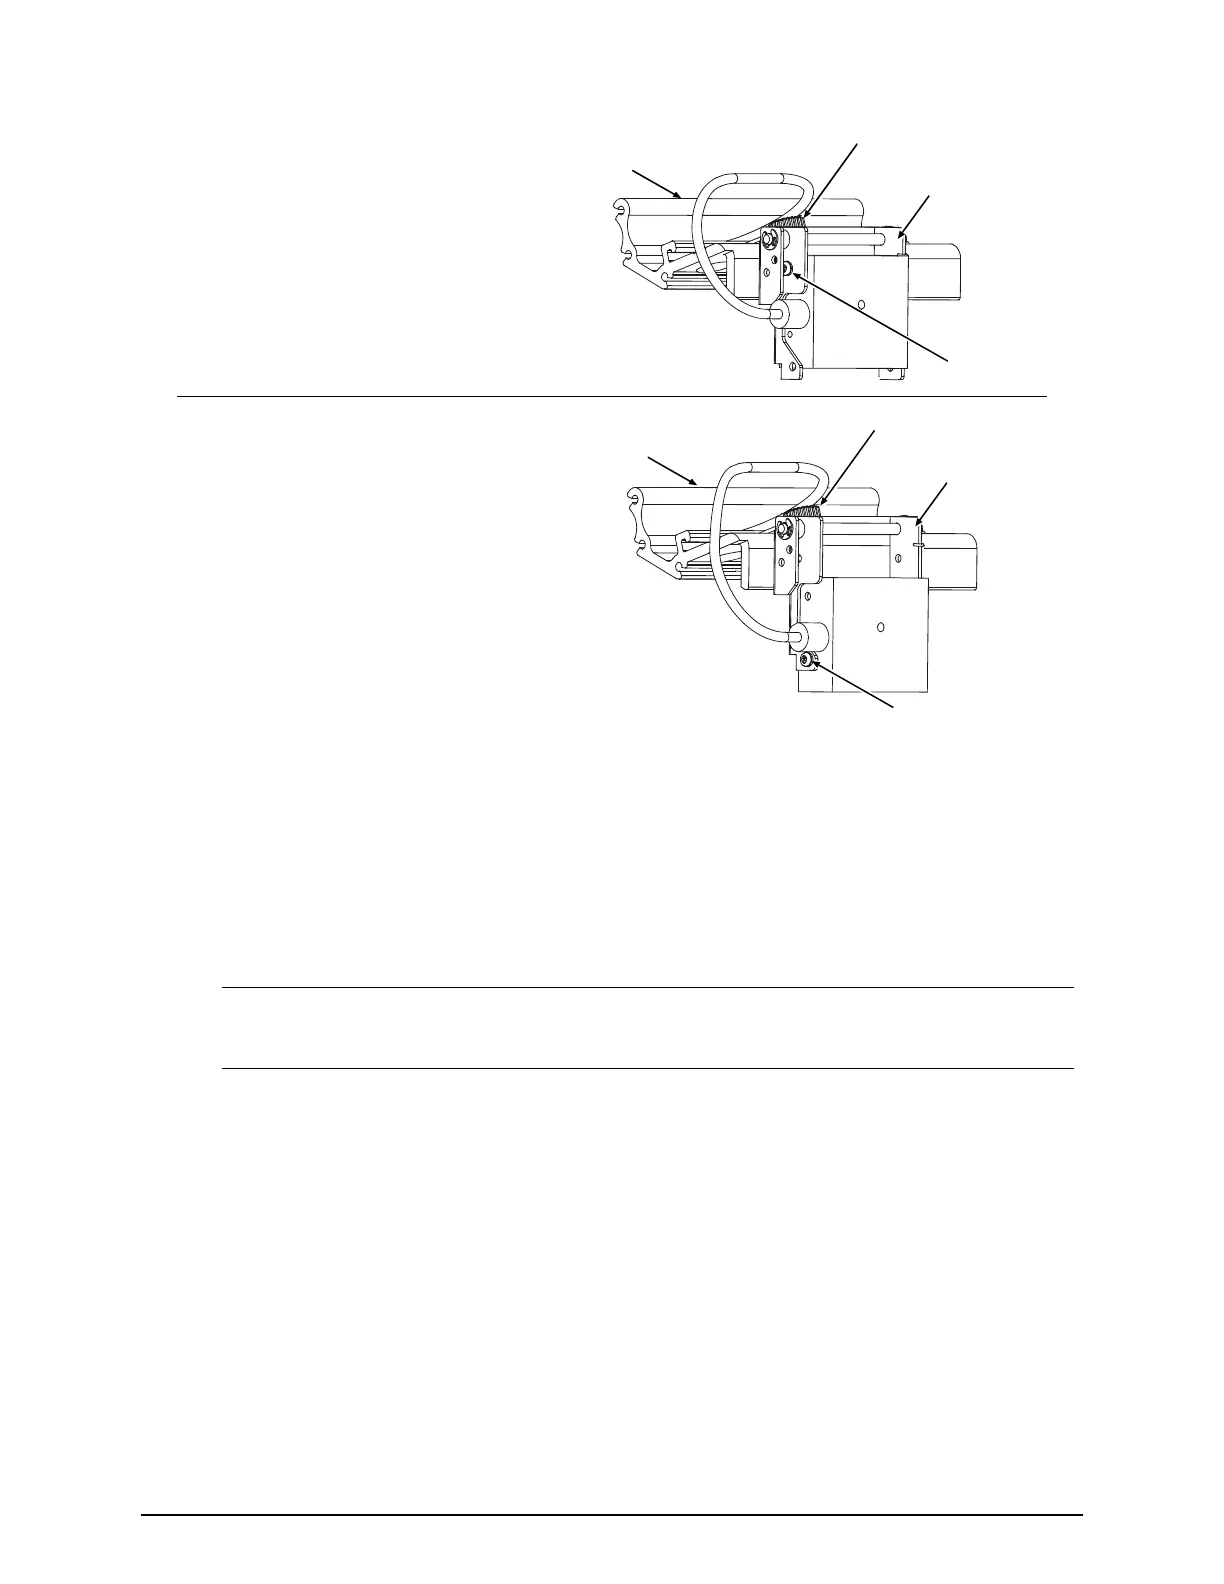
12) Proceed according to the Scan Position:
10-Mil Position: Loosen the
Thumbscrew and slide the Scanner to
the rightmost position on the Mounting
Bracket. Carefully raise the Pivoting
Mount and then tighten the left Locking
Screw. Lower the Pivoting Mount.
Locking Screw
Pivoting Mount
Thumbscrew
Mounting
Bracket
5-Mil Position: Loosen the Thumbscrew
and slide the Scanner to the rightmost
position on the Mounting Bracket.
Tighten the left Locking Screw.
Locking Screw
Pivoting Mount
Thumbscrew
Mounting
Bracket
13) Center the Scanner over the label and tighten the Thumbscrew. Observe the LED (or the SCAN
COUNT) then proceed accordingly:
If the green LED is illuminated (or if the count rapidly increments), go to Step 14.
If the green LED is not illuminated (or if the count does not rapidly increment), restart the
alignment beginning at Step 6.
Note: If using the 5-Mil Scan Position, loosen the Mounting Adjustment Screw and the
Locking Screws before returning to Step 6.
14) Press EXIT. Remove the Print Quality Label and load operating media. Clear faults and position the
labels by pressing FEED. With the printer at READY, print a batch of live labels. If Scanner Faults
occur, re-center and secure the Scanner above the bar code(s); and, if problems persist see
“Troubleshooting.” This completes alignment.
 Loading...